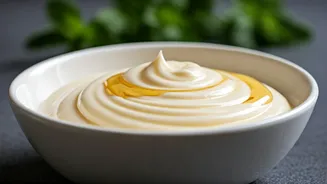


Why Homemade Curd?
Embracing homemade curd offers a healthier alternative to store-bought options, which often contain preservatives and additives. Making your own dahi ensures
purity and can be a cost-effective practice, especially as summer approaches and the demand for this cooling, probiotic-rich food increases. Digital creator Shashank Asli has shared three straightforward methods to consistently produce excellent curd at home, allowing you to enjoy its benefits daily. Beyond its refreshing taste, homemade curd is a powerhouse of nutrients, including probiotics crucial for gut health, and essential minerals like calcium and phosphorus, contributing significantly to overall well-being.
Lemon Juice Method
One innovative approach to making thick curd involves utilizing the natural acidity of lemon juice. After dividing a litre of whole milk into three separate bowls, you can add the juice of half a lemon to one. The citric acid in lemon juice effectively initiates the fermentation process, leading to the formation of a curd that is not only thick but also possesses a pleasant, slightly tangy flavour profile, ensuring good consistency for various culinary uses.
Green Chilli Technique
Another simple yet effective method for curd preparation incorporates a green chilli. By adding one whole green chilli, or one with its top portion removed, to a bowl of milk, you can harness the naturally occurring lactobacillus bacteria present on the chilli's surface. These beneficial bacteria are instrumental in kickstarting the curdling process. While this technique results in well-set curd, it may produce a consistency that is slightly thinner compared to the lemon juice method, though without imparting any noticeable chilli flavour.
Curd Starter Method
The most traditional and arguably the most reliable way to prepare homemade curd involves using a small amount of existing, good-quality curd as a starter culture. By introducing a spoonful of your previous batch of dahi into warm milk, you are essentially adding a concentrated source of active cultures. This method is highly favored for its consistency, reliably yielding a curd with the perfect texture and familiar, comforting taste that many home cooks aim for.
Achieving Thickness
To ensure your homemade curd sets into a thick, firm consistency, several key steps are recommended. Begin by boiling a litre of whole milk and then simmering it on low heat until it visibly thickens, a process that can take around 10 minutes. Once slightly cooled but still warm, froth the milk vigorously by transferring it between pans multiple times. This aeration is crucial. Subsequently, gently incorporate your starter culture (1 teaspoon to 1 tablespoon) into the frothed milk, whisking gently to distribute it evenly. Transfer this mixture to a clean casserole, thick-bottomed bowl, or an earthen pot, cover it, and let it set in a warm place for 5 to 8 hours, or overnight, depending on the ambient temperature. Prompt refrigeration once set prevents over-fermentation.
Essential Do's & Don'ts
For optimal results, always opt for fresh, high-quality whole milk, as its fat content contributes significantly to curd thickness. Prolonged simmering of the milk is beneficial, but be cautious not to scorch it. Use a fresh curd starter, ensuring it's at room temperature before adding it to the milk; avoid using sour or old starter as it will negatively impact the final taste and texture. Uniformly dissolving the starter culture is vital, so whisk it well. Earthenware pots are excellent for setting curd, as they help maintain a consistent temperature. If you live in a colder climate, extending the setting time or placing the curd in a slightly warm oven or wrapping it in warm layers can aid the process. Consistency can vary, so repeated attempts help you find your perfect method.