
Understanding Live Photos
Live Photos, a feature offered by Apple, are more than just still images. They capture a brief video along with the photo, essentially creating moving
memories. When you take a Live Photo, your iPhone records what happens 1.5 seconds before and after you press the shutter button. This results in a short burst of motion and sound, adding depth to your captured moments. This is crucial as these mini-videos are the source material for creating your videos. Understanding this core functionality is vital to the entire process. These moving images capture the essence of a moment in a more immersive way than a regular photograph can. The motion, when combined, tells a complete story in a succinct manner.
Selecting Your Photos
The initial step is to select the Live Photos you want to incorporate into your video. Carefully consider which photos best represent the story you intend to tell. Browse through your photo library and identify the Live Photos that encapsulate your desired theme or event. Consider the order in which you took the photos, as this can often be a natural starting point for the video's sequence. Make sure you've selected enough photos to create a compelling, yet concise video. Decide how long each clip should be; this will affect the overall duration. Think of it as crafting a narrative, so arrange the photos to flow logically, creating a story. A well-curated selection is the foundation for an engaging video.
Choosing the Right App
Several apps are designed to make the process of creating videos from Live Photos simple and efficient. The key here is to choose an app that supports the conversion of Live Photos. Many video editing applications offer this functionality, allowing you to import your Live Photos directly. Some popular choices include iMovie (built-in for iOS), which is user-friendly for beginners, and more advanced options for those seeking additional control. Research app compatibility with your device and the editing capabilities they offer. Some apps provide templates, transitions, and music options to make your video even more appealing. Selecting the right app is essential as it will influence the entire workflow and final outcome of your video.
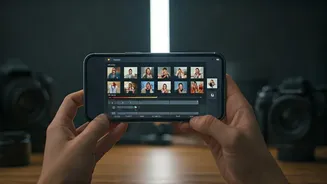
Importing and Arranging
Once you have selected your chosen app, the next step involves importing your Live Photos into the app's timeline or workspace. The order in which you arrange the photos significantly influences the narrative of your video. Most apps let you drag and drop the photos to reorganize them. Pay close attention to the visual flow: Ensure that the transitions between photos are smooth and the sequence tells a cohesive story. Experiment with different arrangements to see what produces the most effective visual effect. Some apps offer options to trim the video clips captured in the Live Photos, enabling you to highlight specific moments within each photo. Proper arrangement creates the groundwork for an engaging story.
Adding Transitions and Effects
To improve the visual appeal of your video, consider adding transitions and effects. Transitions serve to smoothly connect one Live Photo to another, preventing abrupt cuts that might disrupt the viewing experience. Simple crossfades or more creative transitions can be added depending on the app's capabilities. Besides transitions, explore effects available within your chosen application. Some apps provide filters, color correction tools, and other effects to enhance the overall look and feel of your video. When using effects, make sure they complement the content of your Live Photos and the intended mood. Using effects and transitions effectively can significantly elevate your video from amateur to professional.
Incorporating Audio
Audio elements can significantly enhance the impact of your video. Your Live Photos capture brief snippets of audio. The app you choose allows you to control the volume of the audio from each Live Photo. Adjust these levels to achieve a balanced sound mix, ensuring that the audio does not overpower the visuals. Consider adding background music that complements the theme of your video, giving an emotional depth to your clips. Many apps offer music libraries with royalty-free options, or you can import your own tracks. Ensure the music is appropriate and does not clash with any sounds captured in the Live Photos. Thoughtful incorporation of audio can dramatically boost the storytelling capabilities of your video.
Editing and Refining
Once you have added transitions, effects, and audio, it's time to refine your video. Review the entire video and make adjustments to ensure everything works seamlessly together. Check for any jarring transitions, audio imbalances, or areas where the sequence could be improved. Some apps allow you to adjust the duration of each Live Photo clip, which can be useful to improve pacing. Fine-tune your video until it fully expresses your intended message. This involves critical assessment, which might require watching your video several times. Make any final changes or corrections. Take care during the refinement process, as it is crucial to ensure that your video is polished and conveys a well-presented narrative.
Exporting and Sharing
The final stage involves exporting your finished video and sharing it. Most editing apps provide an export feature, allowing you to save your video in different formats. Choose a format that is compatible with the platforms you want to share on. Consider the resolution of your video; higher resolutions will produce clearer results but will also result in larger file sizes. After exporting your video, you can share it directly from the app or upload it to your preferred social media channels, such as Instagram, Facebook, or YouTube. Sharing your creation makes it possible to share your captured moments with family and friends. Make sure the video looks its best, and then let it be seen!