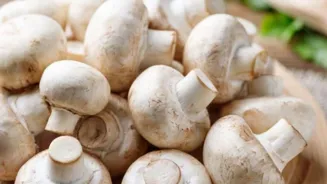
Mushrooms are one of those ingredients that instantly elevate a dish—whether it is pasta, stir-fries, or soups. But if you are tired of paying high prices for store-bought mushrooms or worry about chemical
sprays on them, here’s some good news: you can grow fresh mushrooms right at home with very little effort.
There are several varieties you can cultivate, such as button mushrooms, oyster mushrooms, and drumstick mushrooms. Among these, oyster mushrooms are perfect for beginners. They grow quickly, don’t require much attention, and the seeds—known as spawn—are easily available at local agricultural shops or online stores.
Choosing The Right Spot To Grow
Mushrooms love a cool, dark, and humid environment. Unlike most plants, they don’t need sunlight to grow. A spare room, balcony corner, or any shaded indoor space will work well. The temperature should stay between 20–28°C for the best growth. To maintain humidity, lightly spray water in the area or hang damp cloths to keep the air moist.
Preparing The Base
The growing surface, called the substrate, plays a key role. Wheat straw is the most commonly used option. Start by cutting it into small pieces, boiling it thoroughly to kill germs, and drying it completely.
Next, mix the mushroom spawn into the straw and fill the mixture into polythene bags or shallow trays. Remember to poke small holes in the bags to allow air circulation.
The Growing Phase
Once your bags or trays are ready, place them in the prepared dark and humid space. Over the next 15-20 days, keep an eye on moisture levels, without letting the mixture get soggy. Within a week, you will notice a white, thread-like layer spreading across the substrate. This is called mycelium, and it signals that your mushrooms have started developing.
With proper care, you will see tiny mushrooms emerging soon after, and your first harvest will be ready in just a few weeks.
Growing mushrooms at home is not just cost-effective but also ensures you enjoy fresh, chemical-free produce right from your kitchen garden.
