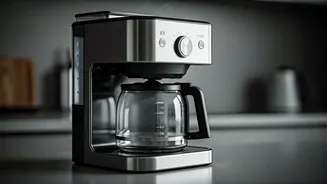


Daily Brew Care
Establishing a daily cleaning routine for your coffee brewer is fundamental to maintaining its performance and the quality of your coffee. After each use,
it's essential to thoroughly rinse out the carafe, the filter basket, and any other removable parts. Using warm water is effective for this initial rinse. Additionally, a quick wipe-down of the machine's exterior with a damp cloth will address any stray coffee stains or accidental spills, preventing them from becoming stubborn marks. This simple habit prevents residue buildup and keeps your brewing station hygienic and ready for the next day's delightful cup.
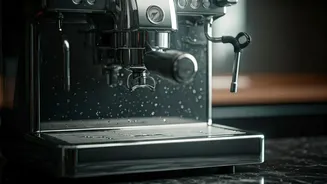
Weekly Deep Clean
To tackle mineral deposits and more ingrained grime, a weekly deep cleaning ritual is highly recommended. You can achieve this using either a commercial descaling solution or a homemade mixture of equal parts white vinegar and water. Begin by filling the coffee maker's water reservoir with this cleaning solution. Then, initiate a brewing cycle, but stop it about halfway through. Allow the machine to sit undisturbed for approximately 30 minutes. This crucial resting period enables the vinegar or descaler to effectively break down any accumulated mineral buildup within the internal components. Once the soaking time is complete, resume and finish the brewing cycle. Following this, it is imperative to run two to three full cycles using only plain water. This rinsing process is vital to completely eliminate any lingering taste or scent of the vinegar or descaling agent, ensuring your coffee remains pure and unadulterated.
Tackling Hidden Spots
Beyond the carafe and filter basket, several less obvious areas of your coffee maker require attention to maintain peak hygiene and functionality. Reusable coffee filters, for instance, should be meticulously washed in warm, soapy water after each use. If your dishwasher is equipped to handle such items, you can conveniently run dishwasher-safe filters through a cycle. Be sure to pay close attention to often-overlooked spots such as the brewing spout, the gasket that seals the brew head, and the drip tray, if your machine features one. A small brush, like an old toothbrush, can be an invaluable tool for dislodging coffee grounds and residue from these nooks and crannies, preventing blockages and bacterial growth.
Ensuring Lasting Hygiene
The final, yet critically important, step in your coffee maker cleaning routine is ensuring all components are thoroughly dried before reassembly or storage. Allowing components to air dry completely is essential to prevent the development of mold and mildew, which thrive in damp environments. Furthermore, to promote consistent airflow and minimize moisture retention, it's advisable to store your coffee maker with its lid slightly ajar. Considering your coffee maker as an integral part of your overall health regimen is a mindful approach. A pristine coffee machine safeguards you from inadvertently ingesting contaminants that could negatively impact your well-being, ensuring each brew is not only flavorful but also healthy.