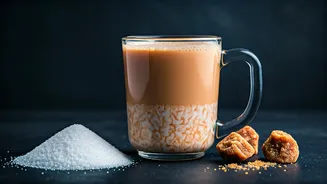


Introduction to Sattu
Sattu, the star ingredient, is a powerhouse of nutrition made from roasted gram flour. Originating in Bihar, it's a staple in many households, known for
its cooling properties and high protein content. It's often consumed during the summer months to combat the heat. This versatile ingredient forms the heart of our paratha, imparting a unique earthy flavor. It's not just tasty but also incredibly healthy, making it a great choice for a balanced meal. The history and cultural significance of sattu add another layer of appreciation to this dish, reflecting a rich culinary heritage.
Preparing the Dough
The process begins with the dough, a simple mixture of wheat flour, salt, and water. A little bit of oil adds a soft texture to the paratha. Kneading the dough well is crucial for a pliable texture. The dough should be soft but not sticky, allowing it to be easily rolled out. After kneading, let the dough rest for at least 30 minutes, covered, to ensure a smooth, elastic consistency. The resting period helps gluten to develop, resulting in parathas that are easy to roll out and cook without tearing. A well-prepared dough is key to a perfect sattu paratha.
Crafting the Sattu Filling
Creating the filling involves combining sattu with finely chopped onions, green chilies, and a blend of spices. Key spices include ajwain (carom seeds), coriander powder, and a pinch of black salt. These spices provide a balanced flavor profile that complements the sattu. A squeeze of lemon juice adds a zesty touch. The filling should be well mixed, ensuring the flavors are evenly distributed. Be careful to ensure the filling is not too wet, which could make the paratha difficult to roll. The right balance ensures that the paratha has a great taste and remains intact during cooking.
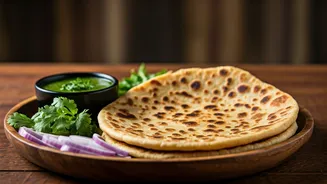
Assembling the Paratha
Take a portion of the dough and roll it into a small disc. Place a generous amount of the sattu filling in the center. Carefully bring the edges of the dough together to enclose the filling, sealing it tightly. Gently flatten the filled ball and then carefully roll it out into a paratha. Be careful to apply even pressure to avoid the paratha from tearing and the filling from spilling out. The thickness should be even, creating a perfect balance between crispiness and a soft interior. This careful process ensures that each paratha is filled perfectly without any leakage.
Cooking the Paratha
Heat a tawa (griddle) over medium heat. Place the rolled-out paratha on the hot tawa. Cook it on both sides, applying oil or ghee, until golden brown spots appear. Press gently with a spatula to ensure even cooking and to puff up the paratha. Cooking time will vary depending on the thickness of the paratha and the heat of the tawa, but typically it takes a few minutes on each side. The goal is to get a crispy exterior while the inside remains soft and well-cooked. Properly cooked parathas will have an enticing aroma and visual appeal.
Serving Suggestions
Sattu paratha is best enjoyed hot, making it a perfect meal for dinner. Traditionally, it's served with a side of yogurt, pickle, and a dollop of butter. The yogurt provides a cooling contrast to the spicy filling. The pickle adds a tangy kick that complements the savory paratha. Butter enriches the flavor and adds a satisfying element. In modern variations, it can also be served with chutney or raita. The dish is versatile and can be tailored to individual tastes. Exploring different side dishes will enhance your enjoyment of the sattu paratha.
Variations and Tips
Experiment with the spices in the filling to tailor it to your preferences. Add ingredients like ginger or garlic for added flavor. For a healthier version, use whole wheat flour. Avoid overfilling the paratha as it can be difficult to manage. Ensure the tawa is hot enough to prevent the paratha from sticking. To prevent the filling from leaking, ensure the edges are properly sealed. Practice makes perfect – don't be discouraged if the first few attempts are not perfect. Consider making a larger batch for meal prepping to save time. Enjoy the process of perfecting your Bihari sattu paratha.