
Gather Your Supplies
Before diving into the deliciousness, gather all the necessary components. First, you will need high-quality chocolate, as this will be the star ingredient,
making the overall experience more enjoyable. Also, ensure you have milk or cream to achieve the correct consistency. It is also essential to get some sugar or any sweetener you prefer, providing the ideal level of sweetness, and a pinch of salt will enhance all the flavors. Finally, have popsicle molds and sticks ready for the freezing process. Preparing everything in advance will make the popsicle-making adventure a breeze, setting the foundation for a sweet success story. Making sure to have the supplies available will also help your journey to make the perfect chocolate popsicles.
Melt the Chocolate
The process of melting chocolate properly is essential in achieving a smooth popsicle base. Start by breaking the chocolate into smaller pieces, making it easier and faster to melt evenly. This could be done using a double boiler setup, which is a gentle method. Alternatively, you can opt for the microwave, but in this case, take extra precautions, using short bursts of 30 seconds at a time, stirring well after each interval to prevent burning. This careful approach guarantees the chocolate melts smoothly, without any lumps or scorched spots. The goal is a velvety consistency, the foundation for your perfect popsicle. Once you achieve the smooth texture, it's a sign that you are one step closer to enjoying your homemade frozen treat.
Mix in Liquids
After the chocolate is melted, it's time to add the liquids, bringing the popsicle mixture to life. Begin by pouring in the milk or cream, blending it gently to make sure it is fully combined with the melted chocolate. For a richer flavor, cream is an ideal choice, adding a luxurious texture. Next, add the sugar or sweetener to your preference, starting with a small amount and taste-testing as you go, ensuring the perfect sweetness level. Do not forget a pinch of salt, as it will subtly enhance the chocolate flavor. Stir the mixture until everything is evenly blended, creating a smooth and consistent liquid ready for the next stage. It is important to have the liquids well-mixed, giving the popsicles a delightful taste.
Flavor Enhancements
This stage provides an opportunity to give your chocolate popsicles unique flavor combinations. Consider adding vanilla extract for a classic enhancement, infusing the mixture with a warm and aromatic quality. You can also incorporate a dash of cinnamon for a subtle spicy note, adding depth to the chocolatey taste. Alternatively, a hint of peppermint extract can provide a refreshing twist, perfect for a cooling treat. For a nutty touch, consider including finely chopped nuts, like almonds or hazelnuts, that will bring a crunchy texture. These additions should be added gradually, taste-testing as you go to make sure you achieve the perfect balance. The key is to play around and experiment, creating popsicles that suit your tastes.
Pour into Molds
Once you have mixed all the ingredients, you need to carefully pour the mixture into your popsicle molds. This step ensures the popsicles get their signature shape and size. Position the molds on a tray to avoid any spills. Slowly fill each mold, leaving a small gap at the top to accommodate the expansion during the freezing process. Be careful not to overfill the molds. Any spillage could affect the final shape and aesthetics of the popsicles. After pouring, you may tap the molds gently on the counter. This step eliminates air bubbles that could leave imperfections. Ensuring a smooth fill helps guarantee the perfect popsicle shape and presentation. The goal is to create clean, even popsicles, ready to be enjoyed.
Insert the Sticks
After filling the molds, the following step is inserting the popsicle sticks. Place the sticks into the mixture, ensuring they stay centered within each mold. If the mixture isn't thick enough to hold the sticks upright, wait until the mixture starts to freeze slightly before adding the sticks. Otherwise, the sticks might tilt and compromise the aesthetics. If you are using molds that don't come with built-in stick holders, you can improvise by covering the molds with foil. This prevents the sticks from moving around during the freezing process. Ensure each stick is aligned and secure, guaranteeing that you have a handle to grip and enjoy your frozen treat. This is a crucial step because it transforms the mixture into a popsicle.
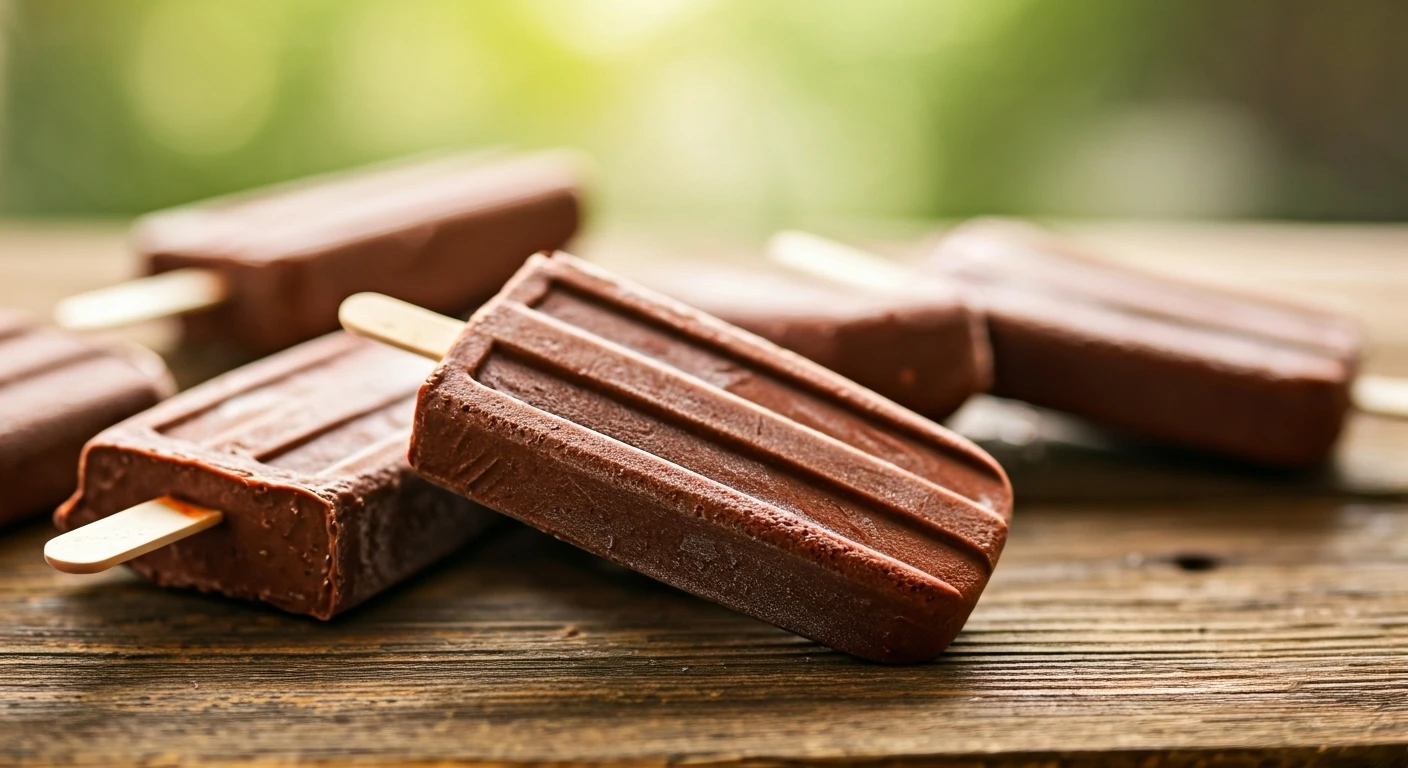
Freeze and Enjoy!
After all the ingredients are put together, the final step is freezing the popsicles. Place the filled molds into the freezer, ensuring they sit flat and undisturbed, allowing them to freeze completely. Freezing typically takes a minimum of 4 hours, but for better results, overnight is usually recommended, guaranteeing the popsicles are frozen solid. Once frozen, take the molds out of the freezer and run them under warm water. This loosens the popsicles, making them easy to remove. Then, gently pull the popsicles from the molds and enjoy your homemade frozen treat. Taste the effort of all these steps in a single bite of these delightful popsicles. This is the ideal reward after your labor, a sweet and refreshing way to end this popsicle-making adventure.