


Gather Your Supplies
Before starting, collect all the necessary ingredients. You will need: 1 cup of milk (any kind), ½ cup of heavy cream, ½ cup of granulated sugar (adjust
to taste), ¼ cup of unsweetened cocoa powder, a pinch of salt, and 1 teaspoon of vanilla extract. Essential equipment includes popsicle molds and sticks, a saucepan, a whisk, and measuring cups and spoons. Having everything ready beforehand streamlines the process, saving time and ensuring a smoother experience. It's also wise to have a clean workspace ready for food preparation to maintain cleanliness and hygiene. Make sure you have adequate space in your freezer to accommodate the molds.
Combine the Ingredients
In a saucepan, start by combining the milk, heavy cream, sugar, cocoa powder, and salt. Whisk these ingredients together thoroughly over medium heat. The goal is to ensure the cocoa powder dissolves completely and that the sugar dissolves, avoiding any gritty texture in your final product. Continue whisking consistently until the mixture is well-blended. This step is critical for the eventual smooth consistency of your popsicles. Stir constantly to prevent the mixture from burning or sticking to the bottom of the saucepan, especially as it begins to heat up. A smooth, uniform mixture ensures the popsicles freeze evenly.
Heat and Stir Thoroughly
Place the saucepan over medium heat. Continue to whisk the mixture constantly as it warms up. The aim is to heat the mixture gently, allowing the sugar to fully dissolve and the cocoa to integrate smoothly. Avoid boiling the mixture, as this could alter the final texture of the popsicles. The mixture should heat through but not reach a rolling boil; a simmer is ideal. This gentle heating process helps develop the flavors of the chocolate. Continue stirring until the mixture is smooth and slightly thickened. At this stage, the mixture should cling slightly to the back of a spoon.
Add Vanilla Extract
Once the mixture has heated sufficiently, remove the saucepan from the heat. Add the vanilla extract and stir it in well. Vanilla extract enhances the chocolate flavor, adding depth and complexity to the taste of the popsicles. Stir gently to distribute the vanilla evenly throughout the mixture. Vanilla extract also adds a subtle aroma that will further enhance the sensory experience of the final product. Make sure the mixture is not too hot before adding the vanilla, as high heat can diminish its flavor.
Cool the Mixture
Allow the chocolate mixture to cool completely before pouring it into your popsicle molds. You can speed this process by placing the saucepan in an ice bath, stirring occasionally until cool. It is essential to cool the mixture to prevent the formation of ice crystals, which can affect the texture of your popsicles, making them less smooth and enjoyable. Allowing the mixture to cool also gives the flavors a chance to meld, enhancing the overall taste. Ensure the mixture is at room temperature before proceeding to the next step, which is crucial for the final texture.
Fill the Molds
Carefully pour the cooled chocolate mixture into your popsicle molds. Be cautious to avoid spills. Fill each mold almost to the top, leaving a little space for expansion during freezing. Use a spoon or small pitcher for easier pouring. This step ensures that each popsicle gets an equal amount of the delicious mixture. Make sure the molds are clean and dry before filling to prevent any issues during freezing. If the molds are not filled appropriately, the resulting popsicles may have uneven shapes or textures.
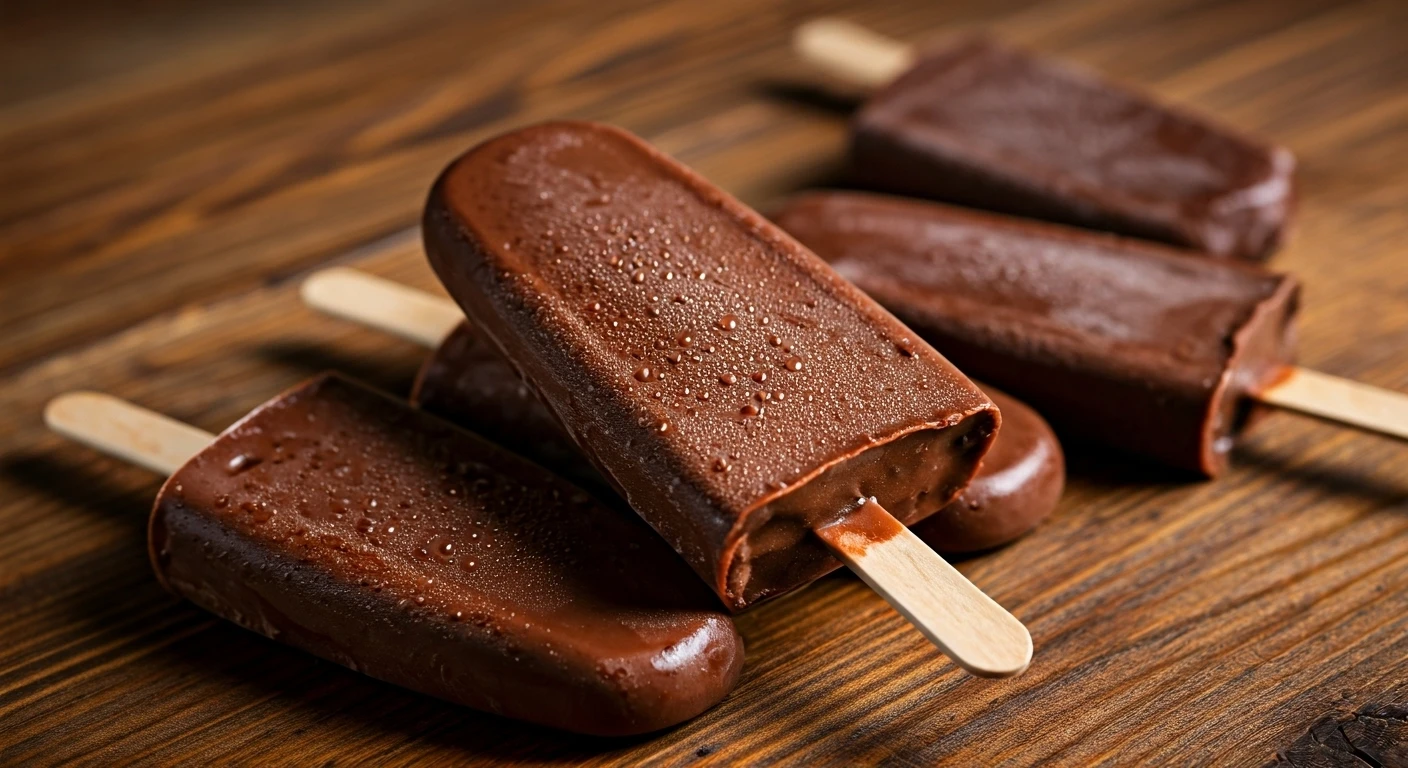
Freeze and Enjoy
Insert the popsicle sticks into the molds. Ensure the sticks are centered and straight. Place the filled molds in the freezer and let them freeze for at least 4-6 hours, or preferably overnight, until completely solid. Once frozen, remove the popsicles from the molds. You can do this by running warm water over the outside of the mold for a few seconds to loosen the popsicles. Enjoy your homemade chocolate popsicles! They're a perfect treat on a warm day. Store any leftover popsicles in the freezer for future enjoyment.