
Gather Ingredients
The initial step involves assembling all the necessary components for your chocolate popsicle adventure. You'll need specific items to ensure success.
A good quality chocolate base is essential, providing the foundational flavor for your popsicles. This can be cocoa powder, melted chocolate, or even a chocolate syrup. Next, you'll need a sweetener, such as sugar, honey, or your preferred alternative, to add the desired level of sweetness. Milk or a dairy substitute plays a key role in achieving the creamy consistency. Optional additions such as vanilla extract or a pinch of salt can enhance the flavors of the frozen treat, and make the popsicles even more desirable.
Mix the Base
Once you have the ingredients ready, combine them to create the base. Start by gently warming the milk or dairy substitute in a saucepan. This is just to help dissolve the sugar and cocoa powder. Add the cocoa powder (or melted chocolate) and sugar to the warm milk. Stir the mixture continuously until the cocoa powder and sugar are fully dissolved and blended seamlessly. If you're using vanilla extract or a pinch of salt, now's the time to include those additions. Be careful not to boil the mixture, as this can affect the final texture of the popsicles. Continue stirring the base until it has the consistency of a smooth liquid, free from any lumps.
Sweeten to Taste
Taste the base you've prepared and adjust the sweetness to your liking. The amount of sugar (or your sweetener of choice) will greatly impact the final flavor profile of your popsicles. If you find the mixture isn't sweet enough, gradually add more sugar, stirring continuously until it dissolves completely. Be sure to sample the base as you go, making sure it suits your taste preferences perfectly. Remember that the freezing process can slightly diminish the perception of sweetness, so you might want to aim for a slightly sweeter taste than you initially desire. This ensures that the popsicles have the perfect amount of sweetness when fully frozen.
Pour into Molds
When the base is prepared and the sweetness is adjusted, it's time to pour the mixture into popsicle molds. Make sure you have your molds clean and ready. Carefully pour the chocolate mixture into the molds, filling each one almost to the top. If you don't have a funnel, be extra cautious to avoid spills. You can use a spoon or a measuring cup to ensure an even distribution of the mixture into each mold. Clean up any spills immediately. Once the molds are filled, gently tap them on the counter to remove any air bubbles. This step helps to create smooth, evenly frozen popsicles.
Add the Sticks
Next, insert the popsicle sticks into the molds. If your molds have built-in slots for the sticks, carefully insert them into the designated spots. If your molds don't have slots, or you are using homemade molds, insert the sticks once the mixture has partially frozen. This prevents the sticks from floating or shifting during the freezing process. Depending on your mold design, you might need to wait a short time (approximately 30-45 minutes in the freezer) until the mixture starts to thicken slightly. This allows the stick to stand upright without toppling over. Ensure the sticks are centered and positioned properly within each popsicle mold.
Freeze to Set
The filled molds, complete with the sticks, now go into the freezer for the final stage. Place the molds on a level surface in your freezer. Let the popsicles freeze for a minimum of four hours, or preferably overnight, for the best results. The freezing time may vary depending on your freezer's temperature and the size of your molds. Check the popsicles after four hours to see if they are completely solid. If they are not, leave them in the freezer for a bit longer until they are completely frozen. The goal is to ensure the popsicles are frozen solid throughout for optimal taste and texture. Properly frozen popsicles hold their shape, provide a refreshing, cool treat and are easy to handle.
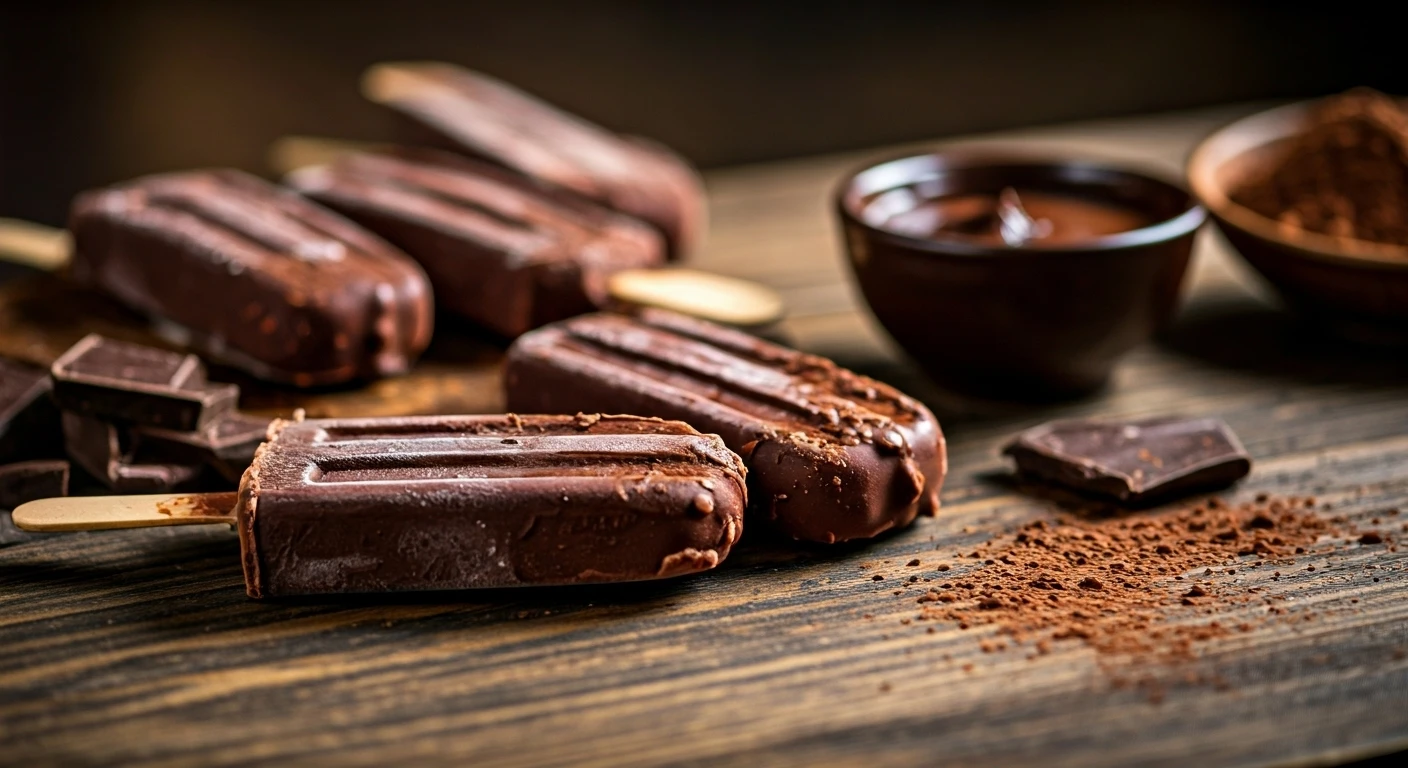
Unmold and Enjoy!
The final step is to unmold the frozen popsicles and enjoy them. To unmold, you can either run warm water over the molds for a few seconds or let them sit at room temperature for a brief time. This helps to loosen the popsicles from the molds. Gently pull the popsicle sticks to release the popsicles from the molds. If they resist, try running warm water over the molds again, but don't overdo it, as this could lead to melting. Now, your homemade chocolate popsicles are ready to be enjoyed! You can eat them immediately. Consider adding some toppings such as chocolate chips, sprinkles, or a drizzle of chocolate syrup for extra pleasure.