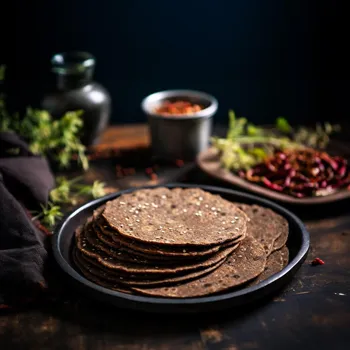
Unlock the secrets to perfect Masala Dosa! Elevate your dosa game with 8 essential tips. Dive into the art of dosa-making!
Bangalore – The masala dosa, that crispy, golden crepe filled with a spiced potato
mixture, is a South Indian staple loved across India and beyond. But achieving that perfect dosa – the kind that’s both delightfully crispy and surprisingly fluffy – can seem like a culinary challenge.
Fear not, dosa enthusiasts! We've compiled the ultimate guide, packed with eight practical tips, to help you create dosas that will impress your family and friends.
From choosing the right ingredients to mastering the art of spreading the batter, we will cover the key to unlocking dosa perfection is within your reach. Let's embark on this culinary journey and discover how to elevate your dosa game.
Imagine the satisfaction of serving up dosas that are light, airy, and bursting with flavor!
Perfecting dosa batter: key ratios, soaking, grinding, fermentation for light, crispy dosas
The foundation of any great dosa lies in the batter. This isn't something you can rush; it takes patience and the right proportions. Start with high-quality urad dal (split black lentils) and parboiled rice (idli rice is best).
The ideal ratio is generally 1:3 – one part urad dal to three parts rice. However, feel free to experiment slightly to find what works best for your taste. Now, here’s the crucial part: soaking. Soak the urad dal and rice separately for at least 4-6 hours, or even overnight.
This allows the grains to fully hydrate, resulting in a smoother batter and a lighter dosa. Remember, under-soaked ingredients will lead to a grainy batter, making it difficult to spread evenly and achieve that desired crispiness. After soaking, grind the urad dal first.
Grind it until it's incredibly smooth and fluffy, almost like whipped cream. This airy texture is key to a light and porous dosa. Next, grind the rice until it's a slightly coarse paste. Combining the two ground mixtures is where the magic begins.
Mix them thoroughly with salt and add water gradually to achieve a batter consistency similar to a thin pancake batter. Let this mixture ferment for at least 8-12 hours, or even longer in colder climates. Fermentation is what gives the dosa its characteristic tangy flavor and airy texture.
A well-fermented batter will have doubled in volume and have tiny bubbles throughout.
Use cast iron for best dosa texture, season well; non-stick tawa may lack crispness
The type of pan you use can significantly impact the dosa's texture and appearance. A seasoned cast iron pan is generally considered the best choice. Cast iron distributes heat evenly, ensuring that the dosa cooks uniformly and develops a beautiful golden-brown color.

Properly seasoning the pan is crucial to prevent the dosa from sticking. To season a cast iron pan, simply heat it over medium heat, add a tablespoon of oil, and spread it evenly over the surface.
Let the oil heat until it just starts to smoke, then remove it from the heat and let it cool completely. Wipe away any excess oil with a clean cloth. Repeat this process several times to build up a non-stick surface. Alternatively, you can use a non-stick tawa.
However, keep in mind that non-stick tawas may not provide the same level of crispness as cast iron. The key is to ensure that the tawa is hot but not smoking hot. If the tawa is too hot, the batter will immediately set, making it difficult to spread evenly.
If it's not hot enough, the dosa will stick and become soggy. A medium-high heat is usually ideal. Before pouring the batter, lightly grease the tawa with oil. You can use a cut onion dipped in oil or a clean cloth dipped in oil to spread a thin layer evenly.
Spreading dosa batter evenly for crispy dosas
Spreading the batter is an art form that requires practice. Pour a ladleful of batter onto the hot tawa. Using the back of the ladle, quickly spread the batter in a circular motion from the center outwards. The goal is to create a thin, even layer without any thick spots.
Don't worry if you don't get it perfect the first time. With practice, you'll develop the technique. One common mistake is using too much batter. A thin layer is essential for achieving a crispy dosa. Another mistake is spreading the batter too slowly.
The batter should be spread quickly and efficiently to prevent it from sticking to the tawa. If you find that the batter is sticking, try adding a little more oil to the tawa. The amount of oil you use will depend on the type of pan you're using and the stickiness of the batter.
As the dosa cooks, you'll notice small holes forming on the surface. This is a good sign – it means the dosa is cooking properly and will be light and airy. Once the dosa starts to turn golden brown around the edges, drizzle a little oil around the edges and in the center.
This will help it crisp up even more.
Elevate dosa with flavorful aloo masala filling
The masala filling is what elevates a plain dosa to a masala dosa. While there are many variations, a classic aloo masala is a popular choice. To make aloo masala, you'll need boiled potatoes, onions, ginger, garlic, green chilies, turmeric powder, and mustard seeds. Start by heating oil in a pan.
Add mustard seeds and let them splutter. Then, add chopped onions, ginger, and garlic and sauté until softened. Add turmeric powder and green chilies and cook for another minute. Next, add the boiled and mashed potatoes. Mix well and season with salt to taste.
You can also add other spices like coriander powder, cumin powder, or garam masala for extra flavor. Cook the potato mixture until it's heated through and slightly dry. This will prevent the dosa from becoming soggy. The key to a good aloo masala is to balance the flavors.
It should be spicy, savory, and slightly tangy. Feel free to adjust the spices to your liking. Once the aloo masala is ready, keep it warm until you're ready to assemble the dosas.
Cook golden dosa, add aloo masala, serve with sambar, chutney
Once the dosa is cooked golden brown on the bottom, it's time to add the masala filling. Spoon a generous amount of aloo masala onto the center of the dosa. Then, fold the dosa in half or into a roll. Serve immediately with sambar and coconut chutney.
Sambar is a lentil-based vegetable stew that is a classic accompaniment to dosa. Coconut chutney is a creamy, tangy chutney made from grated coconut, green chilies, ginger, and spices.
The combination of the crispy dosa, the flavorful aloo masala, the tangy sambar, and the creamy coconut chutney is a culinary delight. Experiment with different fillings. You can use paneer, vegetables, or even cheese. The possibilities are endless!
Garnish your dosas with fresh coriander leaves for a pop of color and flavor. Serving dosas with a variety of chutneys and dips is a great way to customize your experience for picky eaters! A tomato chutney or even a simple raita can add a refreshing element.
Practice and experiment to perfect masala dosa
Perfecting the masala dosa takes practice. Don't get discouraged if your first few attempts aren't perfect. Keep experimenting with the batter consistency, the tawa temperature, and the spreading technique. Eventually, you'll find what works best for you.
Remember, the key to a great dosa is patience, attention to detail, and a love for cooking. Now that you have these tips, go forth and create dosa magic in your kitchen! Don't be afraid to experiment with different variations and fillings to create your own signature dosa.
The joy of cooking lies in the creativity and the satisfaction of sharing delicious food with your loved ones. Happy cooking! Soon you will be making dosas that rival your favorite South Indian restaurant. Once you master the basic technique, you will find that making dosas is easy to make and fun.
AI Generated Content. Glance/InMobi shall have no liability for the content


