Create a Stunning Garden Pathway Today! Easy steps to transform your garden into a paradise walkway in just a day! Read more
Ever dreamt of a garden pathway that's not just functional, but also a real eye-catcher?
A pathway that invites you to stroll through your little patch of paradise, admire your flowers, and maybe even discover a hidden bench for a peaceful cup of chai?
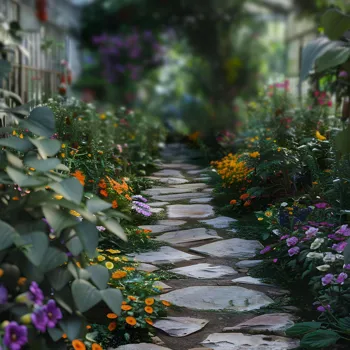
Well, you don't need to be a professional landscaper or spend a fortune to achieve this! We've got you covered with five easy-peasy steps that anyone can follow to create a stunning garden pathway in just a day.
So, grab your gardening gloves, put on your favorite Bollywood tunes, and let's get started!
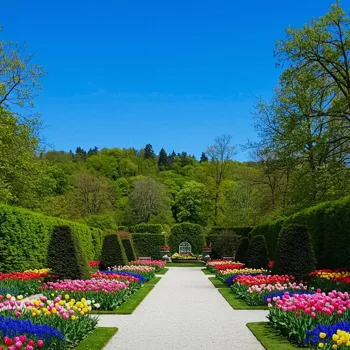
Plan garden paths based on garden style, function, and path purpose
Before you even think about touching a spade, take a good look at your garden. Where do people naturally walk? What areas do you want to connect? Do you want a straight path, a winding path, or something in between? Think about the overall style of your garden.
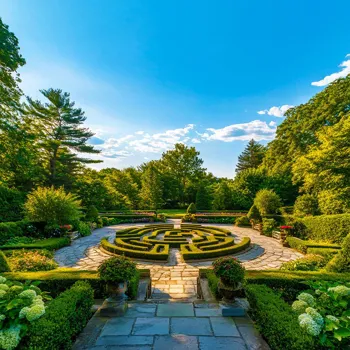
For a more formal garden, a straight path with neat edges might be ideal. For a more relaxed, cottage-style garden, a winding path with irregular stones could be perfect. Consider the purpose of the path, is it just for walking or will you need to transport a wheelbarrow along it?
Once the pathway is clearly defined, measure the length of the path to identify the materials that you might require.
Choose garden materials wisely for aesthetics and safety
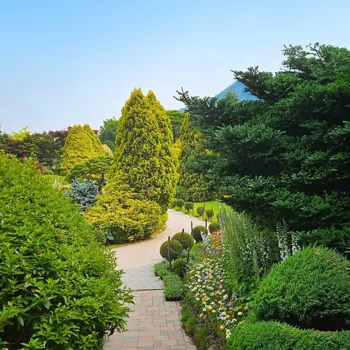
Now, let's talk about materials. The possibilities are endless! You can use paving stones, gravel, wood chips, brick, or even stepping stones. Choose materials that complement your garden's aesthetic and are also practical for your needs.

Paving stones are durable and create a formal look, while gravel is more affordable and provides a rustic feel. Wood chips are a budget-friendly option but may need to be replaced more often. Consider the weather conditions in your area as well.
Some materials might become slippery when wet, so choose wisely. If you have pets or children, this is also another factor to consider and think about material that don't include sharp edges or materials that tend to cut.
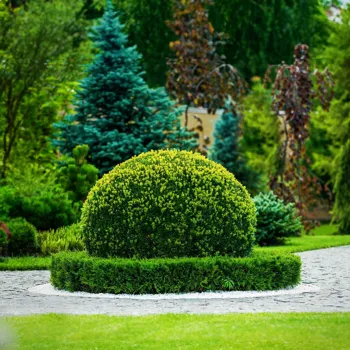
Enhance your garden path with edging, lighting, and decor for a welcoming ambiance
Don't forget about the little details! Adding edging to your path can really elevate the look. You can use bricks, stones, or even plants to create a defined border. Lighting can also add a magical touch, especially in the evenings.
Solar-powered lights are a great option as they are easy to install and don't require any wiring. Consider adding some decorative elements along the path, such as potted plants, sculptures, or even a small water feature.
A well-planned pathway creates an inviting and welcoming ambience to your garden. Think if you want to use the pathway during night? If yes, lighting becomes an important aspect to consider. And remember, it is all about planning and being creative.
Plan, gather supplies, ask for help, load car to avoid strains
Once you have a clear plan in mind, it's time to gather your supplies. Make a list of everything you need, from the main material for the path to edging, tools, and any decorative elements you want to add. Head to your local garden center or hardware store and get everything you need.
Don't be afraid to ask for help from the staff if you're unsure about anything. They can give you valuable advice and recommendations based on your specific needs and budget. And don't forget to load your car so that you do not get back strains and injure your back.
Essential tools for gardening projects, plus safety gear tips
You might need some essential tools like a shovel, rake, wheelbarrow, measuring tape, level, and a rubber mallet. If you are using paving stones or bricks, you might want to rent a plate compactor to help compact the base layer.
Also, remember to buy any necessary safety gear, such as gloves, safety glasses, and sturdy shoes. While it might seem like a lot of effort to buy the right equipment at first, once you have these materials, they will come in handy for many of your gardening endeavours!
Ensure that you check the quality of the materials before buying them. Some materials can erode faster than others.
Compare prices at stores for best deals; use recycled materials
Do not forget to compare prices at different stores. Some stores might offer discounts or special promotions, so shop around to get the best deals. If you're on a tight budget, consider using recycled materials.
You can use old bricks, broken paving stones, or even reclaimed wood to create a unique and eco-friendly pathway. There are a lot of websites where you can source these materials. Check the online forums and the social channels in your local neighbourhood to find affordable material providers.
And remember, there is no substitute to doing your homework before you get started. Keep those materials close by, and organized in a location.
Prepare ground thoroughly for a stable garden pathway
Now comes the slightly more laborious part – preparing the ground. This step is crucial for creating a stable and long-lasting pathway. Start by marking out the area where you want your path to be. You can use a garden hose or string to create the desired shape.
Once you are happy with the layout, remove any grass, weeds, or debris from the area. Use a shovel to dig down to a depth of about 4-6 inches. This will allow you to create a solid base for your pathway. Ensure the base is level throughout for an even garden walkway.
Compact gravel layer evenly for stable pathway; ensure proper drainage
Next, add a layer of gravel or crushed stone to the excavated area. This will help with drainage and prevent your pathway from becoming waterlogged. Use a rake to spread the gravel evenly and then compact it down using a plate compactor or a hand tamper.
A well-compacted base is essential for preventing your pathway from sinking or shifting over time. Also, level the crushed stone and ensure that it is even on either sides, once this exercise is done. If there is any excess, you can always remove it or utilize it for your flowerbeds.
Landscape fabric prevents weeds, sand creates smooth surface for paving
Consider adding a layer of landscape fabric on top of the gravel. This will help prevent weeds from growing up through your pathway. Cut the fabric to size and secure it with landscaping staples. Overlapping the landscape fabric at the joints to ensure that is continuous and does not have any gaps.
And then, add a layer of sand on top of the landscape fabric. This will create a smooth and level surface for your paving stones, bricks, or other chosen material! Ensure there are no gaps.
Lay path materials evenly for a beautiful walkway
Now comes the fun part – laying the path! Start by placing your chosen material along the prepared base. If you are using paving stones or bricks, make sure they are level and evenly spaced. Use a rubber mallet to tap them into place.
If you are using gravel or wood chips, spread them evenly over the base and rake them smooth. For stepping stones with grass, ensure that the grass is evenly spread for a beautiful green walkway. Add soil and seeds to help the grass propagate to the edges.
Curved garden paths add character and creativity
Get creative with the layout! Don't feel like you have to stick to a perfectly straight line. A slightly curved or winding path can add a lot of character to your garden. You can also mix and match different materials to create a unique and interesting design.
The pathways can be designed in any pattern either vertically or horizontally. Remember to leave space in the sides for the pathway to settle down later. In time, the edges of the pathway would shift, so this space helps to maintain the integrity of the initial design pattern.
Create a beautiful walkway with care and attention to detail
Take your time and enjoy the process. This is your chance to create something beautiful and functional that you will enjoy for years to come. Once you have laid all the materials, sweep any excess sand or gravel off the surface. Use a hose to lightly water the pathway.
This will help to settle the materials and compact the base, ensuring a more secure walkway. Remember if you aren't satisfied with the alignment, you can always realign, or replace some of the stones! Be observant and pay attention to the minute details.
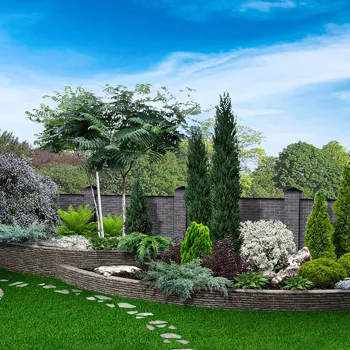
Add edging to define path borders for a polished look
Once your pathway is laid, it's time to add the finishing touches that will really make it shine. Add edging to define the borders of your path and prevent the materials from spreading. You can use bricks, stones, or even plants to create a neat and attractive edge.
Consider the height of edging that will work most efficiently ensuring that materials and other unwanted things don't spillover on the pathway. With strong borders, you are able to ensure that the pathway remains well maintained.
Create magical atmosphere with solar lights along garden paths
Install lighting along the path to create a magical atmosphere in the evenings. Solar-powered lights are a convenient and eco-friendly option. You can also use string lights or lanterns to add a touch of whimsy.
They can illuminate the garden space at night, creating beautiful patterns of lights on the grass. In addition, consider the weather forecast and plant suitable lighting equipment based on that information to ensure durability. You may also utilize lights that are bright or more dim based on the plants around the pathways,
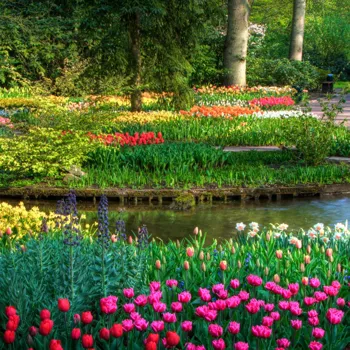
Enhance garden paths with decor and plants for charm and function
Add decorative elements along the path to personalize your space. Potted plants, sculptures, or even a small water feature can add charm and character. Choose plants that complement the style of your garden and thrive in the local climate. Mulch can be added to the path to prevent weed growth.
Remove any loose aggregates from the pathway such as dirt or twigs. Your garden pathway is now complete! Now, take a step back and admire your handiwork! You've created a beautiful and functional addition to your garden that you can enjoy for years to come.