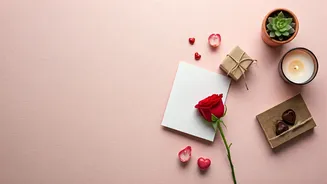


Unleash Your Creativity: 6 DIY Home Decor Projects for All Skill Levels. Transform your space with these inspiring ideas!
Folks, are you feeling a little 'thanda' with your home decor? Does your living
room look like it's stuck in 2010? Well, worry not! You don't need to spend a bomb hiring an interior designer.
With a little bit of 'jugaad' and some readily available materials, you can transform your house into a haven that reflects your personality.
We've curated six fantastic DIY home decor projects, ranging from super-easy to slightly challenging, so there's something for everyone, no matter your skill level. Get ready to unleash your inner artist and give your home a much-needed 'tadka' of creativity!
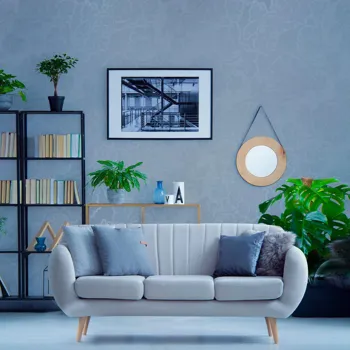
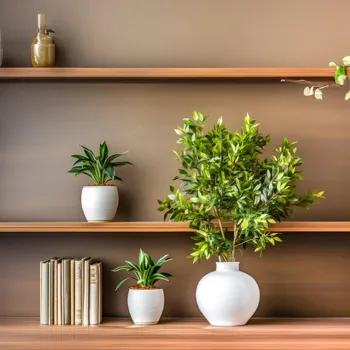
The Effortless Elegance of Floating Shelves:
Let's start with something super simple that even your 'nani' could do! Floating shelves are a fantastic way to add storage and display space without taking up too much room.
You'll need some wooden planks (you can get these cut to size at your local hardware store), some sturdy brackets, a drill, and screws. First, decide where you want to place your shelves and mark the spots for the brackets. Then, using your drill, carefully screw the brackets into the wall.
Make sure they are level for a neat finish, otherwise anything you keep will be at slant. Finally, simply place the wooden planks on top of the brackets, and voila! You now have stylish floating shelves to display your books, plants, or favourite knick-knacks.
Paint the wood in colors of your choice and enjoy.
This project shines for its simplicity and versatility. You can use different types of wood depending on your budget and personal preference, or even repurpose old wooden crates for a rustic look.
The brackets can also be chosen to match your desired aesthetic, from sleek and modern metal brackets to ornate, vintage-inspired ones. Another advantage is that floating shelves can be installed in any room of the house, from the living room to the kitchen to the bathroom.
They're perfect for small spaces or for adding a touch of minimalist chic to any room. You can arrange them in a variety of exciting ways, like creating a staggered effect, or using multiple shelves to create a large display wall.
The possibilities are truly endless and this small addition will take the look of your home to another level.
Painted Plant Pots: A Splash of Colour:
Do you believe in plants? If you do, then you must be having a plenty of pots. Are they dull and boring? Grab some simple clay or terracotta pots. These are readily available in any nursery in plain dull colors. Now let us bring new life to these.
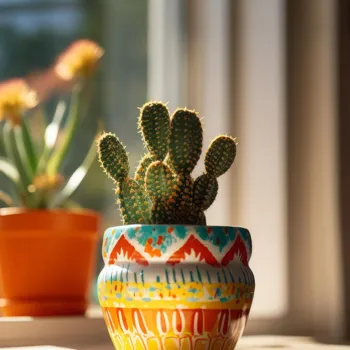
All you need are some bright acrylic paints, paintbrushes, and a little bit of imagination. Start by cleaning the pots to remove any dirt or dust. Then, let your creativity flow!
You can paint geometric patterns, floral designs, abstract art, or even personalize them with your name or inspirational quotes. For a truly unique look, try using different painting techniques like stippling, sponging, or even creating ombre effects.
Once the paint is dry, seal the pots with a clear varnish to protect the designs from the elements.
These painted pots are a great way to add a pop of colour and personality to your indoor and outdoor spaces. They also make fantastic gifts!
You can tailor the designs to match the recipient's taste or even create a themed set of pots for special occasions. Experiment with different paint colours and techniques to discover what works best for you.
Remember to use weather-resistant paints and sealants if you plan to keep your pots outdoors. This simple project is a fantastic way to recycle old pots, use up leftover paint, and add your own creative touch to your home. A lot of plants in colorful pots will make your home look beautiful.
Place indoor plants on your shelves, on tables and in verandahs.
Mirror Makeover: Reflect Your Style:
Got an old, plain mirror that's seen better days? Don't throw it away! With a little bit of effort, you can transform it into a stunning statement piece. There are many ways to revamp a mirror.
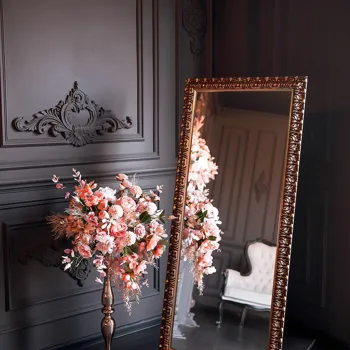
You can use decorative tiles, seashells, beads, or even small pieces of stained glass to create a unique frame. Simply glue your chosen embellishments around the edges of the mirror using a strong adhesive. For a more rustic look, you can wrap the frame in rope or twine.
If you're feeling artistic, you can even paint directly onto the mirror using glass paint or markers. Get creative with your designs and create a mirror that truly reflects your personal style.
This is an affordable and eco-friendly way to repurpose old mirrors and give them a new lease on life.
It's also a great way to add a touch of glamour or whimsy to any room. Consider the overall style of your home when choosing your embellishments. For a modern look, opt for sleek tiles or geometric patterns. For a bohemian vibe, use seashells, beads, or colourful glass.
If using glue, make sure to use a strong adhesive that is suitable for both glass and your chosen material. And remember to allow the glue to dry completely before hanging your newly decorated mirror. A stylish mirror will give an illusion of more space in the room.
For example, if you have a small living room, hang a big decorative mirror.
Key Holder: Organize and Beautify:
Are your keys always getting lost? This is a very common problem with most of us. Worry no more! Create a simple and stylish key holder to keep them organized and easily accessible. You can use a small piece of wood, a corkboard, or even an old picture frame as the base for your key holder.
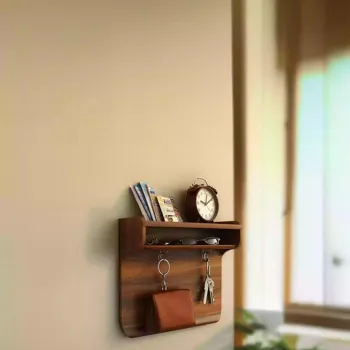
Attach small hooks or knobs to the base for hanging your keys. Decorate the base with paint, fabric, or any other materials you like. You can even personalize it with your family name or a catchy quote. Hang your key holder near the entrance of your house for easy access to your keys.
This project is both practical and decorative. It's a great way to keep your keys organized and prevent them from getting lost, while also adding a touch of style to your entryway. You can customize your key holder to match the décor of your home.
For a rustic look, use a piece of reclaimed wood and antique-style hooks. For a modern look, use a sleek piece of metal or acrylic and minimalist hooks. Make sure to use strong hooks that can hold the weight of multiple keys.
This simple project is a great way to upcycle old materials and add a personal touch to your home. You may also add a small shelf to keep your wallet or phone to make life easy.
Pallet Furniture: Rustic and Recycled:
Feeling a bit more ambitious? Pallet furniture is a fantastic way to create unique and eco-friendly pieces for your home. Pallets are readily available and often free from construction sites or businesses. You can use them to create coffee tables, benches, headboards, or even entire sofas!
Start by sanding down the pallets to remove any splinters or rough edges. Then, paint or stain them to your desired colour. Get creative with your designs and add cushions, legs, or other embellishments to complete your furniture.
Pallet furniture is a great way to add a rustic and industrial touch to your home. It's also an eco-friendly way to recycle old materials and create unique pieces that no one else will have. Before using pallets, make sure they are clean and free of any harmful chemicals.
You can often find information about the type of wood used and any treatments applied to the pallet by looking for markings on the wood. When building pallet furniture, make sure to use screws and nails that are specifically designed for working with wood.
This will ensure that your furniture is sturdy and durable. This project is a great way to challenge yourself and create truly unique and stylish home décor.
Dreamcatcher: A Touch of Whimsy
A dreamcatcher does not make dreams come true. It is a simple thread work that will add traditional crafts to your decor. This project needs a little patience. To make a dreamcatcher, you'll need a metal ring hoop, some yarn or twine, beads, feathers, and scissors.
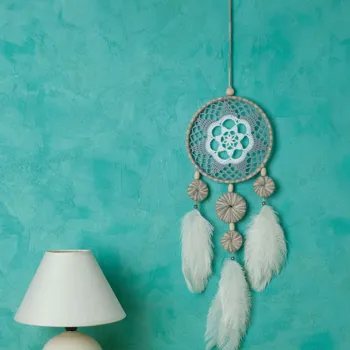
Wrap the hoop in yarn or twine, fixing the beginning and end with glue. Then, starting from the centre of the hoop and knot the yarn using a regular pattern. Once the thread work is done, you can decorate it with beads and feathers. Arrange it the way that looks the best.
Dreamcatchers are often associated with Native American cultures, and are believed to filter dreams. This is a nice addition for children's rooms as well. You can hang dreamcatchers above your bed or in any room where you want to add a touch of whimsy and relaxation.
Use different colours of yarn, beads, and feathers to create a dreamcatcher that matches your personal style. Get creative with your designs and add other embellishments like shells, buttons, or crystals.
So there you have it!
Six DIY home decor projects that are sure to unleash your creativity and transform your living space. Remember, there are no rules when it comes to DIY.
So, embrace your inner artist, experiment with different materials and techniques, and have fun creating a home that truly reflects your unique personality. Happy crafting!