Unleash your creativity with 6 DIY home decor projects! Transform your space and impress with unique personal touches
Feeling a bit bored with your home these days? Does it feel like it needs a bit of a "zhuzh-up,"
as we say in India? Well, good news, boss! You don't need to spend a bomb on fancy interior decorators.
You can unleash your inner artist and give your home a fresh, personalized touch with some easy-peasy DIY projects. These aren't complicated rocket science stuff, mind you.
These are simple, fun, and budget-friendly ideas that anyone can tackle – even if you think you don't have a creative bone in your body! So, put on some Bollywood music, grab your chai, and let's get started! We're about to transform your living space, one DIY project at a time.
Get ready to impress your neighbours and feel a sense of accomplishment you didn't know you were missing! Time to get your hands dirty (in a good way, of course!).
Learn to create beautiful terrariums as a relaxing hobby
First up, let's talk about "Terrarium Magic." Terrariums are basically mini-gardens in glass containers, and they are absolutely trending these days. You can find all sorts of beautiful containers at your local market or even reuse old glass jars. Think jam jars, mason jars, even old fishbowls!
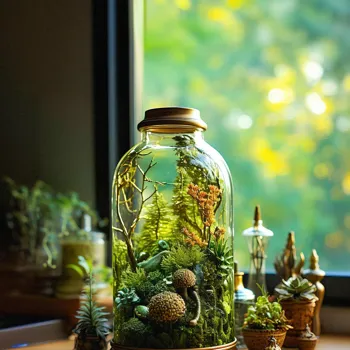
Now, inside, you can create a little world. Layer some pebbles for drainage, followed by activated charcoal (to keep things fresh), and then some potting soil. Choose plants that like humidity, like ferns, mosses, and small succulents.
Arrange them prettily, add some decorative stones or figurines, and voila! You've got a stunning terrarium that will bring a touch of nature indoors. These little green ecosystems are not only beautiful but also super low-maintenance.
Just a little spritz of water every now and then, and they're happy as can be. Plus, making them is a great way to relax and de-stress after a long day at work. So, ditch the online shopping and try your hand at some terrarium therapy! It's good for your soul and good for your home.
Upcycle fabric scraps into vibrant statement wall art pieces
Next, we have "Statement Wall Art with Fabric Scraps." Do you have a bunch of colorful fabric scraps lying around from old tailoring projects or maybe some leftover sarees? Don't throw them away! They're the perfect ingredients for some unique and eye-catching wall art.
You can stretch the fabric over wooden frames (available at most craft stores), or even glue it to a sturdy cardboard backing. Create abstract designs, geometric patterns, or even cut out shapes and make a collage. Get creative with your color combinations and textures.
You can even add embellishments like beads, buttons, or embroidery to give it an extra touch of pizzazz! These fabric art pieces add a pop of color and personality to any room. Hang them individually or create a gallery wall for a truly dramatic effect.
It's a fantastic way to upcycle old materials and create something beautiful and one-of-a-kind. And the best part? It's a whole lot cheaper than buying expensive artwork from the stores. Your walls will thank you!
Revamp plant pots with vibrant paint for a fun, creative project
Now let's explore “Charming Painted Plant Pots.” Get rid of those dull, boring terracotta plant pots and give them a makeover with some paint! This is a super easy and fun project that even kids can participate in.
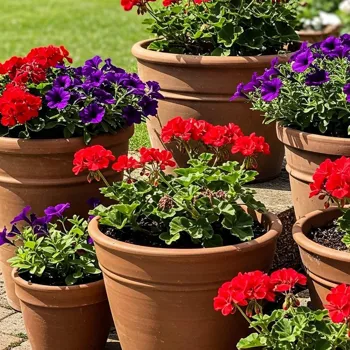
You can use acrylic paints, which are readily available and come in a wide variety of colors. Paint geometric patterns, floral designs, quirky illustrations, or even just solid colors with contrasting trims. Let your imagination run wild!
You can also add texture by using stencils or sponges to create interesting patterns. Once the paint is dry, seal the pots with a clear varnish to protect the paint from chipping and fading. These painted plant pots will instantly brighten up your balcony, garden, or even your windowsill.
And they make great gifts too! Imagine giving a friend a beautiful succulent planted in a pot that you painted yourself. It's a thoughtful and heartfelt gift that they'll cherish for years to come. So, grab your paintbrushes and unleash your inner Picasso on those plain old plant pots!
They're begging for a makeover.
Transform old ladder into stylish shelf for décor & storage
Let's move on to “Upcycled Ladder Shelf.” Do you have an old wooden ladder lying around in your garage or attic? Don't throw it away! It can be transformed into a stylish and functional shelf with a little bit of elbow grease.
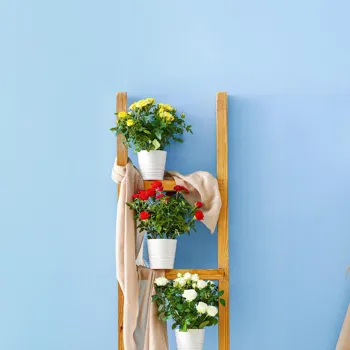
Simply clean the ladder thoroughly, sand it down to remove any rough edges, and then paint or stain it in your desired color. You can leave it rustic for a more farmhouse-chic look, or paint it a bold color for a more modern feel.
Once the paint or stain is dry, lean the ladder against a wall and use the rungs as shelves. You can use it to display books, plants, photo frames, or any other decorative items. It's a great space-saving solution for small apartments or rooms. And it adds a touch of rustic charm to any décor.
You can also add wooden planks to the rungs to create wider shelves for more storage space. This upcycled ladder shelf is not only functional but also a conversation starter. Your guests will be impressed by your creativity and resourcefulness.
Personalize your space with "Photo Clip String Lights" to showcase cherished memories creatively
Time for your personalized touch with this "Photo Clip String Lights.” Ditch the ordinary and decorate your home with photos using a string of lights! Why keep your precious memories hidden away in albums or on your phone when you can display them in a fun and unique way?
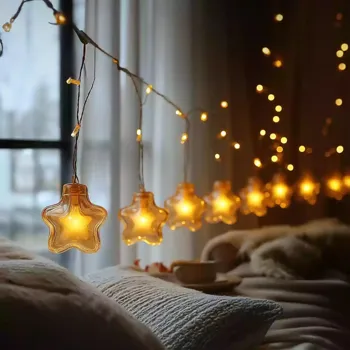
This project is super simple and requires minimal materials. All you need is a string of fairy lights (battery-operated ones are ideal), some mini clothespins, and your favorite photos. Simply clip the photos to the string lights using the clothespins, spacing them out evenly.
Hang the string lights along a wall, across a window, or even around your bed frame. The soft glow of the lights combined with your cherished memories will create a warm and inviting atmosphere. It's a perfect way to personalize your space and add a touch of whimsy.
You can also change the photos whenever you want, so it's a constantly evolving display of your life's adventures. This photo exhibit will be a sure hit among your friends and family!
DIY decorative mirrors can transform a room inexpensively and creatively
Finally, let's not forget about this simple creation: “DIY Decorative Mirrors.” Mirrors can make a small room feel bigger and brighter, and they can also be a stylish decorative element. Instead of buying expensive designer mirrors, why not create your own?
All you need is a plain mirror (you can find them at most hardware stores), some glue, and some decorative materials. You can use seashells, pebbles, beads, buttons, mosaic tiles, or even small pieces of broken glass to create a unique and eye-catching frame around the mirror.
Simply glue the decorative materials to the frame of the mirror, arranging them in your desired pattern. You can create symmetrical designs, abstract patterns, or even personalized motifs. Let your imagination guide you! Once the glue is dry, clean the mirror thoroughly and hang it on your wall.
The reflection of light will brighten up your space, and the decorative frame will add a touch of personality. These DIY mirrors also make great gifts for friends and family. It is an excellent addition to your home decor.
AI Generated Content. Glance/InMobi shall have no liability for the content