


Unlock the secrets to perfect dosas! Learn the art of fermentation and cooking techniques for fluffy dosas. Read on!
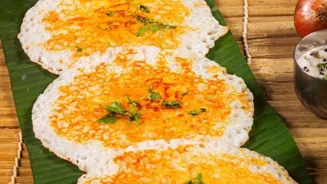
Dosa, the quintessential South Indian breakfast, is a staple in many Indian households.
But achieving that perfect balance of crispy edges and a soft, fluffy center can sometimes feel like a culinary challenge.
The secret, as many seasoned cooks will tell you, lies in the fermentation process and the cooking technique. Let's unlock the secrets to making dosas that will have everyone asking for more!
The key to a perfect dosa lies in the batter preparation
The heart of a good dosa is the batter. It's more than just a mix of ingredients; it's a living, breathing entity that needs the right environment to thrive.
The basic ingredients are simple: rice (usually parboiled or a combination of parboiled and raw), urad dal (split black lentils), and fenugreek seeds. The proportion is key. A common ratio is 4:1 or 3:1 rice to urad dal, with a small amount of fenugreek.
Soak these ingredients separately for at least four to six hours, or even overnight, in plenty of water. This softens the grains and beans, making them easier to grind and allowing for better fermentation. After soaking, drain the water and grind the urad dal first.
Grind it into a fine, airy batter, adding water gradually to achieve a smooth, fluffy consistency. The texture should be like whipped cream. Next, grind the rice, again adding water slowly to get a slightly grainy but smooth batter. Don’t over grind the rice as it can make the dosa sticky.
Mix both the batters together well with your hand, add salt, and let it ferment. The type of water used also affects the fermentation. RO filtered water is not suitable. Use regular tap water.
Fermentation creates dosa's tangy flavor and fluffy texture
Fermentation is where the magic happens. This process involves microorganisms breaking down the starches in the rice and dal, producing lactic acid and carbon dioxide.
The lactic acid gives the dosa its characteristic tangy flavor, while the carbon dioxide leavens the batter, creating those desirable air pockets that result in a fluffy texture. The ideal fermentation time depends on the weather.
In warmer climates, 8-12 hours may be sufficient, while in colder climates, it may take 18-24 hours. A good indicator of successful fermentation is a noticeable increase in volume and the presence of small bubbles throughout the batter. The batter should also have a slightly sour smell.
Remember to store the batter in a warm place to encourage fermentation. You can also use a preheated oven (turned off!) or an Instant Pot on the yogurt setting to create a controlled warm environment.
If the batter ferments too much (becomes overly sour), add a pinch of baking soda to neutralize the acidity before making dosas. The consistency of the batter after fermentation is also important.
It should be thick enough to spread thinly on the tawa without tearing, but not too thick that it becomes difficult to spread. If needed, adjust the consistency by adding a little water.
Cooking crispy dosas requires a well-seasoned tawa and proper heat control
Now it's time for the cooking! The most important tool for making dosas is a well-seasoned tawa (griddle). Cast iron tawas are ideal because they distribute heat evenly and retain it well, resulting in crispy dosas.
However, non-stick tawas can also be used, especially for beginners, as they prevent the dosa from sticking and tearing. Before you start, make sure the tawa is hot enough. A good way to test the temperature is to sprinkle a few drops of water on the tawa.
If the water sizzles and evaporates almost immediately, the tawa is ready. If the water just sits on the surface, it’s not hot enough. If the water splatters violently, it’s too hot. Once the tawa is ready, reduce the heat to medium. This prevents the dosa from burning before it cooks through.
Take a ladleful of batter and pour it onto the center of the tawa. Using the back of the ladle, spread the batter in a circular motion, starting from the center and moving outwards. Aim for a thin, even layer. Don't worry if there are a few small holes; these will add to the crispy texture.
Crisp dosa making tips for perfect results
Once you have spread the batter, drizzle a little oil or ghee around the edges and in the center of the dosa. This helps to crisp up the dosa and prevents it from sticking. Cover the tawa with a lid for a minute or two. This allows the dosa to steam and cook through evenly.
Remove the lid and check the dosa. When the edges start to lift away from the tawa and the dosa turns golden brown, it's ready to flip. Use a thin spatula to gently lift the dosa and flip it over. Cook the other side for another minute or two, until it is also golden brown and crispy.
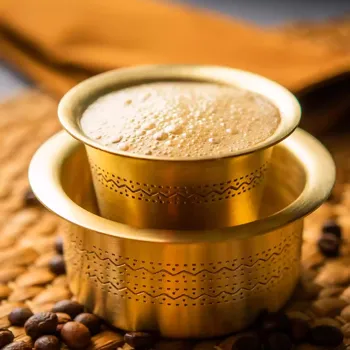
If you prefer a softer dosa, you can skip flipping it over. Once the dosa is cooked to your liking, fold it in half or into a triangle and serve immediately. Dosa is typically served with sambar (a lentil-based vegetable stew) and chutney (a coconut or tomato-based condiment).
However, you can also get creative and serve it with other fillings, such as potato masala (aloo masala), paneer (Indian cheese), or even leftover vegetable curry.
Making aloo masala and sambar recipes explained briefly
Making the aloo masala is an art in itself. Boil potatoes, peel them, and mash them lightly. Sauté mustard seeds, urad dal, chana dal, and curry leaves in oil. Add chopped onions, green chilies, and ginger. Fry until the onions turn golden brown. Add turmeric powder, asafoetida, and salt.
Add the mashed potatoes and mix well. Cook for a few minutes, stirring occasionally, until the potatoes are heated through and the mixture is fragrant. Garnish with chopped coriander leaves and a squeeze of lemon juice.
Similarly, making sambar involves boiling toor dal (split pigeon peas) with vegetables like drumsticks, pumpkin, and eggplant. Temper mustard seeds, fenugreek seeds, and red chilies in oil. Add chopped onions, tomatoes, and sambar powder. Cook until the tomatoes are softened.
Add the cooked dal and vegetables. Simmer for a few minutes, allowing the flavors to meld. Finish with tamarind extract and chopped coriander leaves.
Experiment with different rice types for dosa batter
Experiment with different types of rice to find what works best for you. Some people prefer using idli rice, which is a type of parboiled rice specifically used for making idlis and dosas. Others prefer a combination of parboiled rice and raw rice, which gives the dosa a slightly different texture.
You can also add a small amount of poha (flattened rice) to the batter, which helps to make the dosas softer. Don't be afraid to adjust the amount of water you add while grinding. The consistency of the batter is key, so add water gradually until you reach the desired consistency.
If you accidentally add too much water, you can add a little rice flour or semolina to thicken the batter. Always use a clean and dry ladle to take batter from the container. This prevents contamination and extends the shelf life of the batter.
If you have leftover batter, store it in an airtight container in the refrigerator. It will keep for up to a week.
Master the art of making fluffy dosas with practice and patience
With a little practice and patience, anyone can master the art of making fluffy dosas. So, gather your ingredients, fire up your tawa, and get ready to enjoy a delicious and satisfying South Indian breakfast. The key is to experiment, adjust the recipes to your liking and observe. Happy cooking!