


Discover the art of creating your own Paneer - a creamy, versatile Indian cheese. Dive into the step-by-step guide!
Paneer, that soft, milky, and oh-so-versatile Indian cheese, is a staple in many a vegetarian
kitchen.
Whether it's swimming in a rich makhani gravy, tossed with vibrant veggies in a stir-fry, or grilled to perfection in a tandoori, paneer adds a creamy texture and subtle flavour that elevates any dish. But did you know that making your own paneer at home is surprisingly simple?
Forget the store-bought stuff packed with preservatives – with just a few ingredients and a little patience, you can whip up a fresh batch of homemade paneer that's bursting with flavour and free from any unwanted additives.
Plus, the satisfaction of creating something delicious from scratch is simply unmatched!
Making paneer at home gives you complete control over the ingredients and the final product. You can use the highest quality milk available, ensuring a richer and creamier paneer.
Plus, you can adjust the level of acidity to your liking, making it tangier or milder based on your preference. Homemade paneer also tends to be much softer and more tender than the commercially produced variety, which often contains stabilizers and preservatives that can affect its texture.
And let's not forget the cost savings! Making your own paneer is significantly cheaper than buying it from the store, especially if you use local or farm-fresh milk. It's a win-win situation for your taste buds and your wallet!
So, are you ready to embark on this cheesy adventure?
Let’s dive into the step-by-step guide to making your own delicious, fresh paneer at home. Trust us, once you try it, you'll never go back to the store-bought version!
Ingredients You'll Need:
1 gallon (approximately 4 liters) of full-fat milk (cow or buffalo milk works best)
1/4 cup of lemon juice or white vinegar (or a combination of both)
A large pot
A cheesecloth or muslin cloth
A colander
A heavy object (like a pot filled with water or a stack of books)
Step-by-Step Instructions:
Step 1: Bring the Milk to a Boil
Pour the milk into a large, heavy-bottomed pot. This will help prevent the milk from scorching at the bottom. Place the pot over medium heat and bring the milk to a rolling boil, stirring occasionally to prevent it from sticking or forming a skin on the surface.
Keep a close eye on the milk as it heats up, as it can quickly boil over if you're not careful. Once the milk reaches a boil, reduce the heat to low.
Step 2: Add the Acid
This is where the magic happens!
Slowly add the lemon juice or vinegar (or a combination of both) to the milk, stirring gently as you pour. You'll notice the milk beginning to curdle, separating into solid white masses (the paneer) and a watery liquid (the whey).
If after adding the full amount of acid the milk hasn't fully curdled, you can add a little more, a tablespoon at a time, until you see a clear separation. Be careful not to add too much acid, as this can make the paneer tough and rubbery.
Keep stirring gently for a minute or two to ensure the curdling process is complete.
Step 3: Separate the Paneer from the Whey
Line a colander with a cheesecloth or muslin cloth. Carefully pour the curdled milk into the lined colander.
The cheesecloth will trap the solid paneer, while the whey will drain through. Once all the curdled milk has been poured into the colander, gather the edges of the cheesecloth and tie them together to form a small sack. Gently squeeze the sack to remove any excess whey.
The more whey you remove, the firmer your paneer will be.
Step 4: Press the Paneer
Place the sack of paneer on a plate or in a shallow dish. Place a heavy object on top of the sack to press the paneer. This will help remove even more whey and give the paneer a firm, compact texture.
You can use a pot filled with water, a stack of books, or any other heavy object you have on hand. The longer you press the paneer, the firmer it will become. For a softer paneer, press for about 30 minutes. For a firmer paneer, press for an hour or more.
Step 5: Chill and Store
Once the paneer has been pressed to your desired consistency, remove it from the cheesecloth. Rinse the paneer under cold water to stop the cooking process and remove any remaining whey. Wrap the paneer tightly in plastic wrap or store it in an airtight container.
Refrigerate the paneer for at least 30 minutes before using it in your recipes. This will help it firm up even further and make it easier to cut and handle. Homemade paneer can be stored in the refrigerator for up to 3-4 days.
Tips and Tricks for Perfect Paneer:
Use full-fat milk: Full-fat milk yields the richest and creamiest paneer. Avoid using skim milk or low-fat milk, as they won't produce as much paneer.
Don't overboil the milk: Overboiling the milk can result in a tough and rubbery paneer. Keep a close eye on the milk and reduce the heat as soon as it reaches a boil.
Add the acid slowly: Adding the acid too quickly can also result in a tough paneer.
Pour the lemon juice or vinegar slowly and gently, stirring as you pour.
Don't over-squeeze the paneer: While it's important to remove excess whey, over-squeezing the sack can make the paneer dry and crumbly.
Experiment with different acids: You can use lemon juice, vinegar, or a combination of both to curdle the milk. Experiment to find the flavour that you like best. Some people even use citric acid.
Use the whey: Don't throw away the whey!
It's a nutritious liquid that can be used in soups, stews, or even to knead dough for roti or paratha.
Add flavourings: While pressing the paneer, you can add flavourings like chopped herbs, spices, or nuts to create flavored paneer.
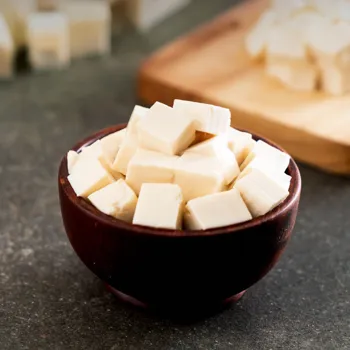
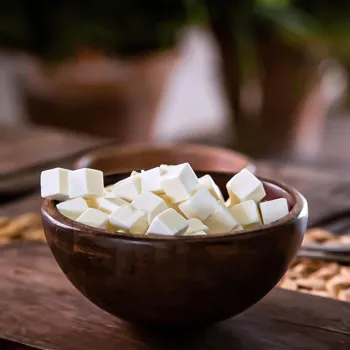
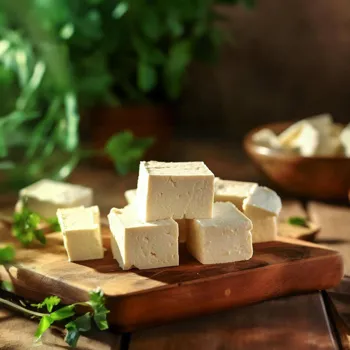
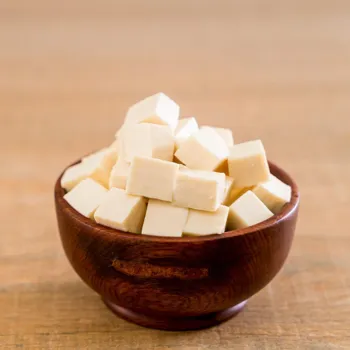
Make paneer cubes: Once the paneer has chilled, you can cut it into cubes and store it in the refrigerator for easy use in your favourite recipes.
Freeze paneer: Homemade paneer can be frozen for longer storage. Wrap the paneer tightly in plastic wrap and then place it in a freezer-safe bag.
Thaw the paneer in the refrigerator overnight before using.
Paneer Recipes to Try:
Now that you've mastered the art of making your own paneer, it's time to put it to use in some delicious recipes! Here are a few ideas to get you started:
Paneer Butter Masala: A classic Indian dish made with paneer in a creamy tomato-based gravy.
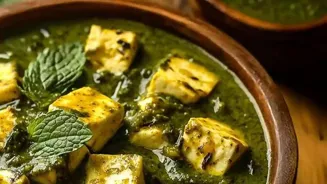
Palak Paneer: Paneer cooked with spinach and spices. A healthy and flavourful vegetarian option.
Paneer Tikka: Marinated paneer cubes grilled to perfection. A popular appetizer or snack.
Paneer Bhurji: Scrambled paneer with onions, tomatoes, and spices. A quick and easy breakfast or lunch option.
Paneer Paratha: Stuffed Indian flatbread with a filling of mashed paneer and spices. A delicious and satisfying meal.
Shahi Paneer: This is a delicious North Indian dish prepared with fresh homemade cheese.
Kadhai Paneer: Kadhai paneer is a popular Indian dish where paneer (Indian cheese) and bell peppers are cooked in a spicy and flavorful gravy.
Chilli Paneer: Chilli paneer is a popular Indo-Chinese dish where cubes of paneer are tossed in a spicy, and tangy sauce.
Matar Paneer: A semi-dry curry that is a combination of peas and paneer simmered in a tomato gravy.
Paneer Kofta: a dish that consists of melt-in-the mouth paneer dumplings simmered in a rich tomato-based gravy.
Making your own paneer at home is a rewarding experience that allows you to enjoy fresh, delicious, and healthy Indian cheese. With just a few simple ingredients and a little patience, you can create paneer that is far superior to anything you can buy in the store.
So, gather your ingredients, put on your apron, and get ready to embark on this cheesy adventure! Your taste buds will thank you for it. Happy paneer making!
AI Generated Content. Glance/InMobi shall have no liability for the content