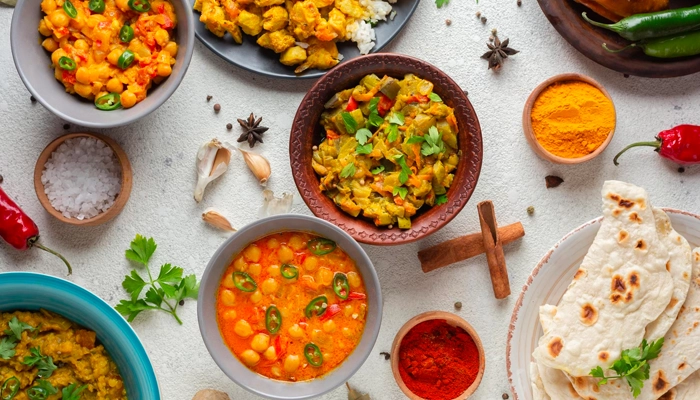
Unlock the secrets of making Traditional Vegetable Biryani at home! Dive into a flavorful journey!
Biryani, the very name conjures up images of fragrant rice, aromatic spices, and a dish that's nothing
short of a culinary masterpiece. While many associate biryani with non-vegetarian options, the vegetarian avatar is equally delightful and packed with flavour.
Making biryani may seem daunting, but with the right guidance and a little patience, you can easily recreate this classic dish in your own kitchen.
This comprehensive guide will walk you through the steps of making a traditional Vegetable Biryani at home, ensuring a delicious and authentic experience. Get ready to impress your family and friends with your biryani-making skills!
Understanding the Essence of Biryani
Before diving into the recipe, it's important to understand what makes biryani so special. Unlike a simple pulao where everything is cooked together, biryani involves layering pre-cooked rice with a flavorful vegetable gravy (or "salan").
This layering technique, followed by slow cooking (dum), allows the flavors to meld together beautifully, creating a symphony of taste and aroma. The key to a good biryani lies in the quality of ingredients and the careful balancing of spices.
Don't be afraid to experiment a little to find the spice levels that suit your palate. And finally, remember that patience is key! The slow cooking process is what makes biryani truly special, so don't rush it.
Gathering Your Ingredients: The Biryani Toolkit
The magic of biryani stems from its ingredients. For this vegetarian version, you'll need:
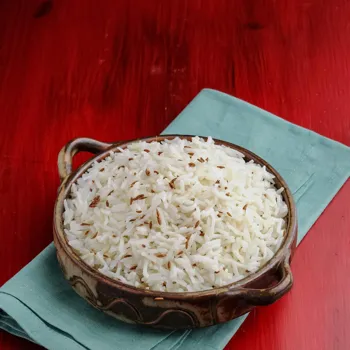
Rice
Basmati rice is the undisputed champion for biryani. Its long grains and delicate aroma make it perfect for this dish. Look for aged Basmati rice for the best results.

Vegetables
A medley of vegetables adds texture and flavour. Consider using potatoes, carrots, cauliflower, green peas, beans, and even some paneer (Indian cheese).
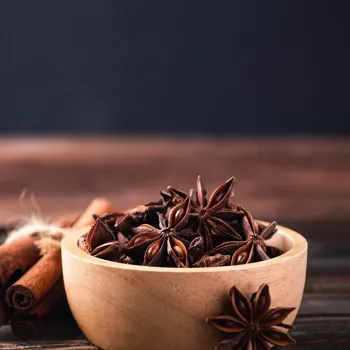
Spices (Whole)
These form the foundation of your biryani's aroma. You'll need bay leaves, cinnamon sticks, cloves, cardamom pods (both green and black), and peppercorns.
Spices (Powdered)
These add depth and complexity to the flavor. You'll need turmeric powder, red chilli powder (adjust to your spice preference), coriander powder, cumin powder, garam masala, and biryani masala (optional, but adds a nice touch).
Aromatics
Ginger-garlic paste, onions, mint leaves, and cilantro (coriander leaves) are essential for building flavour.
Dairy
Yogurt (plain, preferably full-fat) and ghee (clarified butter) add richness and help in marinating the vegetables.
Other Essentials
Saffron strands (for colour and aroma), milk (for soaking saffron), oil (for cooking), salt, and water.
Step-by-Step Recipe: Crafting Your Biryani Masterpiece
Now, let's get cooking! Here's a detailed recipe to guide you through the process:
Step 1: Preparing the Rice
rinse Basmati rice to remove starch for non-sticky texture
Rinse the Basmati rice thoroughly under cold water until the water runs clear. This removes excess starch and prevents the rice from becoming sticky.
Soaking rice for 30 minutes enhances cooking process
Soak the rice in water for at least 30 minutes. This helps the grains expand and cook evenly.
Boil water with spices for flavoring
In a large pot, bring plenty of water to a boil. Add a bay leaf, a cinnamon stick, 2-3 cloves, 2-3 green cardamom pods, and a teaspoon of salt.
Cook rice 70-80% done for dum process
Cook the rice until it's about 70-80% done. The grains should still have a slight bite to them. This is crucial, as the rice will continue to cook during the dum process.
Rice cooling method to prevent sticking
Drain the rice immediately and spread it on a large tray to cool slightly. This prevents it from sticking together.
Sauté sliced onions for rich, caramelized flavor
Add sliced onions and sauté until golden brown. This step is important for developing a rich, caramelized flavour.
Cook ginger-garlic paste until fragrant
Add ginger-garlic paste and sauté for another minute until the raw smell disappears.
Vegetables sautéed for 5-7 minutes
Add the chopped vegetables (potatoes, carrots, cauliflower, beans, peas, etc.) and sauté for 5-7 minutes.
Cook spices until fragrant without burning
Add turmeric powder, red chilli powder, coriander powder, cumin powder, garam masala, and biryani masala (if using). Sauté for another 2-3 minutes until the spices release their aroma. Be careful not to burn the spices.
Cook yogurt for 5-7 minutes until thickened
Add yogurt and mix well. Cook for 5-7 minutes until the yogurt is well incorporated and the gravy thickens slightly.
Simmer veggies in gravy until 80% cooked
Add a cup of water and bring the gravy to a simmer. Cook until the vegetables are about 80% done. They should still have a slight bite to them.
Step 3: Layering and Dum Cooking
This is where the magic happens! “Dum” cooking refers to slow cooking in a sealed container.
Cook vegetable gravy in large pot
In a large, heavy-bottomed pot or Dutch oven, spread a layer of the vegetable gravy.
Enhance rice with saffron-infused milk for color and aroma
Sprinkle some saffron-infused milk (soak a few saffron strands in warm milk for 15-20 minutes) over the rice. This will add a beautiful colour and aroma.
Layer gravy, rice, saffron milk; top with rice
Repeat the layers – gravy, rice, saffron milk – until all the ingredients are used up. The top layer should be rice.
Seal pot tightly for dum cooking process
Cover the pot tightly with a lid. You can seal the lid with dough or use a heavy weight to ensure a tight seal. This is crucial for the dum process.
Use low flame or griddle to prevent burning pot
Place the pot on a low flame (or use a heavy-bottomed griddle or tava underneath the pot to prevent burning).
Cook on dum for 30-45 minutes without lifting lid
Cook on dum for 30-45 minutes. Do not lift the lid during this time. The steam trapped inside the pot will cook the rice and vegetables to perfection.
Rest biryani after cooking to enhance flavors
After 30-45 minutes, turn off the heat and let the biryani rest for another 10-15 minutes before opening the lid. This allows the flavors to settle.
Fluff biryani gently with fork to avoid breaking rice
Gently fluff the biryani with a fork, being careful not to break the rice grains.
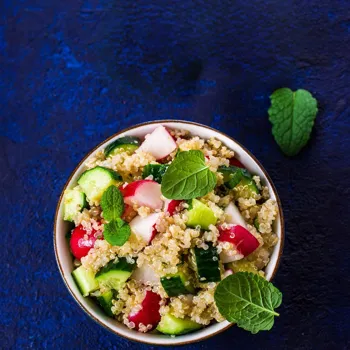
Delicious Indian meal accompaniments
Serve hot with raita (yogurt dip), papad (thin, crispy wafers), and pickle.
Rice Quality Matters: Use good quality, aged Basmati rice for the best results.
Don't Overcook the Rice: The rice should be only 70-80% cooked before layering.
Don't Underestimate the Dum: Dum cooking is essential for the flavors to meld together. Make sure the pot is tightly sealed.
Adjust Spices: Don't be afraid to adjust the spice levels to your preference.
Experiment with Vegetables: Feel free to add or substitute vegetables based on your availability and liking.
Ghee is Key: Ghee adds richness and flavor. Don't skimp on it!
Patience is a Virtue: Biryani requires time and patience. Don't rush the process.
With this comprehensive guide, you're well on your way to mastering the art of making traditional Vegetable Biryani at home. So, gather your ingredients, put on your chef's hat, and get ready to create a culinary experience that will delight your senses.
Enjoy the process, and most importantly, savor the delicious results! Biryani is more than just a dish; it's a celebration of flavors, aromas, and traditions and with a little practice one can master it.
AI Generated Content. Glance/InMobi shall have no liability for the content