
Discover the art of making authentic paneer at home with our step-by-step guide! Elevate your dishes with homemade goodness
Paneer, oh paneer! That soft, milky, and versatile cheese is a staple in Indian
cuisine. From palak paneer to paneer tikka, its melt-in-your-mouth texture and ability to absorb flavours makes it a favourite across generations.
But did you know you can easily make fresh, authentic paneer right in your own kitchen? Yes, you heard it right! No need to rely on store-bought versions, which can sometimes be loaded with preservatives or not quite as fresh.
With just a few simple ingredients and a little bit of patience, you can create your own delicious paneer that will elevate your vegetarian dishes to a whole new level. Get ready to impress your family and friends with your newfound culinary skills!
We'll walk you through a simple step-by-step process, ensuring your success. So, put on your apron, gather your ingredients, and let's get started on this exciting culinary adventure!
Making paneer at home is not only satisfying but also allows you to control the quality of ingredients and customize the texture to your liking. Whether you prefer it soft and crumbly or firm and sliceable, the possibilities are endless.
Plus, homemade paneer has a superior taste compared to the store-bought variety, making it a worthwhile endeavor. Don't be intimidated by the process; it's much simpler than you might think.
With a few basic kitchen tools and some fresh milk, you'll be well on your way to enjoying homemade paneer in your favourite Indian dishes. So, skip the trip to the grocery store and embark on this culinary journey with us. We promise, the end result will be worth your while.
You'll not only gain a new skill but also enjoy the satisfaction of creating something delicious from scratch.
Ingredients You'll Need
To make authentic paneer at home, you only need a few essential ingredients:
Full-fat milk: The key ingredient! Use full-fat milk for the best results. The higher fat content will give you a richer, creamier paneer. Avoid using toned or skimmed milk, as it won't yield the same results. About 1 litre (4 cups) is a good starting point. Acidic agent: This is what will help to curdle the milk and separate the whey from the solids (paneer). You have several options here:
Lemon juice: A classic choice! Freshly squeezed lemon juice is preferred, as it provides the best flavour. You'll need about 2-3 tablespoons.
Vinegar: White vinegar works well. Use about 2 tablespoons.
Yogurt/Curd: Adds a unique tangy flavour. Use about 1/4 cup of plain yogurt.
Optional: A pinch of salt can be added for flavour.
Equipment Needed
Large pot: To boil the milk. Make sure its big because the milk can spill over and make a mess
Cheesecloth or muslin cloth: For straining the paneer. A clean cotton kitchen towel can also work in a pinch.
Colander: To hold the cheesecloth while straining.
Heavy object: To press the paneer and remove excess water. A heavy pan, pot filled with water, or even a few books wrapped in plastic will do the trick.
Thermometer(Optional): It is not necessary but will give you confidence.
Step-by-Step Instructions
Boil the milk: Pour the milk into the large pot and bring it to a boil over medium heat, stirring occasionally to prevent it from sticking to the bottom. Keep a close watch, as milk tends to boil over quickly.
Add the acidic agent: Once the milk comes to a rolling boil, reduce the heat to low and slowly add the lemon juice (or vinegar/yogurt), stirring gently. You'll start to see the milk curdle and separate into solids (paneer) and a yellowish liquid (whey).
If the milk doesn't curdle properly, add a little more lemon juice, a teaspoon at a time, until it does.
Strain the paneer: Line the colander with the cheesecloth or muslin cloth. Carefully pour the curdled milk into the lined colander, allowing the whey to drain out.
Rinse the paneer: Gently rinse the paneer with cold water to remove any residual lemon or vinegar flavour. This also helps to stop the cooking process.
Squeeze out excess water: Gather the edges of the cheesecloth and twist it tightly to squeeze out as much water as possible.
Press the paneer: Place the cheesecloth-wrapped paneer on a flat surface and place a heavy object on top to press it. This will help to firm up the paneer and remove even more water. Press for at least 2-3 hours, or even overnight in the refrigerator, for a firmer paneer.
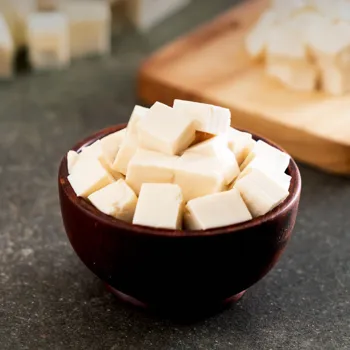
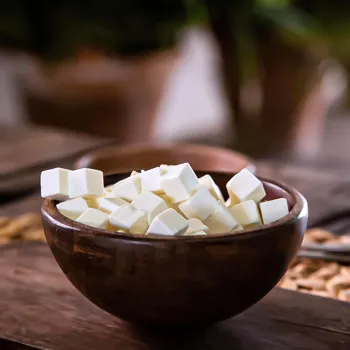
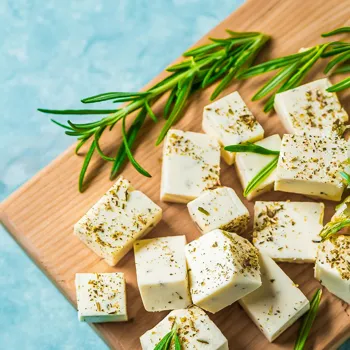
Cut and use: Once pressed, remove the paneer from the cheesecloth and cut it into your desired shapes. Use it immediately in your favourite recipes or store it in the refrigerator for later use. Make sure to keep it submerged in water to prevent it from drying out . It will last for about 3-4 days.
Tips for Perfect Paneer
Use fresh, full-fat milk: This is crucial for achieving the best texture and flavour.
Don't overboil the milk: Overboiling can result in a rubbery paneer.
Add the acidic agent slowly: This allows for a more controlled curdling process.
Don't over-squeeze or over-press the paneer: This can make it dry and crumbly.
Adjust pressing time for desired firmness: Press for a shorter time for softer paneer, and longer for firmer paneer.
If your paneer turns out too hard: Try soaking it in warm water for a few minutes before using it.
This will help to soften it up.
Serving Suggestions
Now that you have your homemade paneer, the culinary possibilities are endless! Here are just a few ideas to get you started:
Palak Paneer: A classic North Indian dish featuring paneer simmered in a creamy spinach gravy.
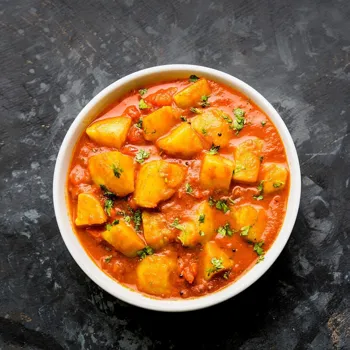
Paneer Tikka Masala: A rich and flavourful curry with marinated and grilled paneer.
Paneer Butter Masala: A creamy and buttery tomato-based curry.
Shahi Paneer: A royal dish with paneer cooked in a rich cashew and cream gravy.
Paneer Bhurji: A scrambled paneer dish, perfect for breakfast or a light meal.
Paneer Paratha: Stuffed flatbread with a spiced paneer filling.
Paneer Tikka: Marinated and grilled paneer skewers, a popular appetizer.
Paneer Sandwich: Use it as a filling to make a healthy and delicious sandwich.
Making paneer at home is a simple and rewarding experience that allows you to enjoy fresh, authentic Indian cheese in your favourite dishes. With a little practice, you'll be able to create perfect paneer every time. So, go ahead and give it a try!
Your family and friends will be impressed by your culinary skills, and you'll enjoy the satisfaction of creating something delicious from scratch. Happy cooking! Remember to experiment with different acidic agents and pressing times to.
AI Generated Content. Glance/InMobi shall have no liability for the content