Discover the secrets to perfect samosas - crispy pastry, flavorful fillings, and golden-brown goodness! Read on for expert tips!
Samosas, the quintessential Indian snack, are a beloved treat enjoyed across
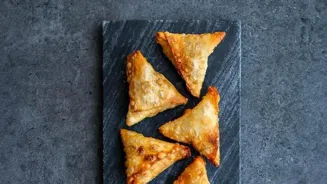
the country and beyond. These crispy, golden-brown pockets of savory goodness are perfect for tea time, parties, or just a quick snack.
While readily available at street corners and sweet shops, the joy of making samosas at home is unmatched.
The aroma filling your kitchen, the satisfaction of creating something delicious from scratch, and the ability to customize the filling to your liking – it's an experience every foodie should try. But let's be honest, achieving samosa perfection can be a bit tricky.
The pastry needs to be flaky and crisp, the filling flavorful and well-cooked, and the entire process needs to be executed with care. Fear not, aspiring samosa chefs!
This guide will walk you through the secrets of making perfect samosas, from creating the ideal dough to crafting a delicious filling, and finally, achieving that golden-brown crispness we all crave. Get ready to impress your family and friends with samosas that are truly restaurant-quality!
With the right techniques and a little practice, you'll be a samosa pro in no time. So, gather your ingredients, put on your favorite music, and let's embark on this delicious journey together.
The key to great samosas: perfect pastry with right ingredients and techniques
The foundation of any great samosa is, of course, the pastry. A perfectly crisp and flaky crust is what separates a good samosa from a truly exceptional one. The key lies in using the right ingredients and techniques.
For the dough, you'll need all-purpose flour (maida), a pinch of salt, some oil or ghee (clarified butter), and water. The proportion of fat to flour is crucial. Too little fat, and the samosas will be hard and dry. Too much, and they'll be greasy.
Aim for a ratio of about 1/4 cup of oil or ghee for every 2 cups of flour. The type of fat you use also matters. Ghee adds a rich, nutty flavor, while oil results in a lighter, crisper pastry. Many North Indian cooks swear by ghee, while many South Indian cooks stand by the normal oil.
Some even add a little bit of ajwain or carom seeds to the flour for a slight digestive effect on the stomach. Once these are added, slowly add water until a tight dough forms. Once the dough is ready, cover and let it rest.
This is a very important step as it activates the gluten, which helps in rolling of dough. After the appropriate rest, the dough is ready to be broken into balls and made into perfectly crisp samosas. Practice is always vital to getting the perfect golden-brown samosas that you wish for.
Get creative with samosa fillings using potatoes, peas, paneer, lentils, or soya for variety
Now, let's talk filling! The filling is where you can really get creative and customize your samosas to your liking. The classic potato and pea filling is a crowd-pleaser, but there are endless possibilities.
You can add paneer (Indian cheese), cauliflower, lentils, or even minced soya granules for a protein-rich option. Regardless of the ingredients you choose, the key is to cook them properly and season them well.
For the classic potato and pea filling, start by boiling or pressure-cooking potatoes until they're soft but not mushy. Peel and crumble them coarsely. In a pan, heat some oil and add cumin seeds, ginger, and green chilies.
Sauté for a minute, then add the potatoes, boiled peas, turmeric powder, coriander powder, chili powder, garam masala, and salt to taste. Mix well and cook for a few minutes, until the spices are fragrant and the filling is heated through. Remember to taste and adjust the seasoning as needed.
A squeeze of lemon juice or a sprinkle of amchur powder (dried mango powder) can add a delightful tang to the filling. Be sure to cool the filling completely before stuffing the samosas. This will prevent the pastry from becoming soggy.
Do not make the filling too soggy as that will create problems while folding samosas. The filling, at most, should be dry.
Learn how to fold samosas in triangle shape with ease
Folding samosas can seem intimidating at first, but with a little practice, you'll get the hang of it. There are several different folding styles, but the most common is the triangle shape. To begin, divide the dough into equal-sized balls. Roll each ball into a thin, oval shape.
Cut the oval in half with a knife. Take one half and moisten the straight edge with a little water. Fold one corner over to meet the opposite edge, forming a cone shape. Press the edges firmly to seal them. Now, hold the cone in your hand and fill it with a spoonful or two of the cooled filling.
Be careful not to overfill, as this can cause the samosas to burst during frying. Moisten the remaining open edge of the cone and press it firmly to seal. Make sure there are no gaps or cracks in the seal, as this will allow oil to seep in during frying.
Repeat the process with the remaining dough and filling. As you fold the samosas, place them on a plate or tray lined with parchment paper to prevent them from sticking. If you find the dough is drying out too quickly, cover it with a damp cloth.
Once all the samosas are folded, they're ready to be fried. There are many YouTube videos to learn the triangular formation, you can take help from there.
Fry samosas in ideal oil temp for crispy perfection
Frying samosas to golden-brown perfection requires patience and attention to detail. The ideal oil temperature is crucial. If the oil is too hot, the samosas will brown too quickly on the outside while remaining uncooked on the inside.
If the oil is not hot enough, the samosas will absorb excess oil and become soggy. Aim for a medium heat, around 325-350°F (160-175°C). You can test the oil temperature by dropping a small piece of dough into the oil. If it sizzles gently and turns golden brown in a few minutes, the oil is ready.
Carefully add the samosas to the hot oil, making sure not to overcrowd the pan. Fry them in batches, turning them occasionally, until they are golden brown and crispy on all sides. This should take about 8-10 minutes per batch.
Remove the fried samosas from the oil with a slotted spoon and place them on a wire rack to drain excess oil. Do not place them on paper towels, as this will make them soggy. Allow the samosas to cool slightly before serving.
This will allow the filling to set and the pastry to crisp up even further. You can also re-fry the samosas for extra crispness, if desired.
Serving homemade samosas with various chutneys is a delightful culinary experience
Serving your freshly made samosas is the final step in this culinary journey. Samosas are delicious on their own, but they're even better when served with a variety of chutneys and sauces. Mint chutney, tamarind chutney, and sweet yogurt are classic accompaniments.
You can also serve them with a spicy green chili sauce or a tangy tomato ketchup. For a more elaborate presentation, arrange the samosas on a platter and garnish them with fresh coriander leaves and a sprinkle of chaat masala.
Samosas are best enjoyed warm, but they can also be served at room temperature. They are a perfect appetizer, snack, or even a light meal. Whether you're hosting a party or simply craving a taste of India, homemade samosas are sure to be a hit.
Don't be afraid to experiment with different fillings and flavors to create your own signature samosa recipe. And most importantly, have fun in the kitchen! Making samosas is a labor of love, but the reward is well worth the effort.
Enjoy your creations with family and friends, and savor the taste of homemade goodness. You can also try making a small batch, keep in the freezer and fry when desired.
Learn to make perfect samosas at home, practice and enjoy the process!
So, there you have it – a comprehensive guide to making perfect samosas at home. From creating the ideal dough to crafting a delicious filling and achieving that golden-brown crispness, you now have the knowledge and skills to impress your friends and family with these iconic Indian snacks.
Remember that practice makes perfect, so don't be discouraged if your first batch isn't quite up to par. Keep experimenting, keep learning, and most importantly, keep enjoying the process. With a little patience and dedication, you'll be a samosa pro in no time.
And who knows, you might even invent your own unique samosa recipe that becomes a family favorite. Happy cooking and enjoy your delicious, homemade samosas! Remember, the best samosas are those made with love and care. So, gather your ingredients, put on your favorite music, and let's get cooking!
A great tip for beginner cooks is to measure out all your ingredients and put them in the right spot. This leads to less mess and can also help to get an idea of what to do! Remember not to fill them with too much masala as filling too much will cause them to break!
Enjoy this delicious and healthy snack!
AI Generated Content. Glance/InMobi shall have no liability for the content