Learn how to make your own paneer at home! Create fresh, delicious cheese with this easy step-by-step guide
Craving some fresh, melt-in-your-mouth paneer but don't want to shell out extra rupees at the
grocery store? Well, fret not, because making your own paneer at home is surprisingly easy and satisfying! Plus, you have complete control over the quality and freshness of the ingredients.
Say goodbye to rubbery store-bought paneer and hello to soft, delicious homemade goodness. In this guide, we'll walk you through a simple, step-by-step process to create perfect paneer in your own kitchen. Get ready to impress your family and friends with your newfound culinary skills!
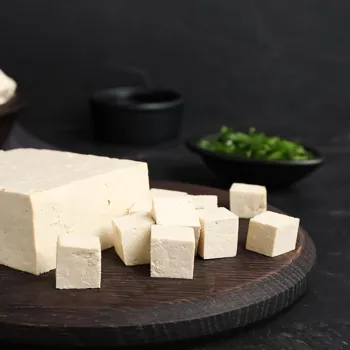
So, what is paneer, exactly? It's a fresh, non-aged cheese common in South Asian cuisine. Unlike many cheeses that require rennet or aging, paneer is made by simply curdling milk with an acidic ingredient. This process separates the milk solids (the paneer) from the whey (the watery liquid).
What you're left with is a block of cheese that's incredibly versatile. You can cube it for curries like palak paneer or matar paneer, crumble it into bhurji, or even grill it for a smoky flavour. The possibilities are endless!
One of the best things about homemade paneer is that you can adjust its texture to your liking. Want it softer? Use less pressure when pressing. Prefer a firmer paneer for grilling? Press it for a longer period.
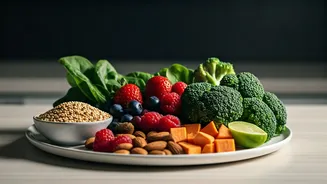
The secret to great paneer lies in the quality of the milk.
Opt for full-cream milk for the richest, creamiest paneer. Avoid using ultra-pasteurized milk, as it may not curdle properly. You'll also need an acidic ingredient to curdle the milk.
Lemon juice is a popular choice, but you can also use white vinegar or even curd (yogurt) whey from a previous batch of paneer. A muslin cloth, also known as cheesecloth to drain the whey from the milk solids. A heavy object like a pot filled with water.
A large, heavy-bottomed pot is ideal for heating the milk evenly. Finally, all you need is a sieve to strain the curdled milk. Now that you know what exactly is Paneer, lets dive into the recipe. The most important is full cream milk so that you will get the most amount of Paneer.
Heat milk, add acid, separate curds from whey, strain
Starting off, pour the milk into a large, heavy-bottomed pot over medium heat. Keep a close watch and stir occasionally to prevent scorching at the bottom. Let the milk heat up gradually until it comes to a rolling boil. You'll notice it start to foam up and rise in the pot.
This is when you need to be extra careful as it can easily boil over! Once the milk has reached a rolling boil, reduce the heat to low. Now, it's time to add your chosen acidic ingredient. If you're using lemon juice, start with 2-3 tablespoons. For vinegar, use a similar amount.
Pour the lemon juice or vinegar into the milk while gently stirring. You'll immediately start to see the milk solids separating from the whey. Continue stirring gently until the whey is clear and the curds have completely separated. This may take a few minutes.
The whey should have a greenish-yellow tint. Ensuring the milk has actually curdled. Next, take the muslin cloth that you have and wrap into a sieve or colander, setting it over a large bowl. Carefully pour the curdled milk into the muslin cloth-lined sieve.
The whey will drain into the bowl, leaving the paneer solids in the cloth.
Tie muslin cloth to drain paneer, then press for firmness
Gather the edges of the muslin cloth and tie them together to form a bundle. Gently squeeze the bundle to remove any excess whey from the paneer. The more whey you remove, the firmer the paneer will be.
Next, hang the bundle over a sink or bowl for about 30 minutes to allow the remaining whey to drain. This step is essential for removing excess moisture and achieving the desired texture. For softer paneer, you will want to squeeze it for a lesser time.
If you don’t have anything to hank the bundle from. then you can move on to the next step which is to press the paneer. After the paneer has drained for 30 minutes, carefully untie the muslin cloth bundle. Now, you'll need to press the paneer to give it its characteristic block shape.
Place the paneer block in the muslin cloth on a flat surface, and fold the cloth around it neatly. Place a heavy object on top of the paneer block. A pot filled with water, a stack of books, or even a heavy pan will do the trick.
Press the paneer for at least 2-3 hours, or even overnight in the refrigerator for a firmer texture. The longer your process, the more the paneer firms up.
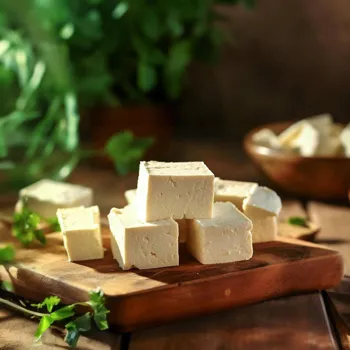
Make homemade paneer, cut or crumble, store in water for freshness
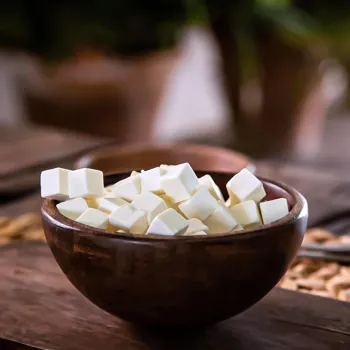
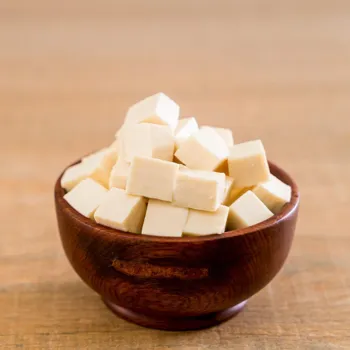
After pressing, carefully remove the heavy object and unwrap the muslin cloth. You'll have a firm block of homemade paneer! Now, you can cut it into cubes or crumble it as needed for your favorite recipes.

If you're not using the paneer immediately, store it in an airtight container in the refrigerator. For longer storage, you can submerge the paneer in water in the container. Change the water daily to keep the paneer fresh for up to a week.
Now that you have cooked up the Paneer at hand, it is time to unleash its flavour. From all types of subzis. to using it with rice and even with roti. The most important task is to ensure that you keep the water inside the Container and keep stored at a cool temperature such as the refrigerator.
Not only will it keep it fresh- it will also ensure that the moisture is intact. The options are truly limitless. But lets talk a little bit about storing the Paneer. Storing it properly. As some may not know where to store it.
Using acidic ingredient, avoiding overheating, and choosing ingredients wisely for perfect paneer
The most common mistake people make is not using enough acidic ingredient to curdle the milk effectively. If the milk doesn't curdle properly, add a bit more lemon juice or vinegar, one teaspoon at a time, until you see clear separation of curds and whey.
Overheating the milk can also lead to a burnt flavour. Keep a close eye on the milk while it's heating and stir regularly to prevent scorching. Also, Avoid ultra-pasteurized milk.
As mentioned earlier, ultra-pasteurized milk may not curdle properly because of the proteins being affected in the process. So, getting this milk may be difficult. Lastly, using old lemon juice or vinegar. For optimum taste and flavour. Only use that product which isn't kept outside too long.
In addition to this, also ensure that when straining with the cloth, to not strain too much or else the paneer may be too dry. There has to be a good balance of water being drained and for paneer to stay juicy.
There are different types of paneer which people have and each type is according to preference.
Homemade paneer: versatile in Indian cuisine, from curries to desserts
Homemade paneer is incredibly versatile and can be used in a wide range of Indian dishes. It's a staple ingredient in vegetarian curries like palak paneer (spinach and paneer), matar paneer (peas and paneer), and shahi paneer (paneer in a rich tomato-based gravy).
You can also crumble it and use it in paneer bhurji (scrambled paneer) or add it to vegetable cutlets and tikkas. Grilled paneer is another delicious option. Marinate paneer cubes in spices and yogurt, then grill or pan-fry them until golden brown and slightly charred.
They're perfect as an appetizer or as part of a vegetarian kebab platter. Paneer can also be used in desserts. Paneer kheer (paneer pudding) and rasmalai (paneer dumplings in sweetened milk) are popular choices for Indian sweets.
As mentioned before, we can make rice mixed with paneer and this is an easier dish to make!. The most important part in making the dish is to get the spices right so that there is plenty of flavour.
Make paneer at home for fresh, high-quality cheese without preservatives
Making paneer at home is a rewarding experience that allows you to enjoy fresh, high-quality cheese without the added preservatives and cost of store-bought options.
With just a few simple ingredients and a little patience, you can create delicious paneer that's perfect for all your favorite Indian dishes. Plus, it's a great way to impress your friends and family with your culinary skills!
So, ditch the store-bought paneer and try making your own at home following our step-by-step guide. You'll be amazed at how easy and satisfying it is. Get ready to enjoy the taste of homemade goodness in every bite! You can experiment with different additions to make flavoured paneer.
Adding herbs, spices, or even chopped vegetables to the milk while it's curdling can create unique flavour combinations. Imagine a paneer infused with cilantro and green chilies, or one with roasted cumin and coriander. Lastly, ensure when storing the paneer, its sealed properly.