Unleash the secrets to perfect Indian flatbreads! Elevate your cooking skills with 8 essential techniques. Dive in for culinary mastery!
Namaste, food lovers! Are you craving the soft, fluffy, and utterly
satisfying world of Indian flatbreads? From the humble roti to the celebratory naan, these breads are a staple in Indian households, and for good reason.
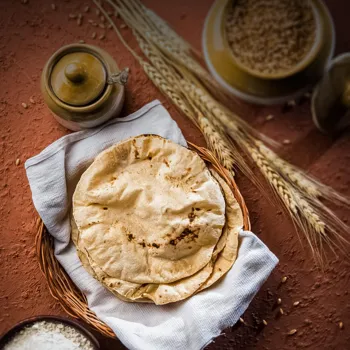
They're versatile, delicious, and the perfect accompaniment to any curry or dal. But let's be honest, making the perfect flatbread can seem daunting at first. Don't worry, we are here to make it easy for you.
This article is your ultimate guide to mastering the art of Indian flatbreads.
We'll unveil eight essential techniques that will transform you from a flatbread novice to a pro, ensuring every roti, paratha, or naan you make is a culinary masterpiece. So, roll up your sleeves, gather your ingredients, and let's embark on this delicious journey together!
We will dive into the nitty-gritty of dough preparation, rolling techniques, and cooking methods, packed with tips and tricks. Trust us, after reading this, you'll be serving up perfect flatbreads that will have everyone asking for more.
Whether you're a seasoned cook or just starting, our tips for flatbreads are here to elevate your cooking. Let's get started and discover some amazing cooking methods and techniques that will help you become an expert at making flatbreads.
The Right Flour is Key
Think of flour as the foundation of your flatbread empire. The type you choose significantly impacts the texture and flavour. For rotis, whole wheat flour (atta) is the traditional choice, lending a slightly nutty flavour and wholesome goodness.
All-purpose flour (maida) is often used for naan and some types of paratha, resulting in a softer, more pliable dough. Experimenting with different flours can also create new flavors. Try using a mix of flours. Adding gram flour (besan) will add a delicious flavor.
You can also mix ragi flour to get a healthy flatbread. Always check the flour quality before using. The freshness and quality of the flour can impact the flavor and how they rise. It's also a very interesting way to give your everyday cooking a different twist for your enjoyment.
Kneading the Dough
Patience is Virtue: Kneading the dough is where the magic happens. It develops the gluten, which is essential for creating a soft and elastic texture. Whether you’re making roti, paratha, or naan, the kneading process is crucial. You must add water in small amounts while kneading the flour.
The dough should not be too hard or too soft. A well-kneaded dough should be elastic and spring back slightly when pressed. This patience ensures a truly delicious base for any dish. To achieve the best results, knead the dough for at least 10-15 minutes.
Use warm water for the dough, it helps with the gluten development. Over-kneading, however, can lead to tough bread. The texture changes with perfect kneading, and then you can be sure of the taste.
The Resting Period
A Moment of Relaxation: After all that kneading, the dough needs a well-deserved rest. Cover the dough with a damp cloth or a lid and let it sit for at least 30 minutes. This resting period allows the gluten to relax, making the dough more pliable and easier to roll out.
For naan, a longer resting period (even overnight in the refrigerator) can enhance the flavour and texture. The resting is very important, so make sure you always let the dough rest. By letting the dough sit, it allows the gluten to relax, and this also makes the dough softer and more elastic.
It also improves the texture of the flatbreads. Try and let the dough rest at room temperature instead of a cold place.
Rolling it Right
Even Thickness Matters: Achieving an even thickness while rolling is crucial for uniform cooking. Uneven thickness can result in some parts of the bread being burnt while others remain undercooked. Use a rolling pin (belan) and a lightly dusted surface to prevent sticking.
Gentle, even pressure is key. Rotate the dough regularly while rolling to maintain a circular shape. A little practice makes perfect. If the dough appears to elastic, let it rest for 5 more minutes.
Experiment with different rolling techniques to find what works best for you, and remember, the goal is to achieve a consistent thickness throughout the bread. Rolling gently will make the dough elastic.
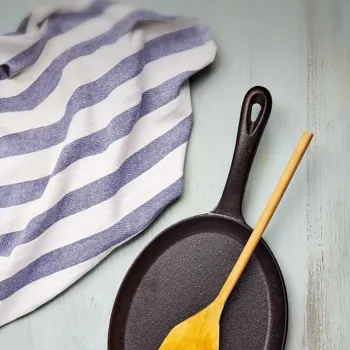
Cooking on a Hot Tawa
The Secret to Puffing: The tawa (a flat griddle) is your best friend when it comes to cooking Indian flatbreads. Heat the tawa over medium-high heat until it's hot enough. Place the rolled-out bread on the hot tawa and cook for about 30 seconds on each side, or until small bubbles start to appear.
For rotis, the real magic happens when you puff them up over an open flame. This creates those signature air pockets, resulting in a light and fluffy roti. Mastering the art of cooking on the tawa and achieving that perfect puff is a badge of honour for any Indian cook.
The heat should be evenly distributed for the best heat. This is important to get the taste right.
Ghee or Butter
A Touch of Luxury: A touch of ghee (clarified butter) or butter elevates the flavour and adds a rich, golden sheen to your flatbreads. Brush the cooked roti or paratha with ghee or butter immediately after removing it from the tawa.
This not only enhances the taste but also keeps the bread soft and pliable. For parathas, ghee is often incorporated into the dough and used generously during cooking, resulting in a flaky and decadent treat. However, it is completely optional, and you may not need it.
You can always choose to use oil if you are health conscious. Make sure you do not add too much of the ghee. Adding this is optional but is a wonderful way to elevate the cooking experience.
Be Mindful of Temperature
Heat plays a huge role in making flatbreads. If the burner is too hot, the flatbread will burn. If the burner is too low, the flatbread will be hard. Finding the optimal temperature takes practice, but pays off in quality and skill.
Creative Flavoring Options: Do not be afraid to experiment with flatbreads! You can change flavors and play around with what you like. Have fun and be inventive.
With these techniques in your arsenal, you're well on your way to becoming a flatbread maestro. So, go ahead, experiment with different recipes, and create your own signature flatbreads that will impress your family and friends. Happy cooking!
AI Generated Content. Glance/InMobi shall have no liability for the content