Discover the secrets to perfect poppadoms! From choosing the right kind to spicing them up, learn 7 tips for crispy snacks
Hello food lovers! Craving that perfect, crispy poppadom to go with your dal chawal
or maybe just as a snack? Making poppadoms at home might seem tricky, but with these seven easy tips, you'll be a poppadom pro in no time.

Forget the store-bought ones, get ready to enjoy the fresh, authentic taste of homemade poppadoms! Let's dive into the secrets of achieving that delightful crunch.
Choosing the Right Kind of Poppadom
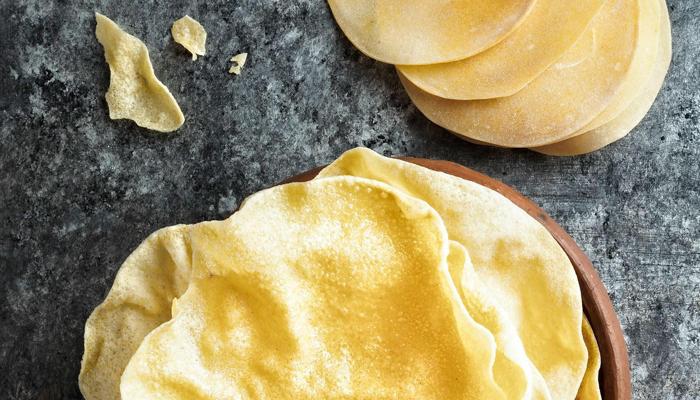
First things first, understanding the different types of poppadoms is key. You'll usually find them made from urad dal (black gram), chana dal (split chickpeas), or a mix of lentils. Urad dal poppadoms are known for their rich flavor and slightly thicker texture.
Chana dal poppadoms are lighter and crispier. Experiment with both to see which one you prefer, or even try a mix for a balanced flavor. The thickness of the poppadom also matters. Thinner ones tend to cook faster and become extra crispy, but be careful they don't burn easily.
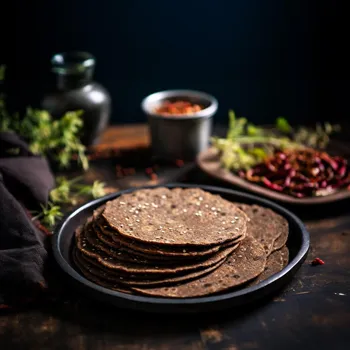
Thicker ones take a bit longer but can handle more spices. Don't hesitate to explore regional varieties too! Different regions in India have their unique takes on poppadoms, with variations in spice blends and lentil combinations.
Try papads from Rajasthan or appalam from south India to discover new flavors and textures. Read the labels carefully when buying pre-made poppadoms, and look for options with minimal additives and preservatives.
Freshly made poppadoms always taste better, especially when you know exactly what ingredients are going in. Choose wisely and get ready for a poppadom adventure!
The Sun-Drying Secret
Sun-drying is an age-old technique that gives poppadoms that unbeatable crispiness. If you're making poppadoms from scratch, this step is absolutely crucial. After rolling out the dough, spread the poppadoms on a clean cloth or tray and let them bask in the sun for a few hours.
The sun's heat evaporates the moisture, preventing them from becoming soggy when fried or roasted. Even if you're using store-bought poppadoms, a little sun-drying can work wonders. Just lay them out for an hour or two before cooking to remove any residual moisture.
Remember to protect them from dust and insects while they're drying. You can cover them with a fine mesh cloth. The best time for sun-drying is during the hottest part of the day. This ensures quick and even drying.
If you don't have access to direct sunlight, you can use a dehydrator at a low temperature. This method might take a bit longer, but it's a great alternative. Sun-drying not only enhances the crispiness but also improves the flavor of the poppadoms. It's a simple step that makes a big difference.
Oil Temperature is Key
When frying poppadoms, the oil temperature is the most important aspect to remember. The oil needs to be hot enough to cook the poppadoms quickly, but not so hot that they burn. A good way to test the oil is to drop a small piece of poppadom into the oil.
If it sizzles and rises to the surface immediately, the oil is ready. If it sinks or doesn't sizzle, the oil isn't hot enough. If it browns too quickly, the oil is too hot. Maintain a consistent oil temperature throughout the frying process.
Use a kitchen thermometer to monitor the temperature if you want to be extra precise. Aim for around 350-375°F (175-190°C). Don't overcrowd the pan. Fry only one or two poppadoms at a time to prevent the oil temperature from dropping. This will also ensure that each poppadom cooks evenly.
Use a slotted spoon to gently press the poppadom down into the oil. This helps it to cook evenly and prevents it from curling up. Cooking it perfectly is important for a perfect papad.
The Roasting Method
If you're trying to avoid too much oil, roasting is a fantastic alternative. Roasting poppadoms gives them a slightly different flavor and texture but still delivers that satisfying crunch. There are a couple of ways to roast them: directly over an open flame or in the oven.
For the open flame method, use tongs to hold the poppadom over the flame, turning it frequently until it's evenly cooked and slightly charred. Be careful not to burn it! This method requires a bit of practice, but it's quick and gives the poppadom a smoky flavor.
For oven roasting, preheat your oven to around 350°F (175°C). Place the poppadoms on a baking sheet and bake for a few minutes on each side, until they're crisp and golden brown. Keep a close eye on them, as they can burn easily. You can also roast poppadoms in a microwave.
Place them on a microwave-safe plate and microwave for a few seconds at a time, until they're cooked. Be careful not to overcook them, as they can become hard and brittle. Roasting is a healthier option to use less oil.
Spice it Up Right
Spices are what give poppadoms their unique flavors. You can experiment with different spice blends to create your own signature poppadom. Common spices include cumin, coriander, black pepper, red chili powder, and asafoetida (hing).
If you're making poppadoms from scratch, incorporate the spices into the dough before rolling them out. For store-bought poppadoms, you can sprinkle spices on them before frying or roasting. Just be careful not to add too much, as it can burn easily.
You can also make a spiced oil by heating some oil with your favorite spices and then brushing it onto the poppadoms before cooking. This will infuse them with flavor and help them to crisp up. Consider adding some fresh herbs like cilantro or mint to your poppadoms for a refreshing twist.
Ground cumin can add a smoky quality and the right blend is important. Adjust the amount of spice to your personal preference. Start with a small amount and then add more to taste. Don't be afraid to get creative and experiment with different spice combinations.
You might discover your new favorite poppadom flavor.
Storage is Important
Proper storage is crucial for keeping your cooked poppadoms crispy and fresh. Once they're cooled, store them in an airtight container. This will prevent them from absorbing moisture and becoming soggy. A metal tin or a sealed plastic container works well.
You can also add a layer of paper towels to the bottom of the container to absorb any excess moisture. Avoid storing poppadoms in the refrigerator, as the humidity can make them lose their crispness.
If you live in a humid climate, consider adding a desiccant packet to the container to absorb moisture. These packets are often found in food packaging and can help to keep your poppadoms crispy for longer.
If your poppadoms do become slightly soft, you can revive them by briefly roasting them in the oven or microwave. Just be careful not to overcook them. Store poppadoms away from strong odors, as they can absorb flavors from other foods.
With the right storage, poppadoms can be enjoyed for days and should keep fresh. So, there you have it! With these seven simple tips, you're well on your way to making perfect, crispy poppadoms at home. Enjoy your snacking!
AI Generated Content. Glance/InMobi shall have no liability for the content