Unlock the secrets of perfect roti making at home! Dive into the science behind soft, fluffy rotis. Read on for expert tips
For many Indian families, the roti is more than just a staple food; it's a symbol
of home, comfort, and tradition. But achieving that elusive "perfect" roti – soft, fluffy, and perfectly round – can feel like an art form reserved for experienced cooks. Fear not!
The secret lies not just in years of practice, but also in understanding the science behind this humble bread. This article breaks down the key elements, offering insights and tips to help you master the art of roti-making in your own kitchen.
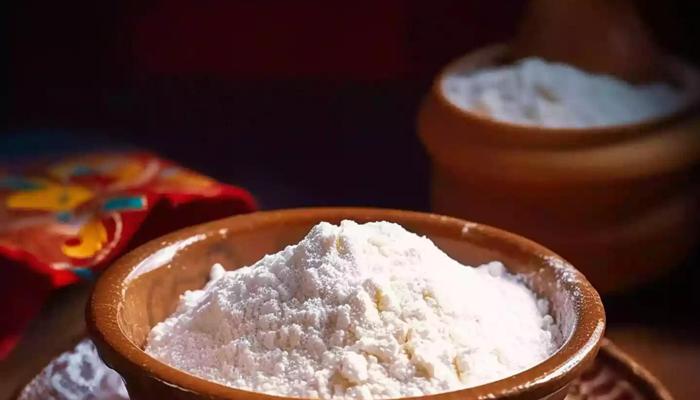
Choose quality atta for perfect roti; freshness and gluten matter
The type of atta you use is the first crucial step. Whole wheat flour is the most common choice, but the quality of the wheat matters. Look for atta that is fresh and finely ground. Some prefer to grind their own wheat at home for the freshest possible flour.
This affects the gluten development, gluten is everything in the flour. Store atta in an airtight container in a cool, dry place to maintain its freshness and prevent it from becoming rancid. Experimenting with different brands of atta can also yield surprising results.
The quality and consistency of the flour are the foundation on which you build your perfect roti. So next time you are venturing outside, check which flour is better to obtain perfect results.
Kneading is key for elastic, chewy roti dough
The kneading process is where the real magic begins. This is not merely combining flour and water; it's about developing the gluten, the protein that gives roti its elasticity and chewiness. Start by adding water gradually to the flour, mixing with your fingers until it forms a shaggy dough.
Then, knead the dough for at least 10-15 minutes. The kneading action aligns the gluten strands, creating a smooth and pliable dough. If the dough is too dry, add a little more water, a teaspoon at a time. If it's too sticky, add a little more flour.
The perfect dough should be soft, slightly sticky, and easy to handle. A well-kneaded dough is essential for soft and pliable rotis that puff up nicely when cooked. This kneading step allows the gluten to develop.
Resting dough improves texture by relaxing gluten for softer rotis
Resting the dough is just as important as the kneading. During this time, the gluten relaxes, making the dough easier to roll and the resulting rotis more tender. Cover the kneaded dough with a damp cloth or plastic wrap and let it rest for at least 30 minutes, or even longer.
The longer the dough rests, the better the gluten relaxation will be. This gives the flour granules time to fully absorb the water. This step is often overlooked but truly contributes to a softer mouthfeel in the final product. This will make your rotis simply the best.
Resting will make the biggest change in the texture.
Rolling out perfect roti requires practice for uniform thickness
Rolling out the perfect roti is as important. Divide the dough into equal-sized balls. On a lightly floured surface, roll out each ball into a thin, even circle and maintaining a constant rotation is difficult. Using a rolling pin, apply even pressure to ensure a uniform thickness.
The key is to avoid making the roti too thin, which can result in a crispy, hard roti, or too thick, which can lead to a doughy roti. Practice makes perfect! Don't be discouraged if your first few rotis aren't perfectly round.
With each attempt, you'll improve your technique and learn to feel the dough. A light touch and even pressure are your best friends when rolling out rotis. Ensure to not stick.
Cook roti on tawa, puff over flame for lightness
Cooking the roti on the tawa is the final act. Heat a tawa (griddle) over medium-high heat. Place the rolled-out roti on the hot tawa and cook for about 30-45 seconds on each side, or until small bubbles start to appear. Flip the roti and cook for another 30 seconds.
Finally, remove the roti from the tawa and place it directly over an open flame for a few seconds on each side. This will cause the roti to puff up dramatically. Be careful not to burn it. The puffing is due to the steam trapped inside the roti, which expands when heated.
This step gives the roti its signature lightness and fluffiness. Keep the heat constant for best results.
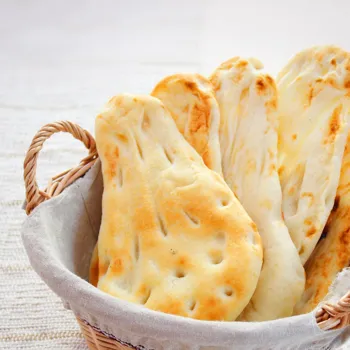
Properly puff roti with ghee for softness and flavor; stack to keep warm
Lastly, once the roti is puffed up, immediately apply ghee or butter to the top surface. This adds flavor and keeps the roti soft. Stack the cooked rotis in a roti basket or a covered container to keep them warm and prevent them from drying out.
The steam trapped within the stack will also help to keep them soft. Enjoy your freshly made, perfectly puffed rotis with your favorite sabzi or daal. With a little practice and attention to detail, you'll be able to consistently make rotis that are the envy of all your friends and family.
So go ahead, embrace the science of bread, and embark on your journey to roti perfection!
AI Generated Content. Glance/InMobi shall have no liability for the content