Discover the simplicity and satisfaction of making fresh paneer at home. Unveil the secrets of creating this versatile cheese
Paneer, that creamy, milky, and delightfully versatile cheese, is a staple in
most Indian kitchens. From palak paneer to paneer tikka, it’s the star of countless vegetarian dishes. But did you know that making paneer at home is incredibly easy?
Forget buying it from the store, often laden with preservatives. This article will give you a simple, step-by-step recipe to create the freshest, most delicious paneer right in your own kitchen. You'll be surprised at how satisfying it is to make your own paneer, and the taste is simply unmatched.
So, put on your apron, gather your ingredients, and get ready to become a paneer-making expert! Let's embark on this exciting culinary adventure together and unlock the secrets of homemade paneer.
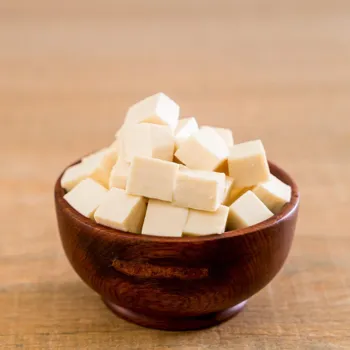
The beauty of making paneer at home lies in its simplicity.
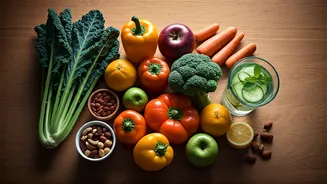
You only need two ingredients: milk and a souring agent, like lemon juice or vinegar. Full-fat milk works best, giving you the richest and creamiest paneer. Avoid using ultra-pasteurized milk, as it may not curdle properly.
The souring agent helps separate the milk solids from the whey, which is how paneer is formed. The process involves heating the milk, adding the souring agent, straining the curds, and then pressing them to remove excess water. It’s a straightforward process that even a beginner cook can master.
Once you get the hang of it, you can experiment with different souring agents to find your preferred taste.
Ingredients and Equipment You'll Need:
1 litre full-fat milk (avoid ultra-pasteurized)
2-3 tablespoons lemon juice or white vinegar
A large pot
A muslin cloth or cheesecloth
A colander
A heavy object for pressing (like a stack of books or a heavy pan)
Step-by-Step Recipe:
Boil the Milk: Pour the milk into a large pot and bring it to a rolling boil over medium heat. Keep a close watch, as milk can easily boil over. Stir occasionally to prevent the milk from sticking to the bottom of the pot.

Add the Souring Agent
Once the milk has reached a rolling boil, reduce the heat to low. Gradually add the lemon juice or vinegar, one tablespoon at a time, stirring gently after each addition. You'll notice the milk starting to curdle, separating into solids (curds) and a yellowish liquid (whey).
If the milk doesn't curdle after adding two tablespoons, add the remaining tablespoon.
Separate the Curds and Whey
Turn off the heat. Line a colander with a muslin cloth or cheesecloth. Carefully pour the curdled milk into the lined colander. The muslin cloth will catch the curds, while the whey will drain through.

Rinse the Curds: Gather the edges of the muslin cloth and gently rinse the curds with cold water. This step helps remove the sour taste of the lemon juice or vinegar. Rinse thoroughly until the water runs clear.
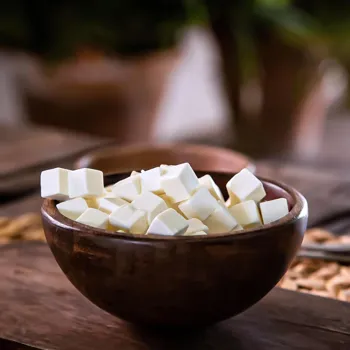
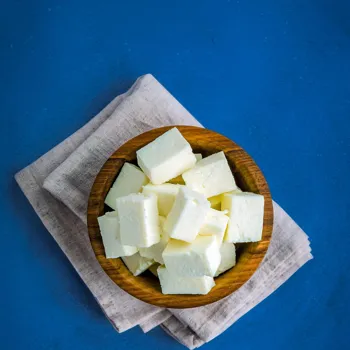
Squeeze Out Excess Water: Twist the muslin cloth tightly to squeeze out as much water as possible from the curds. The drier the curds, the firmer the paneer will be. This step is crucial for achieving the desired texture. Once you squeeze out the water the paneer is ready.
Press the Paneer
Place the muslin cloth containing the paneer on a flat surface. Place a heavy object on top of the paneer to press it firmly for at least 2-3 hours. The longer you press it, the firmer the paneer will be. You can adjust the pressing time according to your preference.
Chill and Store
After pressing, remove the paneer from the muslin cloth. You'll have a firm block of fresh paneer. Cut it into desired shapes and sizes. Store the paneer in an airtight container in the refrigerator for up to 3-4 days. You can also freeze the paneer for longer storage.
Use full-fat milk: This will give you the best results in terms of texture and flavour.
Don't over-boil the milk: This can result in tough paneer.
Add the souring agent gradually: This allows the milk to curdle properly.
Rinse the curds well: This removes the sour taste.
Press the paneer firmly: This gives it a firm texture.
Adjust the pressing time: This will allow you to achieve the perfect firmness.
Variations and Uses:
Once you've mastered the basic paneer recipe, you can experiment with different variations.
Flavoured Paneer: Add herbs, spices, or chillies to the milk while it's heating to infuse the paneer with flavour.
Soft Paneer: Reduce the pressing time for a softer, more crumbly paneer, perfect for making paneer bhurji.
Dessert Paneer: Add a little sugar to the milk for a slightly sweet paneer, ideal for making desserts like paneer kheer.
Paneer can be used in a variety of dishes, both sweet and savoury. Use it in curries like palak paneer, matar paneer, and paneer butter masala. Add it to snacks like paneer tikka, paneer pakoras, and paneer rolls. Use it in desserts like paneer kheer and rasmalai. The versatility of paneer makes it a welcome addition to any meal.
Making paneer at home is not only easy but also cost-effective and healthier than buying it from the store. Homemade paneer is fresher, tastier, and free from preservatives. So, give this recipe a try and enjoy the satisfaction of making your own delicious paneer.
The fresh taste of home-made paneer is quite special and something which will surely change your perspective. You will never buy paneer from the supermarket again. Enjoy making it, and don't forget to share your delicious creations with your loved ones! And that's how you make paneer at home.