Unveiling the Art of Flaky Parathas: Master the Techniques! Dive into the secrets of creating the perfect, flaky paratha
Parathas, a staple in most Indian households, especially in the North, are more than
just flatbread; they are an emotion, a comfort food, and a culinary canvas. From the simple aloo paratha to the elaborate paneer or gobhi variations, the possibilities are endless.
However, the quest for the perfect, flaky paratha often feels like chasing a culinary unicorn. Worry not, fellow foodies! The secret isn't really a secret, just a collection of techniques and tips that, when combined, will elevate your paratha game from good to absolutely glorious.
This isn't just about following a recipe; it's about understanding the process and mastering the art of layering.
Flaky paratha dough: the key is gradual water, oil addition & resting
The very foundation of a flaky paratha lies in the dough. Start with good quality whole wheat flour (atta). Now, this is where things get interesting. Instead of just adding water haphazardly, add it gradually, kneading as you go. The dough should be soft and pliable, not too stiff or too sticky.
Imagine you are giving it a gentle massage, coaxing it into submission. A crucial tip many overlook is the addition of a bit of oil (ghee is preferred, of course!). This small addition works wonders, creating a softer, more elastic dough. Once the dough is ready, let it rest!
This is non-negotiable. Cover it with a damp cloth and let it relax for at least 30 minutes, or even longer. This resting period allows the gluten to develop, resulting in a more manageable and extensible dough, perfect for rolling out those delicate layers.
Various techniques for making flaky parathas include rolling, ghee, flour, and folding
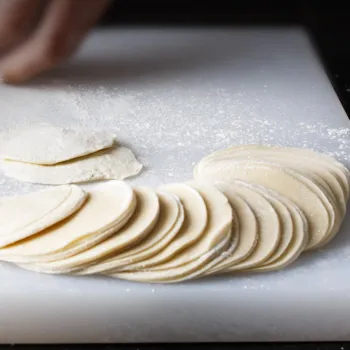
Now, let's talk about technique. There are various methods to achieve those beautiful, flaky layers, but the most common involves rolling out the dough, applying ghee (or oil), sprinkling a dusting of flour, and then folding it in different ways. One method is the classic triangle.
Roll out the dough into a circle, spread the ghee and flour, make a cut from the center to the edge, and then fold it over itself to form a cone. Another popular method involves rolling the dough into a circle, applying the ghee and flour, and then folding it into a rectangle.
No matter which method you choose, the key is to be generous with the ghee and flour. These are the magic ingredients that prevent the layers from sticking together, creating those coveted flaky layers. Also, remember to roll out the paratha gently.
Avoid applying too much pressure, as this can compress the layers and defeat the purpose.
Roll paratha evenly, start from center, experiment with techniques
The rolling technique is very important. When rolling out the paratha after folding, start from the center and work your way outwards. This ensures that the filling is evenly distributed and the layers remain intact. Use a light hand and avoid pressing down too hard with the rolling pin.
You want to coax the paratha into shape, not flatten it into oblivion. Remember, patience is key! If the paratha starts to stick, sprinkle a little more flour on the rolling surface. Don't be afraid to experiment with different rolling techniques to find what works best for you.
Some people prefer to roll the paratha out into a larger circle before folding, while others prefer to start with smaller portions of dough.
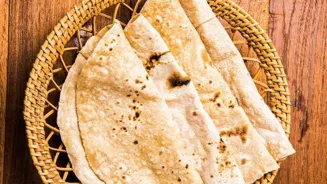
Cook paratha on medium heat for flaky, crispy goodness
The cooking process is where the magic truly happens. Heat a tawa or griddle over medium heat. The tawa should be hot enough to cook the paratha evenly but not so hot that it burns.
Place the paratha on the hot tawa and let it cook for a minute or two on each side, until it starts to develop light golden spots. Now, the key to a soft paratha is cooking on medium heat as opposed to high heat. Once golden brown, flip the paratha and drizzle with ghee (or oil).
Cook the paratha, pressing gently with a spatula, until it is golden brown and crispy on both sides. The gentle pressure helps the paratha to puff up, creating even more flaky layers. Keep flipping and applying ghee until you achieve the desired level of crispness and flakiness.
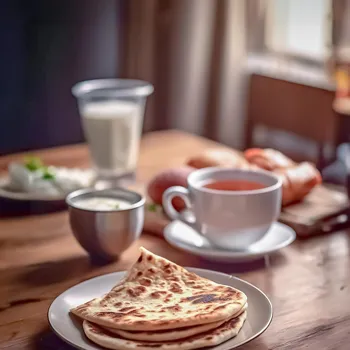
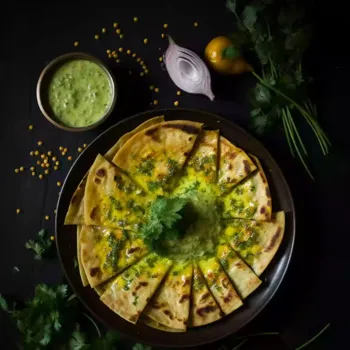
Serving hot, buttered parathas is key to perfection
Serving the paratha is almost as important as making it. Serve it hot, straight off the tawa, with a dollop of butter or a side of yogurt. Aloo parathas pair perfectly with a tangy pickle, while paneer parathas are delicious with a simple raita.
Don’t forget the customary pat of butter melting slowly over the hot surface, adding a richness that’s hard to resist. You can also sprinkle a little chaat masala over the paratha for an extra burst of flavor. Ultimately, the perfect paratha is a matter of personal preference.
Experiment with different fillings, techniques, and serving suggestions to create your own signature paratha. Happy cooking! Enjoy the compliments that are definitely coming your way.
AI Generated Content. Glance/InMobi shall have no liability for the content