Discover the art of making Authentic Indian Rasgulla at home – a sweet adventure awaits! Read on for a step-by-step guide
Kolkata, West Bengal - For generations, Rasgulla has been the undisputed king of
Bengali sweets. It's that spongy, syrup-soaked ball of goodness that melts in your mouth, leaving you with a lingering sweetness that's simply divine.
While readily available in sweet shops across India, the joy of making Rasgulla at home is unparalleled. It’s a delicate process, but with the right guidance and a bit of patience, you can create this iconic sweet in your own kitchen.
Forget factory-made imitations; this is a guide to crafting authentic Rasgulla, the kind that will transport you straight to the heart of Bengal!
Preparing the rasgulla is a journey of flavors, testing your patience but delivering immense joy when you watch the magic in your kitchen and take the first bite. Get ready to embark on this sweet adventure.
Quality paneer from full-cream milk ensures soft Rasgulla
The secret to perfect Rasgulla lies in the quality of your paneer, also known as chhena. Use full-cream milk. Avoid toned or skimmed varieties as they lack the necessary fat content for soft and spongy Rasgulla. You can make paneer at home or buy it from a reputable store.
If buying, ensure it's fresh and not overly dry. To make paneer at home, bring the milk to a boil. Once boiling, reduce the heat and slowly add lemon juice (or vinegar) until the milk curdles. Strain the curds through a muslin cloth.
Rinse with fresh water to remove the lemon flavor and squeeze out excess water. Hang the paneer for 20-30 minutes to remove any remaining moisture. The texture of the paneer is very important and contributes towards the success of the recipe.
Remember, high-fat milk is the key, and the paneer must be carefully hung.
Kneading paneer crucial for Rasgulla texture
Now comes the crucial part: kneading the paneer. This step determines the texture of your Rasgulla. Crumble the paneer and spread it on a clean, flat surface. Using the heel of your palm, start kneading. The goal is to create a smooth, lump-free dough.
This might take about 8-10 minutes, but don't rush. As you knead, the paneer will start releasing its natural oils. Continue until you have a soft, pliable dough, similar to the consistency of a smooth paste. This step is important and patience is key.
Think of this as your moment of zen; it's all about transforming the crumbly paneer into a silky smooth dough that will puff up beautifully in the syrup. If the paneer is too dry, add a tablespoon or two of milk. If it's too wet, continue kneading until the moisture evaporates.
Shape Rasgulla dough into smooth balls for cooking
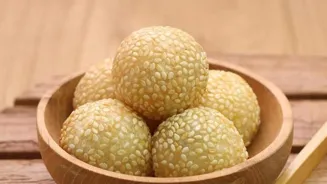
Once your paneer dough is ready, it's time to shape the Rasgulla. Divide the dough into small, equal-sized portions, about an inch in diameter. Gently roll each portion between your palms to form smooth, round balls.
Ensure there are no cracks or fissures on the surface, as these can cause the Rasgulla to break apart while cooking. Place the shaped Rasgulla on a plate and cover with a damp cloth to prevent them from drying out. The size and uniformity of the rasgullas will impact cooking evenly.
Remember, a smooth, crack-free surface is vital for preventing breakage during boiling. Now comes the exciting part where you give shape to the dessert to be cooked.
Prepare sugar syrup for Rasgulla with correct consistency, flavor with cardamom
Next, prepare the sugar syrup, the lifeblood of Rasgulla. In a large, wide-mouthed pot, combine sugar and water. The ratio of sugar to water is crucial for achieving the right consistency. Bring the mixture to a boil over high heat, stirring occasionally until the sugar dissolves completely.
Once the sugar has dissolved, reduce the heat to medium and simmer for a few minutes to create a slightly sticky syrup. The key is to maintain a rolling boil throughout the cooking process.
Add a pinch of cardamom powder for flavor and a teaspoon of lemon juice to prevent the syrup from crystallizing. The syrup should be light, not too thick, and should be at a rolling boil before you add the paneer balls.
Flavoring with cardamom can add a wonderful depth to the sweet, making it truly special. Consistency with recipe helps achieve the right sweetness
Cook Rasgulla in syrup carefully to ensure proper cooking
Now comes the cooking phase. Gently drop the Rasgulla into the boiling syrup, making sure not to overcrowd the pot. Cover the pot and let the Rasgulla cook for about 15-20 minutes. As they cook, they will swell up and double in size.
Occasionally, gently stir the syrup to ensure that the Rasgulla are cooking evenly. After 15-20 minutes, remove the lid and gently press one of the Rasgulla with a slotted spoon. If it feels spongy and bounces back, it's cooked. If it feels hard, cook for a few more minutes.
Once cooked, turn off the heat and let the Rasgulla cool in the syrup. The cooling process is just as important, as it allows the Rasgulla to fully absorb the syrup. Do not overcrowd the pot. This will affect the ability of each unit to cook
Chill Rasgulla for enhanced flavors, serve garnished with nuts or saffron
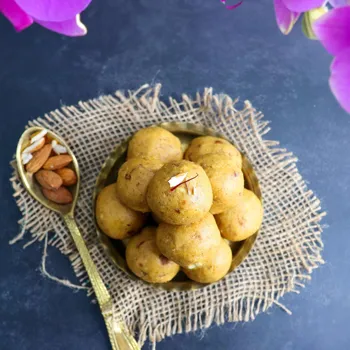
Finally, transfer the Rasgulla along with some of the syrup to a container and refrigerate for at least 2-3 hours. This allows the flavors to meld together and the Rasgulla to become even more spongy and delicious. Serve chilled, garnished with chopped pistachios or a sliver of saffron, if desired.

Making Rasgulla might seem daunting at first, but with practice and attention to detail, you can master this iconic Indian sweet. So, gather your ingredients, put on some music, and embark on this sweet adventure. You won't be disappointed! Chilling is more than just cooling.
Its like a flavor bath for your sweets. It lets all the sweetness soak right in. Add some saffron or nuts because it looks fancy.
AI Generated Content. Glance/InMobi shall have no liability for the content