Perfecting the Base
Begin with a flawless canvas. Before applying any makeup, start with a hydrating primer. This creates a smooth base, ensuring makeup lasts longer and prevents
it from settling into fine lines. Next, opt for a light to medium coverage foundation that matches your skin tone perfectly. Avoid heavy foundations that can look cakey. Apply the foundation evenly, blending it well with a damp sponge or brush. This ensures a seamless, natural-looking finish. For any areas needing extra coverage, use a concealer to spot-correct imperfections, again blending gently for a perfect finish. This is the foundation upon which the rest of the look will be built.
Soft, Neutral Eyeshadow
Focusing on the eyes, a minimalist bride should select eyeshadows in neutral tones. This means sticking to shades like soft browns, creams, and light taupes. These shades enhance the eyes without overpowering them. A matte finish is generally preferred for a softer, more natural look. Apply a light wash of color across the entire eyelid, and then subtly define the crease with a slightly darker shade. Blend well to avoid harsh lines. This creates depth and dimension without appearing overly made-up. Remember, the goal is to enhance, not transform. The neutral eyeshadow provides a subtle definition to the eyes, complementing the natural beauty of the bride.
Natural, Defined Brows
Brows play a vital role in framing the face. For a minimalist bride, the approach should be natural. Instead of heavily sculpted brows, the aim is to enhance the existing shape. Start by lightly brushing the brows with a spoolie brush to groom the hairs. Then, fill in any sparse areas with a brow pencil or powder that matches your natural brow color. Keep the application light, using short, hair-like strokes. Avoid overly dark or sharply defined brows, as this can look harsh. The goal is to create fuller brows while maintaining a soft and natural appearance. This step adds definition and frames the eyes beautifully.
Subtle Blush Application
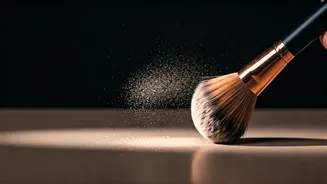
A touch of blush adds a healthy glow to the complexion. Choose a blush color that complements your skin tone. For fair skin, soft pinks or peaches work well. For medium skin tones, rose or coral shades are often flattering. For darker skin, deeper rose or berry shades are good choices. Apply the blush to the apples of your cheeks, and blend upwards towards your temples. The key is to use a light hand. Avoid applying too much blush, as this can easily overwhelm the look. The goal is to add a soft flush, giving the impression of naturally healthy skin. Use a blush brush for an even, natural distribution.
Delicate, Thin Eyeliner
Eyeliner can define the eyes without being too dramatic. For a minimalist bride, a thin line is ideal. Use a gel or liquid eyeliner in a dark brown or black shade. Apply the liner as close to the lash line as possible, starting from the inner corner of the eye and moving outward. Keep the line thin and precise. A subtle wing at the outer corner can add a touch of definition, but keep it minimal. Smudge the liner slightly with a cotton swab to soften the look, and avoid overly thick lines or dramatic wings. The objective is to subtly define the eyes, creating a polished look.
Mascara Only Required
For a minimalist bridal look, skip the false lashes. Instead, focus on using mascara to enhance your natural lashes. Curl your lashes with an eyelash curler before applying mascara to open up the eyes. Choose a mascara that adds volume and length, without clumping. Apply two coats of mascara, allowing each coat to dry slightly before applying the next. Avoid applying mascara to the lower lashes, or use a very light touch if desired. This focus on natural lashes keeps the look light and fresh, while still enhancing your eyes.
Nude Lips for Polish
The lips complete the minimalist bridal look. Opt for a nude lipstick or lip color that complements your skin tone. Choose a shade that is close to your natural lip color, or slightly darker. Apply the lipstick directly from the tube, or use a lip brush for more precise application. Avoid overly glossy or shimmery lipsticks. A matte or satin finish is ideal for a natural look. Consider lining your lips with a lip liner in a similar shade to enhance their shape and prevent the lipstick from bleeding. The result is a polished, sophisticated finish that complements the overall look without drawing too much attention to the lips.
Gentle Highlighting Effect
Highlighting adds a subtle glow to the skin, enhancing the natural radiance of the bride. Choose a highlighter that suits your skin tone. Apply the highlighter to the high points of your face, such as the cheekbones, brow bones, and the bridge of your nose. Use a small brush or your fingertips to apply the product, blending it gently. Avoid using too much highlighter, as this can create an artificial look. The goal is to create a soft, natural glow that enhances your features. This will give you a healthy radiance without appearing overly made-up.
Setting With Mist
To ensure your makeup lasts throughout the day, use a setting mist. After applying all of your makeup, hold the setting mist about six to eight inches away from your face and lightly spray it. This helps to set your makeup, keeping it in place and preventing it from melting or fading. Setting mist also helps to blend the makeup together, giving it a more natural, seamless finish. Look for a setting mist that is hydrating and doesn't leave your skin feeling tight or dry. A setting mist will keep your look flawless for the whole wedding day.
Hydrating Primer Essential
A hydrating primer is crucial for achieving a flawless base. Before starting your makeup, apply a hydrating primer to your entire face. This creates a smooth surface for your foundation, ensuring even application and preventing the makeup from settling into fine lines or dry patches. A hydrating primer also helps to keep your skin moisturized, which is particularly beneficial if you have dry skin or are getting married in a climate with dry air. Choose a primer that is suitable for your skin type. This initial step sets the stage for a radiant and long-lasting bridal look, creating the perfect base to work from.


