What is the story about?
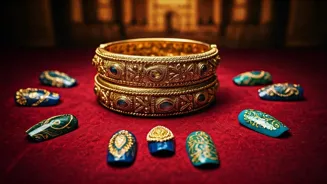
Get ready to flaunt those perfect nails! This guide unveils the secrets to applying press-on nails like a pro, right in the comfort of your home. Say hello to stunning manicures!
Nail Prep is Key
Begin by prepping your natural nails. Gently clean and buff them. Use alcohol wipes for a clean surface. This is crucial to ensure the press-ons stick like they're meant to – like a perfect Bollywood dance number, synchronized and flawless. Remember, a good base is everything!
Perfect Size Matters
Find the perfect size press-on nails to match each of your natural nails. This ensures a natural look. Then, prep your nail base by lightly buffing the surface. Consider this your 'sanskari' step – laying a strong foundation for the beauty that's about to bloom on your fingertips.
Glue Application Guide
Apply a small amount of nail glue to both your natural nail and the back of the press-on. It's like applying 'sindoor' – a little goes a long way! Then, carefully position the press-on nail onto your natural nail and press down firmly, holding it in place for about 20 seconds.
Shape and Seal
Once the glue has dried, file and shape your press-on nails to your desired length and style. After shaping, seal your beautiful work with a top coat for extra shine and protection. This step gives your manicure a 'tadka' of glamour and long-lasting appeal.
Water Caution & Removal
Avoid water for a few hours after application to ensure the glue sets properly. When removing, soak your nails in warm, soapy water to loosen the glue. Gently remove each press-on, avoiding any forceful pulling. Handle them with care, just like a precious heirloom.
