
Clean, Ready Lashes
The journey to perfectly curled lashes begins with a clean slate. Before picking up your curler, make sure your lashes are free from any makeup residue,
dirt, or oils. This step is vital because a clean base helps your curler grip the lashes effectively, preventing them from slipping. Using a gentle, oil-free makeup remover is recommended for this task. Once cleaned, your lashes are ready to fully embrace the curling process, ensuring a smooth, clump-free application and maximizing the curl's hold throughout the day. This foundational step paves the way for the subsequent techniques, setting the stage for stunning, long-lasting results.
Heat Up the Curler
Adding a bit of warmth to your lash curler can significantly enhance its effectiveness. Gently warming the curler's pads creates a gentle, safe environment, which helps mold the lashes into a more pronounced and enduring curl. There are several ways to achieve this, like using a hairdryer to lightly warm the curler for a few seconds before applying it to your lashes. Alternatively, for a safer approach, you can use your body heat by holding the curler's metal part against your skin, allowing it to absorb a bit of warmth. This warming technique ensures the lash fibers become more malleable, making them easier to curl and resulting in a more dramatic curl that holds much better.
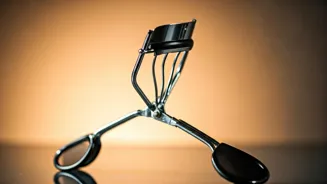
Choose Quality Curler
The choice of your eyelash curler plays a critical role in achieving desired results. Investing in a quality curler is crucial for both the curling effectiveness and the safety of your lashes. Opt for a curler that is well-made with sturdy construction and a comfortable grip, as this gives you more control during application. Look for curlers that have rounded pads and are made from high-quality materials that will not damage or pinch your lashes. Replace your curler's pads regularly and if possible, use a curler with spare pads, as worn-out or damaged pads can lead to breakage. A good curler should provide a smooth, even curl without any unnecessary force or discomfort.
Sectional Curling Technique
Similar to how hairstylists section hair for styling, curling your lashes in sections can provide a more thorough and impactful lift. Start by positioning the curler near the base of your lashes, gently clamping down for a few seconds. Repeat this process for the middle and the tips of your lashes. This strategic approach ensures that every part of your lashes is curled, offering a fuller and more defined look. This method provides a dimensional curl, enhancing the overall impact. By concentrating on each segment, you achieve a more polished and complete curl, making your lashes appear longer and your eyes more captivating.
Hold For Ten Seconds
To truly set the curl and make it last, holding your curler in place for a specific duration is key. After positioning the curler at the base of your lashes, gently clamp it down and hold it for approximately ten seconds. This extended contact allows the curler to mold the lash fibers into the desired shape and set the curl. For a more intense effect, you can apply a bit of heat to the curler pads. This technique helps to enhance the curl and increases its staying power throughout the day. Consistency in hold time is crucial for getting the most out of this method and seeing a real transformation in your lash appearance.
Apply Lash Primer
Lash primer is your secret weapon for amplified curl and long-lasting wear. Applying a coat of lash primer before your mascara creates an ideal base. The primer adds volume, length, and helps to lift and hold your lashes in place. It also acts as a barrier, protecting your lashes from the harsh effects of mascara, like flaking and clumping. Primers come in different formulations. Some include nourishing ingredients that condition your lashes and support overall lash health. After the primer sets, apply your mascara for a perfect curl that lasts all day. The combination of primer and mascara maximizes the curl's impact, giving you gorgeous, eye-catching lashes.
Choose Waterproof Mascara
To maintain your lash curl even in challenging conditions, opting for waterproof mascara is a great idea. Waterproof mascara is formulated to resist water, humidity, and even tears, meaning your perfectly curled lashes will stay intact. The formula provides a stronger hold compared to regular mascara, keeping your lashes curled and lifted all day. Waterproof mascara is available in various formulations, including those that add volume, length, or definition. To fully optimize the curling effect, always apply waterproof mascara after curling your lashes and using a lash primer. By integrating waterproof mascara into your routine, you can confidently face any situation while maintaining flawless, curled lashes.
Avoid Heavy Mascara
While mascara is essential for enhancing your lashes, the type of mascara used can impact the hold of the curl. Heavy or volumizing mascaras can weigh down your lashes, causing them to lose their curl and droop. To prevent this, opt for lightweight mascaras that offer length and definition without adding excessive weight. These types of mascaras usually contain formulas designed to lift and curl the lashes rather than weigh them down. If you prefer volumizing mascaras, applying them in thin coats helps reduce the weight. Avoid layering excessively, as this can lead to the curl collapsing. By carefully selecting and applying your mascara, you can retain the curl and achieve a lasting, lifted lash look.
Comb Through Lashes
For a polished finish and to prevent clumping, combing your lashes is a crucial step. After applying mascara, use a clean lash comb or a spoolie brush to separate your lashes. Combing removes excess product, removes clumps, and provides a natural, defined look. Carefully brush through each lash, starting from the base and moving toward the tips, ensuring the mascara is evenly distributed. This technique not only enhances the definition of each lash but also adds to the curl's longevity by keeping the lashes separated and preventing them from sticking together. It guarantees your lashes look immaculate and your eyes are beautifully framed.
Set With Gel
To completely lock in your curl and ensure it lasts all day, consider setting your lashes with a clear gel. Once you've applied your mascara and combed your lashes, a clear gel can be applied as a final step. The gel acts as a sealant, offering a protective layer that maintains the curl and prevents smudging. Clear gel mascaras are designed to offer a lightweight, transparent finish that holds the curl without adding color or weight. This last step ensures that your lashes stay perfectly curled and defined throughout the day, no matter the weather or activity. This finishing touch provides the ultimate support to achieve and maintain a stunning, long-lasting lash look.