

The Right Gear for a Stable Shot
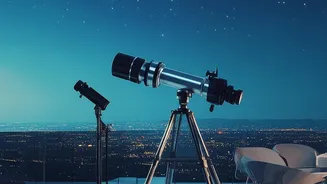
The foundation of a sharp lunar photo is stability. Any vibration during the shot will result in blur. First, you need a telescope on a sturdy, stable mount. While a tracking mount that follows the Moon's movement is helpful, it isn't strictly necessary
for short exposures. Next is your camera. You can use a DSLR, a mirrorless camera, or even a modern smartphone. For connecting a DSLR or mirrorless camera, you will typically need two small accessories: a T-Ring specific to your camera model and a T-Adapter that slides into the telescope's focuser. For smartphones, a dedicated adapter that clamps the phone securely to the telescope's eyepiece is essential for avoiding shaky, poor-quality images.
Choose Your Connection Method
There are three main ways to connect your camera to a telescope. The simplest is the 'afocal' method, where you hold a smartphone or point-and-shoot camera up to the telescope's eyepiece. This is easy but often yields the least sharp results and can be difficult to align perfectly by hand. The best method for clarity is 'prime focus' photography. This involves removing your camera's lens and attaching the camera body directly to the telescope using a T-Ring and adapter. This turns your telescope into a giant telephoto lens for your camera, providing a much cleaner and more stable optical path. A more advanced technique, 'eyepiece projection', uses a special adapter to place an eyepiece between the camera and telescope for even higher magnification of craters and mountains, though it can make the image fainter.
Mastering Manual Camera Settings
Your camera's automatic settings will almost always fail when pointed at the bright Moon against a black sky, resulting in a washed-out white disc. The solution is to use Manual (M) mode. First, set your ISO to a low value, like 100 or 200, to minimize digital noise and keep the image clean. Because the Moon is so bright, you'll need a surprisingly fast shutter speed to avoid overexposure and motion blur. Start with a shutter speed of around 1/125s to 1/250s and adjust from there. Your aperture will be determined by the telescope's own f-ratio.
Nailing a Razor-Sharp Focus
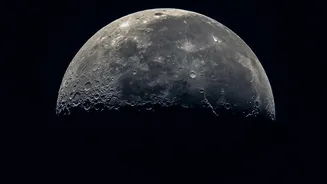
Autofocus will not work; you must focus manually. The best way to do this is by using your camera's 'Live View' function on its rear screen. Digitally zoom in on a high-contrast area, like the edge of a large crater or the line between the Moon's light and dark side (the terminator). Carefully adjust your telescope's focuser knob until the details are as sharp and crisp as possible. Take your time with this step, as perfect focus is the most critical element for a detailed lunar photo. If you are using a smartphone, you can typically tap the screen to focus and then lock it.
Techniques for a Blur-Free Capture
Even with a stable mount, the simple act of pressing the shutter button can introduce enough vibration to blur your shot. To avoid this, use a remote shutter release or set your camera's built-in self-timer to 2 or 10 seconds. This delay allows any vibrations from your hand to settle before the picture is taken. For DSLR users, engaging the 'mirror lock-up' feature is another pro tip. This flips the camera's internal mirror up a few seconds before the shutter opens, preventing the tiny vibration it causes. Finally, don't just take one photo. The Earth's atmosphere is constantly turbulent, causing moments of blurriness and clarity. Take a burst of several images; this 'lucky imaging' approach greatly increases your chances of capturing a perfectly sharp frame during a moment of steady air.