


Why This Tiny Trend is a Big Deal
First, what exactly are microgreens? They aren't sprouts. They're the next stage of a plant's life—young vegetable greens harvested just after the first true leaves have developed. Packed with up to 40 times more nutrients than their mature counterparts,
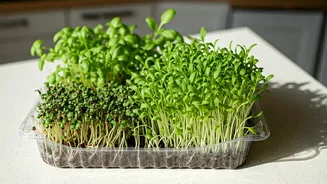
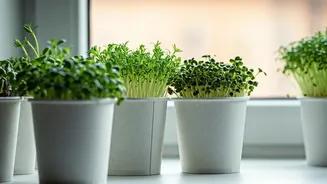
they offer intense flavour and vibrant colour, making them a favourite of chefs and home cooks alike. From spicy radish and mustard to earthy broccoli and sunflower, they can elevate a simple salad, sandwich, or soup. The trend's appeal lies in its accessibility. You don’t need a sprawling garden or expensive equipment; all you need is a sunny windowsill and a bit of patience.
The Allure of Low-Cost Aesthetics
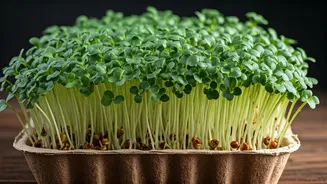
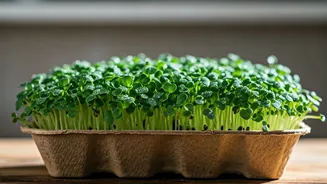
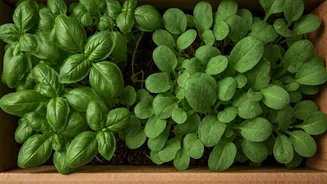
Part of what makes this gardening method so charming is its embrace of simple, upcycled materials. The cardboard tray—whether from packaged mushrooms, tomatoes, or a cut-down delivery box—is the star. This isn’t just about saving money; it’s a conscious aesthetic choice. It taps into a desire for sustainability and a rustic, minimalist look that feels authentic and achievable. In a world of complex gadgets, the simplicity of a cardboard tray, soil, and seeds is a refreshing change. It proves that creating something beautiful and useful doesn't require a big budget, just a little ingenuity.
Gathering Your Simple Supplies
Ready to start your own micro-garden? The list of materials is refreshingly short and affordable. * **A shallow cardboard tray:** A produce tray from the supermarket is perfect. If using a deeper box, cut it down to about 1-2 inches in height. * **Potting mix:** A fine, seed-starting mix works best. Coconut coir is another excellent, lightweight option. * **Microgreen seeds:** Choose easy-to-grow varieties for your first time, like radish, broccoli, or mustard. * **A spray bottle:** For gentle watering. * **A sunny spot:** A windowsill that gets several hours of indirect sunlight is ideal. * **(Optional) A second tray:** To cover your seeds during germination.
Step 1: Prepare Your Planter
Your cardboard tray is nearly ready to go. If you’re worried about it getting soggy, you can poke a few small drainage holes in the bottom, but with careful watering, this is often unnecessary for a single-use planter. Fill your tray with about an inch of pre-moistened potting mix or coconut coir. Don’t pack it down; keep it light and airy. Gently level the surface with your hand. The goal is to create a flat, even bed for your seeds to rest on.
Step 2: Sow the Seeds
This is where the magic begins. Unlike regular gardening, you want to sow your microgreen seeds very densely. Sprinkle them evenly across the entire surface of the soil, almost like you’re seasoning a dish. Try not to let them clump together too much, but they should be close. Once they’re spread out, gently press them into the soil with your palm or a small piece of cardboard. Do not cover them with more soil. Give them a good misting with your spray bottle, ensuring the seeds and the top layer of soil are damp.
Step 3: The Blackout Period
To encourage strong, uniform germination, most microgreens benefit from a few days in the dark. This is called the 'blackout period.' Cover your tray with another cardboard tray or a dark lid. This traps humidity and tells the seeds it’s time to sprout. Check on them daily and give them a light misting to keep the soil surface from drying out. After 2-4 days, you should see tiny, pale sprouts pushing upwards. This is your cue to move to the next step.
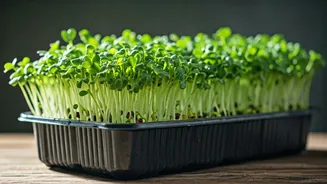
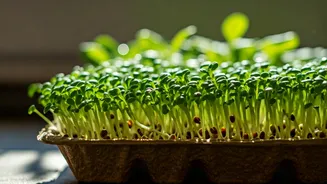
Step 4: Harvesting Your Greens
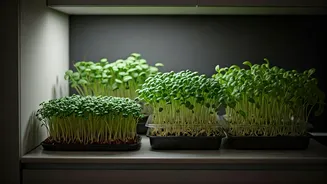
Once your sprouts have emerged, remove the cover and place the tray in a spot with indirect sunlight. Within a day, the pale shoots will turn a vibrant green as they start to photosynthesize. Continue to mist them once or twice a day. Your microgreens will be ready to harvest in about 7-14 days from sowing, depending on the variety. They are ready when they have their first set of 'true leaves' (the second set of leaves to appear). To harvest, use a sharp pair of scissors and simply snip the greens just above the soil line. You can harvest the whole tray at once or trim as needed.