


Finding the Perfect Candidate
The first step is sourcing your chest. You might already have one inherited or tucked away. If not, scour local flea markets, second-hand furniture shops, and online marketplaces. Look past the dusty surface and focus on the 'bones'. Is it made of solid
wood? Does it have interesting details like metal strapping, intricate carvings, or unique latches? Check for signs of major damage like wood rot or severe water warping, but don't be scared of scratches, faded paint, or a bit of rust—that's all character you can work with. A sturdy structure is the most important quality.
The All-Important Prep Work
This is the least glamorous but most critical stage. Skipping preparation is the number one reason DIY projects fail. Start by giving the chest a thorough cleaning inside and out with a mild soap and water solution to remove decades of grime. Once completely dry, it's time to sand. For a painted chest you want to refinish, you may need a coarser grit sandpaper (around 80-120 grit) to remove the old finish. For a raw wood or lightly finished piece, a finer grit (180-220 grit) will suffice to scuff up the surface so that new paint or stain can adhere properly. Always sand in the direction of the wood grain. Wipe away all dust with a tack cloth before moving on.
Choosing Your New Look
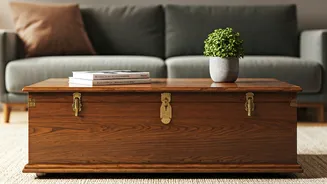
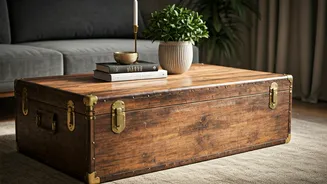
Now for the fun part: deciding on the finish. Do you want a chic, modern look or a rustic, farmhouse vibe? For a solid colour, chalk paint is incredibly user-friendly and gives a lovely matte finish that can be easily distressed for a vintage feel. Milk paint offers a similar, authentically aged appearance. For a more modern or classic look, a high-quality satin or semi-gloss latex paint works beautifully. If the wood underneath is beautiful, consider a stain. A dark walnut or espresso stain can create a rich, sophisticated look, while a lighter oak or grey wash can feel more contemporary and airy. Test your chosen paint or stain on an inconspicuous area first, like the back or bottom of the chest.
Application and Hardware
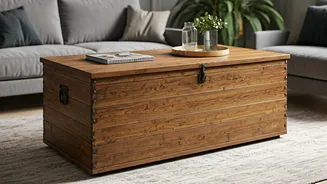
Apply your paint or stain in thin, even coats, allowing each coat to dry completely before applying the next. For large, flat surfaces like the top, a small foam roller can provide a smooth, professional finish with no brush marks. Use a good quality brush for legs, details, and edges. While the paint is drying, consider the hardware. Simply swapping out old, tarnished handles or hinges for new ones in brass, matte black, or brushed nickel can dramatically update the entire piece. You can find a huge variety of furniture hardware online or at home improvement stores.
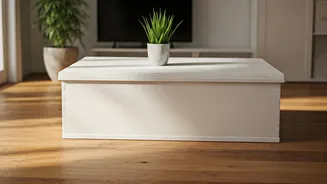
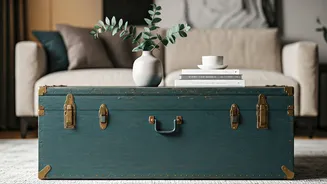
Give it a Lift
Most old storage chests sit directly on the floor. To transform it into a functional coffee table, it needs to be at the right height (typically level with or slightly below your sofa cushions). Adding legs is the perfect solution. You can buy ready-made furniture legs in countless styles—from sleek, mid-century modern tapered legs to ornate, traditionally carved ones. Alternatively, adding a set of sturdy casters (wheels) can give the table an industrial-chic vibe and makes it easy to move around. Simply screw the leg mounting plates or casters securely to the four corners on the underside of the chest.
Seal the Deal
Once your final coat of paint or stain is fully cured, you must protect your hard work. A coffee table endures a lot of use—spills, hot mugs, and scratches. Apply two to three thin coats of a clear protective topcoat. Polycrylic is an excellent choice as it is water-based, low-odour, and won't yellow over time like some oil-based varnishes. For chalk-painted pieces, a clear finishing wax can be buffed in to provide a durable, soft-sheen seal. This final step ensures your new table will look great for years to come.