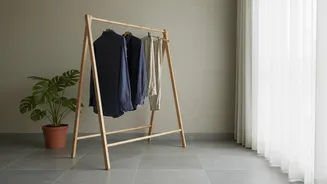




Location, Location, Ventilation
The first step in creating an effective indoor drying zone is choosing the right spot. Forget stashing your clothes rack in a dark, unused corner. Your primary ally against dampness is airflow. Designate an area in a room with good ventilation, ideally
one with a window you can crack open (if shielded from rain) or near a balcony door. This movement of air is crucial for carrying moisture away from your clothes. Also, consider foot traffic. You don’t want your drying rack in a busy hallway where it will be constantly knocked over or obstruct movement. Placing it in a specific, low-traffic but well-ventilated corner turns a simple rack into a purposeful drying station.
Maximise Air Circulation
Once you have your location, the next step is to actively manage the air. High humidity means the air is already saturated with water, making it difficult for moisture from your clothes to evaporate. This is where a fan becomes your best friend. Position a pedestal or table fan to blow air across the clothes on the rack. This doesn't need to be a high-speed blast; a steady, medium-speed flow is often more effective at creating consistent circulation and preventing pockets of stagnant, damp air from forming around the fabric. A ceiling fan can also work wonders if your drying rack is positioned underneath it. The key is to keep the air moving to speed up evaporation significantly.
Choose the Right Tools
Your success also depends on your equipment. If space is tight, consider vertical or tiered drying racks that make the most of height. Collapsible 'gullwing' racks are a popular choice as they offer multiple surfaces and can be stored easily. For smaller apartments, over-the-door racks are an excellent space-saving solution. If your budget allows, a dehumidifier is a game-changer. This appliance actively pulls moisture from the air, drastically reducing drying time and preventing the damp conditions where mould and mildew thrive. Some studies show that using a dehumidifier in tandem with a fan can dry clothes in a fraction of the time it would normally take.
Prep Your Laundry Properly
The drying process begins in the washing machine. Don't overload your machine; tightly packed clothes retain more water and are harder to clean effectively. Use the highest spin cycle your fabrics can safely tolerate. Running an extra spin cycle can remove a surprising amount of excess water, giving you a significant head start. Before hanging each item, give it a good, firm shake. This simple action helps to detangle the fabric, release trapped water, and open up the material to allow for better airflow.
The Art of Strategic Hanging
How you hang your clothes matters just as much as where you hang them. The golden rule is to leave ample space between each garment. Overcrowding the rack traps moisture and is a primary cause of that dreaded musty smell. Use hangers for shirts, kurtas, and dresses. This allows air to circulate inside and outside the garment. For smaller items like socks and undergarments, racks with clips are useful. Hang heavier items like jeans and towels at the ends of the rack or on a separate, sturdier rail. Prioritise lighter fabrics as they will dry faster, freeing up space for the bulkier items.
Banish the Musty Smell
Even with the best techniques, smells can sometimes develop. To prevent this, add about half a cup of white vinegar or baking soda to your wash cycle. Both are natural deodorisers that help neutralise the bacteria responsible for mildew odours. If a garment already smells musty after drying, a soak in a vinegar-water solution before rewashing can often solve the problem. For long-term prevention in your closets, placing silica gel packets, charcoal bags, or even unwrapped camphor can help absorb residual moisture and keep clothes smelling fresh.