




The Hidden Risk in Your Souvenirs
That collection of shells you painstakingly gathered from the shore may be hiding a less-than-charming secret. When a mollusc dies, its soft body decomposes, but tiny bits of organic tissue can remain lodged deep within the shell's spirals and crevices.
This leftover material, along with the shell's natural outer layer, called the periostracum, is a potential food source. While the shell itself is mostly calcium carbonate, which isn't on most insects' diets, the decaying animal matter is another story. This is what turns a beautiful natural object into a potential beacon for common household pests, creating a problem you might not notice until it’s too late.
Meet the Unwanted Guests
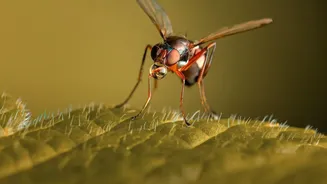
Several types of pests are drawn to the protein-rich residue found in uncleaned shells. The most common culprits are carpet beetles. The adult beetles are often found near windows as they are drawn to light, but it is their larvae that cause the real damage. These small, hairy, carrot-shaped larvae feed on a variety of natural animal materials, including wool, silk, feathers, and the leftover tissue in your shells. You might first notice an infestation by finding their bristly, shed skins or irregular holes in nearby fabrics. Other generalist pests, like certain species of ants and cockroaches, are also opportunistic feeders and can be attracted to the faint odour of decaying organic matter emanating from the shells.
A Step-by-Step Cleaning Guide
Properly cleaning your shells is the single most important step to prevent a pest problem. Never bring home shells that still have a living creature inside. If you've collected empty shells, the goal is to remove any remaining organic matter, inside and out. A popular and effective method is to soak the shells. Start by soaking them in fresh water for several days, changing the water daily to help loosen any tissue. For a more thorough cleaning, you can then boil the shells. Place them in a pot of room-temperature water, bring it to a rolling boil for 5-10 minutes, and then let them cool completely before handling. This helps to cook off and dislodge any stubborn residue.
The Bleach vs. Boiling Debate
For sanitising and removing the flaky outer layer (periostracum), a bleach solution is highly effective. A common recommendation is to create a solution of one part bleach to ten parts water and soak the shells for several hours. This not only kills bacteria but also helps to whiten the shells and remove any stubborn coatings. However, bleach can be harsh and may damage more delicate or colourful shells. Always wear gloves and work in a well-ventilated area when using bleach. Boiling is a bleach-free alternative that is effective for killing bacteria and loosening organic matter, but it might not be suitable for very fragile shells, which can crack from the temperature change. For most sturdy shells, a combination of soaking, boiling, and gentle scrubbing with a toothbrush will suffice to make them clean and safe for display.
Long-Term Care for Your Collection
Once your shells are thoroughly cleaned and completely dry, they should be safe to display. To make them shine, you can apply a light coat of mineral oil or another neutral oil, which helps enhance their natural colour and provides a slight protective barrier. When storing shells, use plastic bins with secure lids rather than cardboard boxes, which can absorb moisture and attract pests themselves. Keep your collection in a dry area. Avoid storing them in damp basements or humid attics, as moisture can lead to other issues like mould or mildew. Regularly dusting your displayed shells will also help keep them in pristine condition, ensuring they remain a beautiful, pest-free reminder of your time by the sea.