





Why Start With Wall Push-Ups?
Before mastering floor push-ups, the wall variation offers a fantastic starting point. It works the same key muscles—your chest, shoulders, and triceps—but with significantly less load on your joints. This makes it an ideal exercise for fitness newcomers,
individuals with wrist or shoulder sensitivity, or anyone looking to perfect their form without the full strain of gravity. Wall push-ups build foundational strength and teach your body the correct movement pattern, engaging your core and promoting stability in a controlled environment. Think of it as creating the blueprint for perfect push-ups to come.
Defining Straight Body Alignment
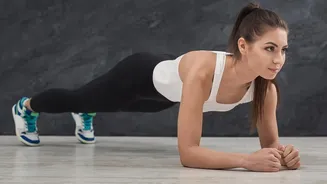
The core principle of a good wall push-up is maintaining a rigid, straight line from your head to your heels throughout the entire movement. Imagine your body is a solid plank of wood that moves as a single, unified piece. This means your core must be engaged, your glutes squeezed, and your back perfectly straight. There should be no sagging in your hips, no arching in your lower back, and no jutting your head forward. This alignment is crucial not just for targeting the right muscles, but also for preventing unnecessary strain on your neck and lower back.
Step-by-Step Setup for Success
Proper form begins before you even start the movement. Stand facing a wall, about an arm's length away, with your feet shoulder-width apart. Place your hands flat on the wall, slightly wider than your shoulders and at about chest or shoulder height. Your fingers should point toward the ceiling. Before you begin, actively brace your core as if you're about to be poked in the stomach, and squeeze your glutes. This creates the tension needed to hold your body in that crucial straight line. Ensure your head is in a neutral position, with your gaze slightly forward—not looking up or down.
Executing the Perfect Repetition
With your body set in a straight, engaged line, you are ready to perform the push-up. Inhale and slowly bend your elbows, lowering your entire body toward the wall as one unit. Your elbows should track backward at roughly a 45-degree angle from your torso, not flared straight out to the sides. Continue until your nose or chest nearly touches the wall. It is vital that your hips and chest move together. Pause for a moment, then exhale as you press firmly against the wall, pushing yourself back to the starting position until your arms are straight but not locked. The movement should be slow and controlled, not rushed.
Common Beginner Mistakes to Avoid
Three errors commonly derail beginners. The first is sagging hips, where the lower back arches and the core disengages. To fix this, consciously re-engage your abdominals and glutes. The second is 'head-poking', where the chin juts forward to touch the wall first. Correct this by keeping your neck neutral and leading with your chest. The third mistake is flaring your elbows out to the sides in a 'T' shape, which puts stress on the shoulder joints. Focus on keeping the elbows tucked closer to your body. If you cannot maintain form, end the set; quality is more important than quantity.
How to Progress and Get Stronger
Once you can comfortably perform several sets of 12-15 wall push-ups with perfect form, it is time to increase the challenge. The simplest way to progress is to step your feet further back from the wall. This increases the angle of your body and forces your muscles to support more of your body weight. From there, you can move to incline push-ups on a sturdy countertop, then a bench or chair, gradually decreasing the height until you are ready to tackle push-ups on the floor. Each step down in elevation is a measurable sign of progress.