


More Than Just a Meal
Let's be honest: you can get vegetable biryani delivered in under 30 minutes. But what arrives is often a pale imitation of the real thing—a simple pulao masquerading under a grander name. A true biryani is a celebration. It’s an exercise in patience
and precision that rewards you with layers of distinct flavours, fragrant aromas that fill your entire home, and perfectly cooked grains of rice, each one separate and infused with spice. Making it yourself isn't about saving money or time; it's about reclaiming the joy of cooking and creating something genuinely spectacular. This is a dish that tells a story, and this weekend, you can be the author.
The Soul of Biryani: The Rice
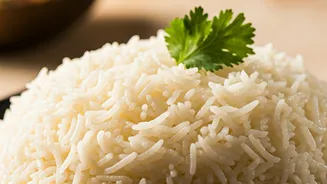
The foundation of an excellent biryani is, without question, the rice. Do not compromise here. You need high-quality, aged, long-grain basmati rice. The 'aged' part is crucial, as it helps the grains cook up fluffy and separate, rather than sticky. The first non-negotiable step is to rinse the rice thoroughly until the water runs clear, then soak it in cold water for at least 30 minutes. This helps the grains hydrate and cook evenly. When you boil the rice, you're only cooking it to about 70% doneness. This is called par-boiling. Flavour the boiling water generously with salt and whole spices like cardamom, cloves, and a bay leaf. This ensures every grain carries a subtle fragrance.
A Symphony of Vegetables
A vegetable biryani can easily fall into the trap of becoming a mushy, indistinct mess. The secret is to choose your vegetables wisely and treat them with respect. A good mix includes sturdy vegetables like potatoes and carrots, which should be cut into uniform, bite-sized cubes. Green beans, cauliflower florets, and green peas add colour and texture. The key is to partially cook them before they go into the biryani. Sauté your potatoes and carrots first until they have a slight golden crust. This step, known as 'bhuno,' develops flavour and helps them hold their shape during the final 'dum' cooking stage. The other vegetables can be lightly blanched or stir-fried. They should all be firm, not fully cooked.
The Magic of the Masala
The vegetable masala is the flavour engine of your biryani. This is where you build the complex, spicy, and tangy notes that will permeate the entire dish. Start by blooming whole spices in ghee or oil. Think cinnamon sticks, star anise, and shah jeera (caraway seeds). Next, sauté onions until they are deeply golden, then add your ginger-garlic paste. The base of your gravy should be thick yogurt, whisked until smooth to prevent splitting. Into this, you'll add your powdered spices: turmeric, red chilli powder, coriander powder, and a high-quality biryani masala. Cook this mixture until the oil begins to separate, then add your partially cooked vegetables and simmer gently. This rich, fragrant gravy is what will coat the vegetables and steam up into the rice.
The Art of Layering
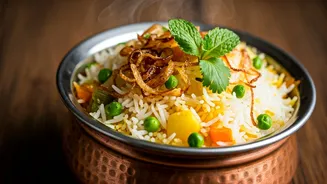
Layering is not just for aesthetics; it's a critical technique for flavour and texture. Start by greasing the bottom of a heavy-bottomed pot (a Dutch oven is perfect) with ghee. The first layer should be rice. This prevents the vegetables from sticking and burning. Next, add a layer of your vegetable masala. On top of that, sprinkle a generous amount of chopped fresh mint and coriander leaves, along with a handful of 'birista' (crispy fried onions). Then, another layer of rice. Repeat this process, ending with a final layer of rice. The top layer is where the final flourishes go: a few more herbs, the remaining fried onions, and the all-important saffron milk (a pinch of saffron steeped in warm milk) drizzled over the top for that classic colour and aroma.
The Final Act: The 'Dum'
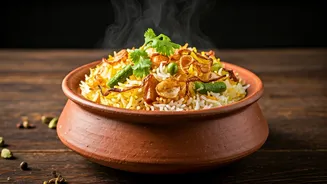
‘Dum’ is the slow-cooking method where the biryani is cooked in its own steam in a sealed pot. This is where the magic happens. The flavours of the rice, vegetables, and spices meld together into a harmonious whole. To create a seal, you can use a traditional dough made from flour and water pressed around the rim of the pot and lid. A simpler, modern alternative is to place a tight-fitting lid on the pot and weigh it down. Cook on the lowest possible heat for 20-25 minutes. Then, turn off the heat and let it rest, still sealed, for another 10-15 minutes. This resting period is crucial for the flavours to settle. When you finally open the lid, you’ll be greeted by an incredible burst of steam and aroma.