


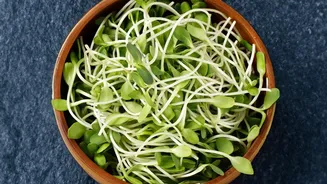

The Power of Pint-Sized Greens
Before diving into the 'how,' let's talk about the 'why.' Microgreens are young vegetable greens harvested just after their first true leaves appear, typically within 7 to 21 days of planting. Despite their small size, they are nutritional powerhouses.
Research has shown that microgreens can contain significantly higher concentrations of vitamins and minerals—sometimes up to 40 times more—than their mature counterparts. They are packed with nutrients like vitamins C, E, and K, as well as antioxidants. Growing them at home means you get maximum freshness and flavour, as many store-bought greens lose nutritional value during transport and storage. Plus, the taste is unbeatable, ranging from spicy radish and peppery arugula to sweet pea shoots.
Your Mini-Farm Shopping List
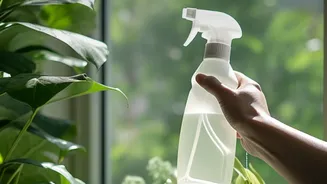
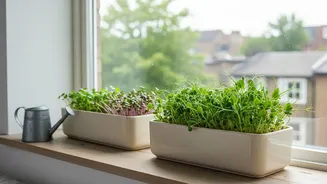
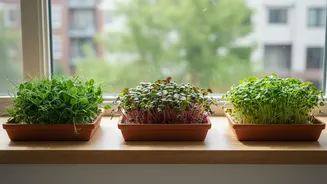
Getting started requires minimal investment and you might already have some of these items at home. Recycled plastic takeout containers or produce clamshells work perfectly, as long as you punch a few drainage holes in the bottom. If you prefer, shallow germination trays are readily available at garden centres. Here’s a basic list of what you'll need: - Shallow trays or containers (at least 2-3 inches deep). - A growing medium, like a peat-based potting mix, coconut coir, or even a few layers of damp paper towels for some varieties. - High-quality seeds. Look for packets specifically labelled for microgreens or use standard vegetable and herb seeds. - A spray bottle for gentle watering. - A sunny windowsill. A south-facing window that receives at least four to six hours of direct sunlight is ideal.
Choosing Your First Crops
For your first harvest, it’s best to start with varieties that are known to be fast and easy growers. This will give you a quick win and build your confidence. Some of the most beginner-friendly options include radish, broccoli, kale, arugula, and mustard greens. These tend to sprout quickly and are less fussy about their conditions. Pea shoots and sunflower seeds are also popular choices; however, their larger seeds benefit from being soaked overnight for 8-12 hours before planting to speed up germination.
A Step-by-Step Planting Guide
With your materials ready, it's time to plant. First, moisten your potting mix until it feels like a damp sponge, but isn't dripping wet. Fill your tray with about an inch or two of this soil and gently press it down to create an even surface. Next, sprinkle your seeds densely and evenly across the soil. You want them close together, but not piled on top of each other. Lightly mist the seeds with your spray bottle. For the first few days, it's beneficial to keep the seeds in the dark to encourage germination; you can do this by covering the tray with a lid or another tray. Check daily and mist as needed to keep the soil surface moist.
Harvesting Your Tiny Bounty
In just a few days, you'll see your seeds start to sprout. Once they do, remove the cover and move the tray to your sunniest windowsill. Continue to keep the soil moist, not wet. The best way to do this is by watering from the bottom if you have a two-tray system, or by gently misting the soil surface. Your microgreens will be ready to harvest in about one to three weeks, depending on the variety. They are typically ready when they are about 1-3 inches tall and have developed their first set of “true leaves,” which will look different from the initial “seed leaves.” To harvest, simply use a sharp pair of scissors and snip the greens just above the soil line.
The Secret to a Continuous Yield
The key to a non-stop supply is staggered planting. Don't just plant one tray; plant several. The process is simple: start a new tray of seeds every few days or once a week. By the time you’ve harvested and finished your first tray, the next one will be ready to go, and the one after that will be just a few days behind. This creates a rotating system of sowing and harvesting that ensures you always have fresh greens on hand. Once a tray is harvested, you can compost the roots, till the soil with a fork, and reuse it for your next planting. This simple cycle transforms your sunny spot from a one-time project into a continuously producing mini-farm.