



Reading the Signs Your Plant Needs More Room
Plants are excellent communicators, and they will tell you when they feel cramped. One of the most obvious signs is roots physically growing out of the drainage holes at the bottom of the pot. You might also see roots pushing up and becoming visible on
the soil's surface. Another key indicator is the plant’s thirst; if you find yourself watering more frequently because the soil dries out in just a day or two, the pot is likely full of roots with little soil left to hold moisture. Stunted growth is also a major clue. If your plant has stopped producing new leaves during its growing season, or the new leaves that do appear are noticeably smaller than older ones, it is struggling for resources. In some cases, the plant may become top-heavy and unstable, tipping over easily. If you're still unsure, gently slide the plant out of its pot. If you see a dense, tangled mass of roots circling the shape of the container, it’s confirmed: the plant is root-bound and needs a new home.
Timing Is Everything for a Smooth Transition
While you can repot a struggling plant at any time of year out of necessity, the ideal time is during its active growing period. For most houseplants in India, this means early spring (February-March) or the monsoon season. Repotting during this phase allows the plant to leverage its natural growth spurt to quickly establish its roots in the new soil, minimising the stress of the move. Avoid repotting during peak summer heat or the dead of winter if possible. The extreme temperatures can add extra stress to an already vulnerable plant, making recovery more difficult. Repotting a plant while it is dormant or expending energy on flowering can also shock the system, so it is best to wait until it is actively putting out new leaves.
Your Step-by-Step Guide to Repotting Success
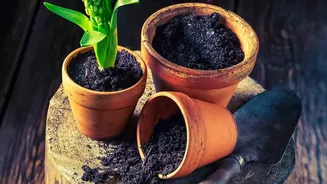
Once you've determined it's time to repot, gather your materials: a new pot, fresh potting mix, and water. Choose a new pot that is only 2 to 4 centimetres wider in diameter than the current one. A pot that is too large can hold excess moisture, leading to root rot. First, water your plant an hour before you begin to help ease its removal. To remove the plant, turn the pot on its side and gently tap the rim on a table edge, holding the plant’s stem to guide it out. Once it’s free, inspect the root ball. Gently massage the roots with your fingers to loosen any tight coils. Don't worry if a few small roots break, but try to be as gentle as possible. Place a layer of fresh potting mix at the bottom of the new pot. Centre the plant inside, ensuring the top of the root ball sits about an inch below the pot’s rim. Fill the space around the root ball with more fresh soil, lightly pressing it down to eliminate large air pockets.
Aftercare for a Happy Recovery
The moments after repotting are crucial for recovery. Once the plant is settled in its new pot, give it a thorough watering until you see water flowing from the drainage holes. This helps the new soil settle around the roots and provides much-needed hydration after the stressful move. For the next few days, place your plant in a spot with bright, indirect light, avoiding direct sun which can cause further stress. It is normal for a plant to show minor signs of 'transplant shock,' such as slight wilting, for a few days to a week. Hold off on fertilising for at least four to six weeks. The fresh potting mix contains plenty of nutrients, and adding more can 'burn' the sensitive, healing roots. Once you see new growth, you’ll know your plant has successfully settled into its new, more spacious home.