


The Allure of Upcycled Lighting
Before you begin, let's talk about why this project is so brilliant. First, it’s a masterclass in sustainable style. Instead of buying a new mass-produced lamp, you’re giving a new life to an old object, saving it from the landfill and adding a piece
with history and character to your space. Second, it’s incredibly budget-friendly. Designer floor lamps can cost a small fortune, but a vintage pot and a simple lamp-making kit deliver the same bespoke appeal for a fraction of the price. Finally, it’s uniquely yours. You get to choose the pot, the shade, and the finish, creating a one-of-a-kind lamp that perfectly matches your home's aesthetic, whether it's rustic, bohemian, or minimalist.
Gather Your Materials
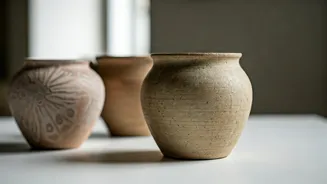
A successful project starts with good preparation. While the headline says 'instantly', taking 15 minutes to gather your supplies will make the process smooth and frustration-free. You will need: * **A Vintage Clay Pot:** Choose a large, sturdy pot suitable for a floor lamp. Terracotta, earthenware, or a glazed ceramic pot will work. Ensure it has a drainage hole or a base you can drill through. * **A Lamp-Making Kit:** These are available at hardware stores and online. A standard kit should include a socket, a harp (the wire frame that holds the shade), a threaded nipple (a short, hollow rod), nuts, washers, and a power cord. * **A Drill and a Masonry/Tile Drill Bit:** This is crucial. Using the wrong bit will crack your pot. Match the bit size to the threaded nipple in your lamp kit. * **A Lampshade:** Choose one that is proportional to your pot base. * **A Lightbulb:** Check your lamp kit for the recommended wattage. * **Optional:** Felt pads for the bottom to protect your floors, and spray paint if you wish to change the pot's colour.
Step 1: Prepare the Pot
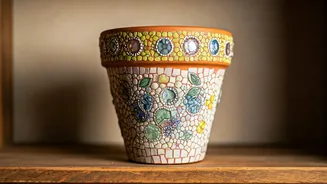
Your pot is the star of the show, so get it ready for its debut. First, clean it thoroughly inside and out with a stiff brush and water, removing any dirt or residue. Let it dry completely. Now for the most important part: drilling the hole for the electrical cord. If your pot already has a large enough drainage hole, you can skip this. If not, you’ll need to make one in the centre of the base. To prevent cracking, apply masking tape in an 'X' pattern over the spot you want to drill. This provides grip and reduces vibration. Set your drill to a low speed and apply gentle, steady pressure. Do not force it. Let the drill bit do the work. It’s wise to have a small cup of water nearby to periodically cool the drill bit. If you need to run the cord out the side instead of the bottom, you can drill a hole near the base in the same manner.
Step 2: Assemble the Electrics
This part may seem intimidating, but modern lamp kits are designed to be user-friendly. Always follow the specific instructions that came with your kit. Generally, the process is as follows: 1. Feed the end of the power cord through the hole you drilled in the pot, from the outside in. 2. Pull the cord all the way up through the top opening of the pot. 3. Thread the cord through the threaded nipple, a washer, and a nut. Secure this assembly in the top opening of the pot, creating the stable base for your socket. Tighten the nut from inside the pot to hold it firmly in place. 4. Follow the kit's instructions to attach the two wires of the cord to the corresponding screws on the socket. Typically, the smooth wire goes to the brass screw and the ribbed wire goes to the silver screw. 5. Once the wires are secure, snap the socket shell into place over the base. At this stage, you are holding a fully wired lamp base.
Step 3: The Finishing Touches
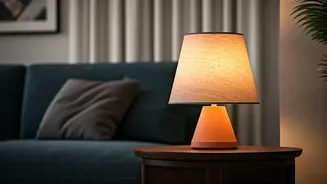
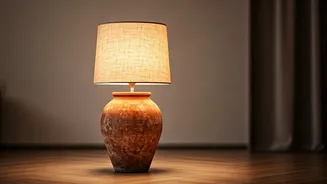
This is the final, satisfying step where your project truly becomes a lamp. Squeeze the two prongs of the lamp harp together and insert them into the two small sleeves on the socket base. They should click securely into place. Now, screw in your lightbulb. Place your chosen lampshade on top of the harp, letting the centre ring of the shade rest on the threaded post at the top. Secure it in place with the finial (the decorative cap) that came with your kit. Finally, place the felt pads on the bottom of the pot to prevent it from scratching your floor. Plug in your new lamp, switch it on, and step back to admire your handiwork. You've just created a chic, custom piece of furniture.