


Why You Should Compost
Composting is nature's recycling process. By managing it at home, you achieve several goals at once. First, you significantly reduce the amount of household waste sent to overflowing landfills. A family can cut its annual waste from 1,000 kg to just 100
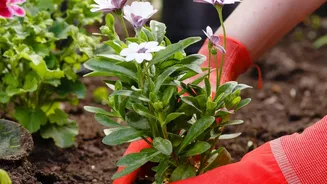
kg through composting and recycling. Second, you create a free, powerful, and all-natural fertiliser for your plants. This homemade compost improves soil structure, helping sandy soils retain water and breaking up heavy clay soils for better root growth. It also introduces beneficial microbes that protect plants from diseases and pests, reducing the need for chemical alternatives.
The Science Made Simple: 'Greens' and 'Browns'
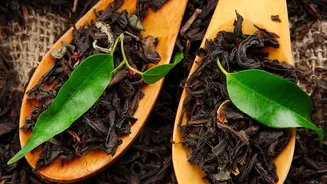
A healthy compost pile needs a balanced diet of two things: nitrogen-rich 'greens' and carbon-rich 'browns'. Getting this mix right is the most critical part of successful, odour-free composting. 'Greens' are your wet, fresh kitchen scraps. This includes all your vegetable peels, fruit scraps, and used tea leaves or coffee grounds. They provide the nitrogen that helps microorganisms multiply and heat up the pile. 'Browns' are dry, carbon-rich materials. Think of dried leaves, sawdust, crushed eggshells, shredded newspaper, or cardboard. These materials provide carbon for energy, absorb excess moisture, and ensure air can flow through the pile, which is crucial for preventing foul smells.
A Beginner-Friendly Method: The Bucket System
You don't need a large garden to start composting. A simple bucket method is perfect for apartments and balconies. All you need are two or three plastic buckets. Drill several holes in the sides and bottom of one or two buckets for aeration, leaving one bucket without holes to act as a base for collecting any liquid runoff (leachate). This setup is easy, contained, and highly effective for small-scale composting. Alternatively, a large terracotta pot or 'khamba' with drainage holes works just as well.
Your Step-by-Step Composting Guide
1. Create a Base: Start by adding a 2-inch layer of 'browns'—like dried leaves or cocopeat—at the bottom of your drilled bucket. This helps with drainage and aeration. 2. Add Your Kitchen Scraps: Add your daily vegetable peels, tea leaves, and other 'greens'. It helps to chop larger peels into smaller pieces, as this speeds up decomposition. 3. Layer with Browns: After adding your 'greens', always cover them with a layer of 'browns'. A good rule of thumb is to use roughly two to three parts browns for every one part greens by volume. This balance is key to avoiding smells and pests. 4. Keep It Moist: Your compost pile should feel like a wrung-out sponge—damp but not soaking wet. If it seems too dry, sprinkle a little water. If it's too wet and smelly, add more dry 'browns'. 5. Mix It Up: Every few days, use a small rake or stick to turn and mix the contents of the bucket. This introduces oxygen, which is vital for the decomposition process and prevents odours.
Important Dos and Don'ts
To ensure your compost remains healthy, there are a few items to avoid. Do not add any cooked or oily foods, meat, fish, or dairy products, as these can attract pests and create bad smells. Stick to raw vegetable and fruit waste. While tea leaves are excellent, make sure to remove any non-biodegradable parts of the tea bag, like staples or plastic-lined tags. Always remember to chop up larger scraps and cover every layer of fresh waste with dry leaves or cardboard.
Harvesting Your Black Gold
Patience is key. Composting can take anywhere from two to six months. You'll know your compost is ready when it has turned into a dark, crumbly material that looks and smells like rich, earthy soil. You shouldn't be able to recognise the original vegetable peels or tea leaves. The pile will have shrunk significantly, and it will no longer be warm in the center. To use it, simply sieve the finished compost to remove any larger, unfinished bits (which can go back into your active bin) and mix the fine, dark material into the soil of your potted plants or garden beds.