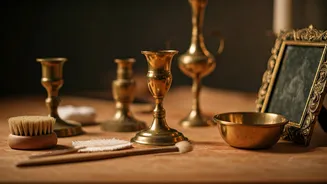


The Thrill of the Treasure Hunt
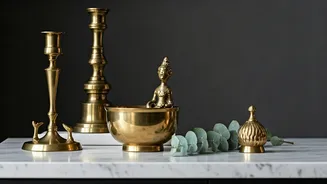
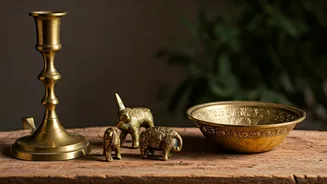
The first step is finding your treasure. Look beyond pristine antique shops. The real gems are often hidden in plain sight at your local Sunday market, ‘kabadiwala’ depot, or online thrift communities. Don't be deterred by a dark, tarnished surface; in fact,
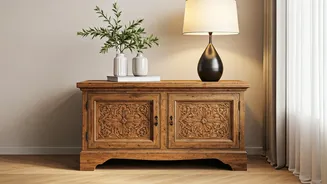
that's often a sign of true vintage character. Look for interesting shapes and solid construction. Common finds in India include old ‘urlis’, lamps, bells, tiffin boxes, and decorative plates. Focus on the potential of the item's form and silhouette, not its current state of shine.
Is It Really Brass? A Simple Test
Before you invest time and elbow grease, it’s crucial to confirm you have solid brass and not a brass-plated item. Plated items can be damaged by vigorous polishing, which can strip the thin brass layer away. The easiest way to check is with a simple magnet. Brass is a non-ferrous alloy, meaning it is not magnetic. If the magnet sticks strongly to your item, it's likely made of iron or steel with a thin brass plating. If the magnet doesn't stick at all, you've probably got solid brass and can proceed with confidence.
Step 1: The Basic Clean-Up
Every restoration project begins with a good wash. Before you tackle the tarnish, you need to remove years of accumulated dirt, dust, and grime. This simple step ensures your polishing efforts are more effective. Prepare a bowl of warm water with a few drops of mild dish soap. Using a soft cloth or a non-abrasive sponge, gently wash the entire surface of the brass item. For intricate carvings or crevices, an old, soft-bristled toothbrush works wonders. Rinse the item thoroughly with clean water and dry it completely with a soft towel. Never let brass air dry, as water spots can form and create new marks.
Step 2: DIY Magic with Kitchen Ingredients
For a natural and effective polish, your kitchen holds the key. The mild acid in lemon juice is perfect for breaking down the copper oxide that causes brass to tarnish.
Method 1: Lemon and Salt. Cut a lemon in half, sprinkle salt onto the cut side, and use it as a small scrubber. Rub it directly onto the brass surface, applying gentle pressure. The salt acts as a mild abrasive. For a less abrasive approach, you can create a paste using lemon juice and baking soda. Apply the paste with a soft cloth, let it sit for about 10-15 minutes, then rinse and dry thoroughly.
Method 2: Vinegar Paste. For tougher tarnish, mix equal parts salt and flour, then add enough white vinegar to form a thick paste. Coat the brass item with the paste and let it sit for up to an hour. The acid in the vinegar will work to dissolve the tarnish. Rinse it off completely and buff dry.
Step 3: For That Professional Gleam
Sometimes, a vintage piece has such heavy-duty tarnish that DIY methods aren't quite enough. In these cases, a commercial brass polish like Brasso can be your best friend. These products are specifically formulated to restore a brilliant shine. Always use them in a well-ventilated area and wear gloves to protect your hands. Apply a small amount of the polish to a clean, soft cloth and rub it onto the brass in a circular motion. You'll see the tarnish lifting onto the cloth. Continue until you've polished the entire piece, then use a separate clean cloth to buff it to a high shine.
Step 4: Protecting Your Polished Treasure
After all your hard work, you’ll want to keep your brass looking brilliant for as long as possible. To protect the shine and slow down future tarnishing, you can apply a protective coating. A thin, even coat of clear lacquer spray is a durable option that seals the surface from oxygen. Alternatively, for a less permanent but effective solution, you can apply a thin layer of carnauba wax or museum wax. Simply rub it on with a soft cloth and buff it to a gentle sheen. This creates a barrier that helps preserve the lustre of your newly restored piece.