


The Allure of the Pink Anthurium
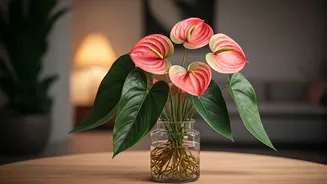
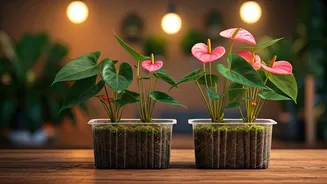
Before we get our hands dirty, let’s appreciate the prize. The pink anthurium, or *Anthurium andraeanum*, is a tropical stunner prized for its vibrant, waxy “flowers,” which are actually modified leaves called spathes. These can last for months, providing
a continuous splash of color. They signal a certain level of plant-parent prowess because, while not terribly difficult, they do appreciate specific conditions. Successfully propagating them is the next level—it’s a sustainable way to fill your home with beauty and proves you’ve truly mastered its care. This is where the gardening clout comes from: it's a visible, beautiful mark of your skill.
Gather Your Propagation Toolkit
Success starts with preparation. You don’t need a science lab, but having the right tools makes the process cleaner, safer, and more likely to succeed. Before you begin, gather these essentials: * **A Healthy Mother Plant:** Choose a mature, bushy anthurium with multiple stems or visible nodes. * **Sharp, Sterile Pruners or Scissors:** Sterilize your cutting tool with rubbing alcohol or a bleach solution (1 part bleach to 9 parts water) to prevent the spread of disease. * **Small Pots with Drainage:** 2-4 inch pots are perfect for new plantlets. * **Fresh Potting Mix:** A chunky, well-draining aroid mix is ideal. You can buy one or make your own by combining orchid bark, perlite, and peat moss or coco coir. * **Rooting Hormone (Optional):** While not strictly necessary, a dab of rooting hormone on cuttings can speed up the process and increase success rates. * **A Clear Jar or Glass (for water propagation):** If you choose this method, make sure the vessel is clean.
Method 1: Division (The Easiest Route)
If your anthurium has become a dense, multi-stemmed clump, division is your best friend. It’s the least stressful method for both you and the plant, providing you with a fully-formed, albeit smaller, plant right away. First, gently remove the entire plant from its pot. Shake off the excess soil so you can clearly see the root system and where the different crowns or stems emerge from the base. Look for natural separation points—clumps of stems that have their own root systems. Using your hands, gently tease these sections apart. If they are tightly bound, you can use your sterile pruners to make clean cuts through the root ball to separate them. Ensure each new division has a healthy portion of both roots and foliage. Pot each new section into its own container with fresh soil, water it thoroughly, and you’re done. It's that simple.
Method 2: Stem Cuttings (For Maximum Clout)
This method feels more surgical and is perfect for leggier plants or for creating multiple new plants from a single stem. Look closely at your anthurium’s stems. You'll see little nubs or bumps along them—these are aerial roots and nodes. A node is where a leaf grows from the stem, and it's where new roots will sprout. Using your sterile pruners, take a cutting that is at least 4-6 inches long and includes at least two or three nodes. You can take a “top cutting” (the very end of a stem) or a “mid cutting” (a section from the middle of a stem). Remove the leaf from the lowest node on your cutting, as this is the part that will go into the rooting medium. Dip the cut end in rooting hormone if you're using it.
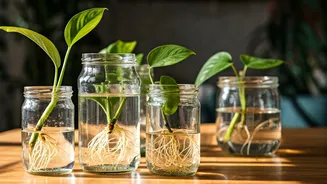
Rooting Your Cuttings: Water vs. Soil
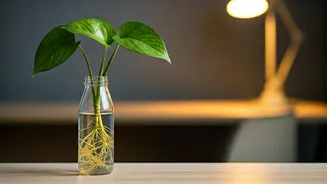
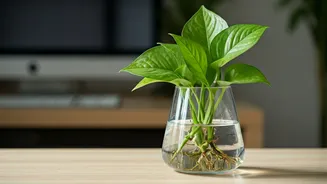
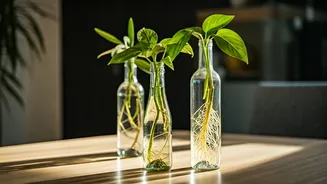
You have two primary options for rooting your new cuttings. **Water Propagation:** Simply place the cutting in a jar of water, ensuring the node where you removed the leaf is submerged but the remaining leaves are not. Place it in a spot with bright, indirect light and change the water every few days to keep it fresh. You’ll be able to watch the roots grow, which is incredibly satisfying. Once the roots are 1-2 inches long, you can transfer the cutting to soil. **Soil Propagation:** Plant the cutting directly into a small pot filled with a moist, well-draining potting mix. Make a hole with a pencil, place the cutting inside, and gently firm the soil around it. To create a humid micro-environment that encourages rooting, you can place a clear plastic bag over the pot. Keep the soil consistently moist but not waterlogged. This method often results in stronger, more robust roots that are already acclimated to soil.
Aftercare and Patience
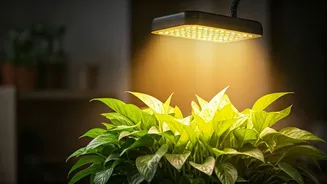
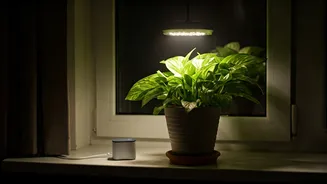
Whether you divided or took cuttings, your new propagations need a little TLC. Place them in a location with bright, indirect light—never direct sun, which will scorch the leaves. They love humidity, so grouping them together, placing them on a pebble tray, or running a humidifier nearby will help them thrive. Avoid fertilizing until you see strong signs of new growth, like a new leaf unfurling. This usually takes a few weeks to a couple of months. The first time you see a tiny, new pink spathe emerge from a plant you grew yourself, you'll understand the ultimate satisfaction of propagation.