


What Exactly is Worm Composting?
Worm composting, or vermicomposting, is the process of using specific types of worms to break down organic food waste. Unlike a hot compost pile in a backyard, a worm bin is a self-contained ecosystem that operates efficiently at room temperature, making
it perfect for apartments, balconies, or under-the-sink storage. The worms, typically Red Wigglers, are voracious eaters that consume food scraps and bedding material. What they leave behind are castings—a polite term for worm manure—which is an exceptionally nutrient-rich and biologically active soil amendment. This process is faster than traditional composting and produces no foul odors when managed correctly.
Setting Up Your Indoor Worm Farm
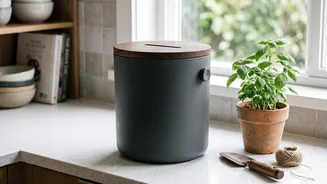
Getting started is simpler than you might think. You'll need a bin, bedding, water, and worms. You can purchase a ready-made tiered system or easily build your own from two opaque plastic totes. The bin needs air holes for ventilation and drainage holes at the bottom. The bedding is the worms' habitat. Shredded black-and-white newspaper, plain cardboard, or coconut coir are excellent choices. Moisten the bedding until it feels like a wrung-out sponge—damp, but not soggy. Fill your bin about three-quarters full with this fluffy bedding. Finally, introduce about a pound of Red Wiggler worms (Eisenia fetida), which are specifically suited for bin life and can be ordered online. Let them acclimate for a day before you start feeding.
A Gourmet Diet for Your Worms
Your worms will feast on a wide variety of kitchen waste. Their favorites include fruit and vegetable scraps (like apple cores, melon rinds, and lettuce), coffee grounds, tea leaves, and crushed eggshells. To help them eat faster, chop scraps into smaller pieces. Always bury the food beneath a layer of bedding to avoid attracting fruit flies and to keep the environment dark and welcoming for the worms. There are, however, some foods to avoid. Steer clear of meat, dairy products, oily foods, and excessive salt, as these can create odors and harm your worms. Highly acidic foods like citrus and onions should be added only in small amounts, as they can alter the bin's pH balance.
Troubleshooting for a Smooth Operation
A well-maintained worm bin is trouble-free, but occasionally issues can arise. If your bin develops an unpleasant odor, it’s often a sign of anaerobic conditions, meaning there's too much food or moisture and not enough air. The fix is usually to stop feeding for a week and add more dry, shredded paper bedding to absorb excess moisture and restore balance. If you see flies, it means food was left exposed. Simply ensure you're burying new scraps completely under the bedding. Maintaining a moisture level similar to a damp sponge is the key to preventing most common problems and keeping the ecosystem healthy.
Harvesting Your 'Black Gold'
After a few months, you'll notice the original bedding has transformed into a dark, crumbly, soil-like material. This is vermicompost, rich with worm castings, and it's time to harvest. One of the easiest methods is to 'migrate and separate'. Push all the finished compost to one side of the bin and add fresh, moist bedding and new food to the empty side. Over the next couple of weeks, the worms will migrate to the new food source, leaving behind a batch of pure, worm-free compost for you to collect and use. This finished product is a treasure for any plant owner.
The Benefits for Your Plants
Worm castings are one of the best natural fertilizers you can give your plants. They are packed with essential nutrients like nitrogen, phosphorus, and potassium in a slow-release form that won't burn plant roots. The castings are also teeming with beneficial microbes that improve soil structure, help retain water, and can even help suppress plant diseases. You can mix the harvested compost into potting soil for new plants, sprinkle it on top of the soil of existing houseplants as a top dressing, or even brew it into a 'compost tea' to use as a liquid fertilizer.