






The Art of In-Flight Accessibility
The frustration of inaccessible snacks is a symptom of a larger packing problem. A well-packed carry-on isn’t just about fitting everything in; it's about being able to retrieve what you need, when you need it, without unpacking your entire life in the
aisle. A successful flight, whether it's a short hop or a long-haul journey, is made infinitely more comfortable with easy access to your essentials. This means thinking about your bag not as a single container, but as a mobile convenience station. According to the Transportation Security Administration (TSA), solid food items like sandwiches, fruit, and granola bars are generally permissible in both carry-on and checked bags. This makes packing your own snacks an easy way to improve your travel day. The key is ensuring those snacks don't get lost in the shuffle.
Choose Your Bag Wisely
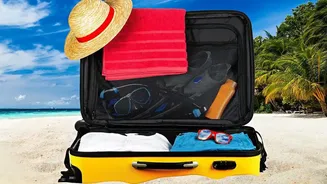
Your ability to access in-flight items starts with the bag you choose. While a simple tote might seem easy, it often becomes a black hole. A backpack with multiple compartments or a rolling carry-on with dedicated front pockets is far more effective. Look for features that promote organization, such as exterior pockets, top-access compartments, and internal dividers. A bag with a padded front section is great for electronics like a laptop or tablet, while smaller external zip pockets are perfect for your passport, phone, and a small packet of biscuits. Soft-shell luggage often provides more flexibility and external pockets for these quick-grab items. Some modern hard-shell bags now also incorporate front-pocket compartments to offer the best of both worlds—protection and access.
Master the Packing Zone System
Instead of just throwing things in, divide your carry-on into zones based on when you'll need the items. Create an “in-flight” zone, a “destination” zone, and an „mergency” zone. The in-flight zone should contain everything you’ll want during the flight: snacks, headphones, a charger, a book, and a water bottle. These items should be packed last, placed in the most accessible part of your bag, like a front pocket or at the very top of the main compartment. The destination zone includes things you won't need until you land, such as toiletries, a change of clothes, or hotel confirmation printouts. These can form the base of your bag. The emergency zone is for items like medications or copies of important documents, which should be kept in a secure but still easily reachable interior pocket.
Beyond Snacks: Organizing All Essentials
The same logic that applies to snacks works for all your in-flight essentials. Use smaller pouches or packing cubes to group like items together. Have one small bag for your charging cables and power bank, another for basic toiletries like lip balm and hand sanitiser, and a third for your entertainment, like earbuds. This not only keeps your main bag tidy but also allows you to pull out just one small pouch instead of rummaging for individual items. Travel organizers are a game-changer for keeping small things from getting lost. This strategy ensures that when you need your headphones to drown out a snoring neighbour, you aren't wrestling with a tangled mess of cables and stray wrappers.
The Pre-Boarding Final Check
One of the most effective travel habits is to do a final bag check at the gate before you board. You’ve likely been through security and may have bought a drink or another snack. Instead of just shoving it in, take a minute to reorganize. Place your water bottle in a side pocket. Put your boarding pass and ID away in a secure but accessible spot. Most importantly, ensure the items for your 'in-flight' zone—your snacks, book, and headphones—are right at the top or in an easy-access pocket. This five-minute ritual saves you the hassle of trying to rearrange your bag while wedged into your seat as other passengers try to get past. It’s the final step to ensuring a smooth, well-fed, and comfortable journey from takeoff to touchdown.