


The Hunt for Hidden Treasure
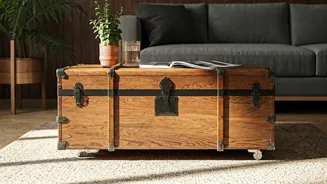
The first step is finding the right chest. This is a journey of discovery, so be patient. Explore local flea markets, antique shops, and even online marketplaces. Look beyond any surface-level dust or peeling varnish and focus on the fundamentals: solid
construction and good bones. Hardwoods like oak, teak, or mahogany are incredibly durable. Check for woodworm (small holes), water damage (dark stains or warping), and a musty smell that could indicate mould. Most importantly, consider the size. Measure your living room space and the height of your sofa's seats. An ideal coffee table is roughly the same height as your sofa cushions or a few inches lower. A chest that’s too tall or too low will feel awkward, so don't be afraid to bring a measuring tape with you.
Preparation is Everything
Once you have your chest, resist the urge to immediately start painting. Proper preparation is the difference between a professional-looking finish and a DIY disaster. Start by giving it a thorough cleaning. A simple solution of mild soap and warm water is usually sufficient to remove decades of grime. Use a soft cloth and avoid soaking the wood. If the chest has intricate carvings, an old toothbrush can help get into the nooks and crannies. Let it dry completely. Next, assess the surface. If the old varnish is flaking, you'll need to sand it down. Start with a medium-grit sandpaper (around 120-grit) and finish with a fine-grit (220-grit) for a smooth surface. Always sand in the direction of the wood grain. If you're planning to paint, a light sanding is all that’s needed to help the primer adhere. Fill any unwanted holes or deep scratches with wood filler, then sand it smooth once it’s dry.
Choosing a Minimalist Finish
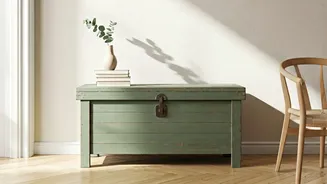
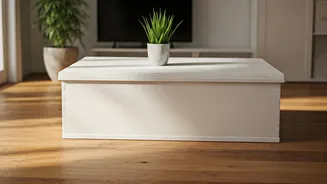
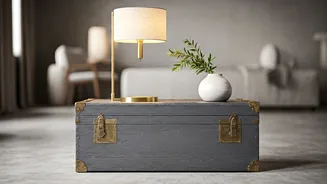
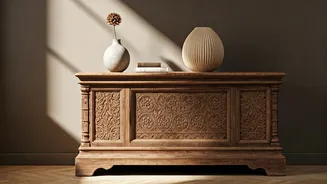
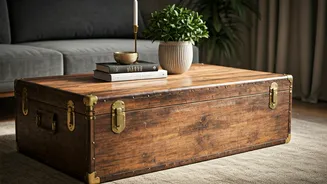
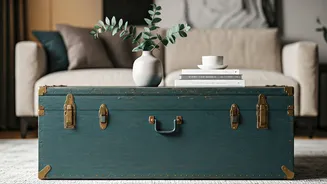
This is where your creative vision comes to life. For a true minimalist aesthetic, your choice of finish is crucial. Painting is a popular option for unifying the piece and covering imperfections. Opt for neutral, sophisticated colours like charcoal grey, deep navy, creamy white, or a muted sage green. A matte or chalk paint finish offers a soft, contemporary look that minimises shine. For the best result, apply a coat of primer first, followed by two thin coats of your chosen colour, allowing each coat to dry completely. If the wood underneath is beautiful, don't hide it! You can enhance the natural grain with a stain or a wax. A dark walnut stain can lend a rich, moody feel, while a clear or white-toned wax can protect the wood while giving it a soft, natural sheen. This approach celebrates the material itself, which is a core tenet of minimalist design.
Functional and Final Touches
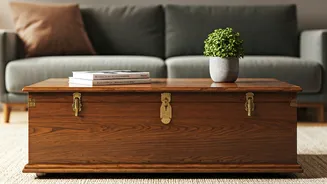
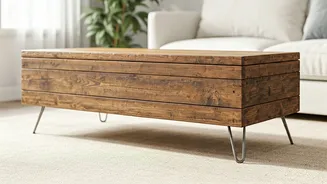
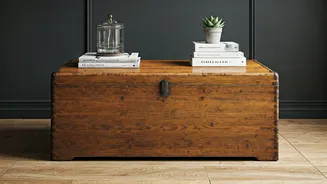
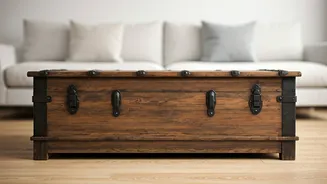
A few final details can elevate your project. First, consider the hardware. You can clean and polish the original handles and hinges to restore their former glory, or you can replace them with modern, minimalist hardware for a clean contrast. Sleek, simple pulls in black metal or brushed brass work beautifully. Next, height. If your chest is too low, you can add feet. Simple, hairpin-style metal legs or short, tapered wooden legs can be screwed into the base to lift it to the perfect coffee table height. Finally, protect your new surface. A coffee table needs to withstand mugs, books, and the occasional spill. Apply several coats of a durable clear polyurethane sealer, especially on the top. For ultimate protection and a very modern look, you could even have a piece of glass cut to fit the top.