

The Challenge of Irregular Shapes
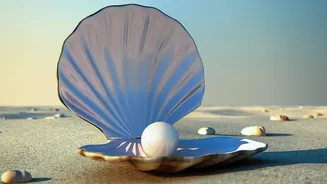
The very thing that makes shell planters so attractive—their whimsical, organic shape—is also what makes them a watering nightmare. Unlike standard cylindrical pots, shell planters often have wide, shallow openings, off-center cavities, and an unstable
base. This design makes it easy to pour too quickly, causing water and soil to spill over the sides. The shallow soil depth also means they can dry out quickly, tempting you to overwater and make even more of a mess. Understanding these built-in challenges is the first step toward solving them. The goal is to deliver water slowly and directly to the roots without disturbing the soil or tipping the planter.
Choose Your Planter Wisely
Your success starts at the store. When selecting a shell planter, look for features that will make your life easier. First, check for a drainage hole. This is non-negotiable for plant health, as it prevents water from pooling and causing root rot. A pot with a drainage hole and a matching saucer is the ideal combination. Some modern shell planters come with a built-in reservoir, making them self-watering. These designs allow the plant to draw water from the bottom as needed, reducing the frequency of watering and the risk of spills. Also, consider the opening. A shell with a slightly deeper, more centered planting area will be more forgiving than one that is very wide and shallow.
The Right Tools for the Job
Your standard watering can might not be the best tool for this delicate task. For maximum control, a watering can with a very long, narrow spout is essential. This allows you to get right to the soil level, bypassing the leaves and directing a gentle stream of water exactly where it needs to go. For very small or crowded shell planters, a simple squeeze bottle provides pinpoint accuracy and prevents you from dislodging tiny plants or soil. Another invaluable tool is a soil moisture meter. These inexpensive gadgets tell you exactly when your plant needs water, helping you avoid the guesswork that often leads to overwatering and spills.
Mastering Spill-Free Technique
The best technique is to water low and slow. Place the narrow spout of your watering can directly on the soil and apply water gradually, allowing it to absorb instead of run off. Water in the morning so the plant has all day to absorb moisture, reducing the risk of overnight root rot. For a completely mess-free alternative, try bottom watering. If your planter has a drainage hole, place it in a sink or tray filled with an inch of water. Let it sit for 15-20 minutes, allowing the soil to soak up moisture through the drainage hole. Once the top of the soil feels damp, remove the planter and let any excess water drain away before returning it to its spot.
Creative Solutions and Quick Fixes
If you're still struggling, there are a few other tricks you can try. One simple hack is to place a few ice cubes on the soil. They will melt slowly, delivering a gradual supply of water that is easily absorbed without overflowing the planter. For planters without drainage, using an inner plastic pot that you can remove for watering is a great solution. You simply take the liner pot to the sink, water it thoroughly, let it drain completely, and then place it back in the decorative shell. This gives you the best of both worlds: the beauty of the shell planter and the practicality of a pot with proper drainage.