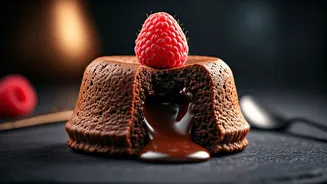


The Secret Weapon: Molten Chocolate Magic
Let’s be honest. When you think of impressing someone with dessert, your mind might go to a multi-layered cake that takes all day or a box of artisanal chocolates that costs a small fortune. Both are valid, but neither is fast. The true secret weapon,
the fastest way to achieve that wide-eyed, spoon-dropping reaction, is the molten chocolate lava cake. Why? Because it operates on a brilliant deception. It looks and tastes like something you’d only get at a high-end restaurant, a dessert that screams culinary expertise. It’s rich, decadent, and has that dramatic, oozy centre. But the reality is that it’s one of the simplest and quickest desserts you can make. It relies on a few key ingredients and one crucial technique: underbaking. It's the perfect combination of high reward and low effort.
Your Shopping List (It's Short)
The beauty of this recipe is its simplicity. You likely have most of these ingredients already. But because the list is so short, the quality of each component really shines through. Don’t skimp on the chocolate! Here's what you'll need: • **Good-Quality Dark Chocolate:** This is the star. Look for something between 60% and 75% cacao. A good Indian brand like Amul Dark Chocolate or Mason & Co. works wonderfully. Avoid milk chocolate; you need the intensity. • **Unsalted Butter:** This adds richness and structure. • **Eggs:** Two whole eggs and two egg yolks. They provide the lift and the custard-like texture. • **Caster Sugar:** Just enough to balance the bitterness of the chocolate. • **Plain Flour (Maida):** A very small amount, just to hold things together. • **A Pinch of Salt:** To enhance the chocolate flavour. That's it. No fancy powders, no rare extracts. Just pure, simple ingredients that come together to create something magical.
The Prep: Less Than 20 Minutes
The active preparation time for these cakes is shockingly brief. You can have them ready to bake in the time it takes for your oven to preheat. You’ll need four ramekins, buttered and dusted with either flour or cocoa powder to prevent sticking. 1. **Preheat & Prep:** Set your oven to 200°C (400°F). Generously butter and flour your ramekins. This is a crucial step for getting the cakes out cleanly. 2. **Melt:** In a heatproof bowl set over a saucepan of simmering water (or in the microwave in short bursts), gently melt the dark chocolate and butter together until smooth. Set aside to cool slightly. 3. **Whisk:** In a separate bowl, use an electric mixer or a whisk and some elbow grease to beat the eggs, egg yolks, and sugar together. You’re looking for the mixture to become pale, thick, and almost doubled in volume. This can take about 5-7 minutes. 4. **Combine:** Gently fold the slightly cooled chocolate mixture into the egg mixture. Be careful not to deflate all the air you just whisked in. Finally, sift in the flour and salt and fold just until combined. Do not overmix.
The Bake: The 12-Minute Countdown
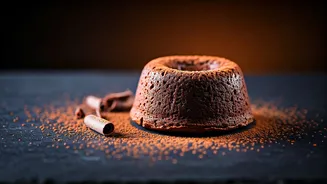
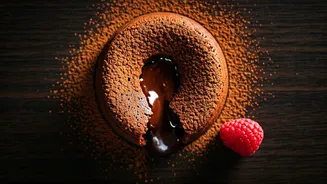
This is where the magic happens, and timing is everything. Divide the batter evenly among your prepared ramekins. Place them on a baking sheet and slide them into the preheated oven. Bake for 10 to 14 minutes. The exact time will depend on your oven. You'll know they are ready when the edges of the cakes are firm and set, but the centre still looks soft and has a slight wobble when you gently shake the pan. This wobble is the promise of the molten core inside. If the top looks completely dry and firm, you’ve likely overbaked it into a (still delicious) small chocolate cake, but you’ll have lost the lava. Once baked, let them rest for just one minute. Then, carefully run a thin knife around the edge of each ramekin. Place a dessert plate on top and, with a confident flick of the wrist, invert the cake onto the plate. Lift the ramekin, and behold your creation.
The Grand Finale: Plating with Flair
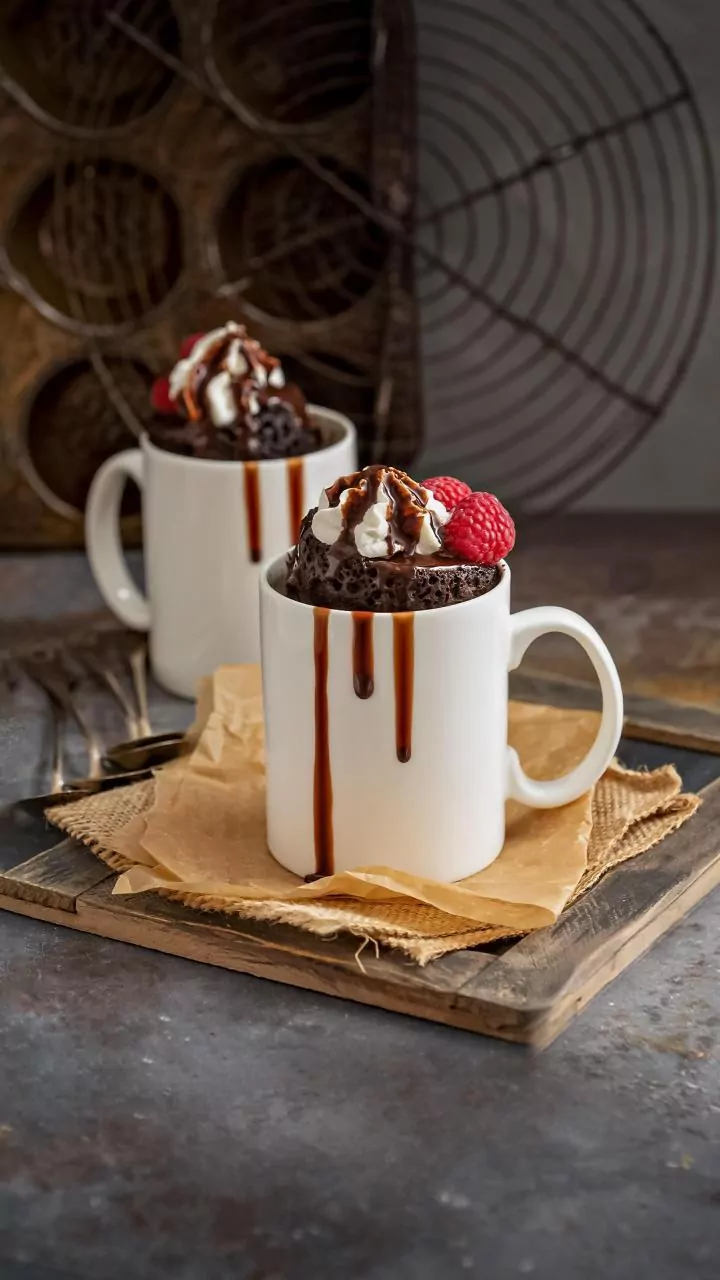
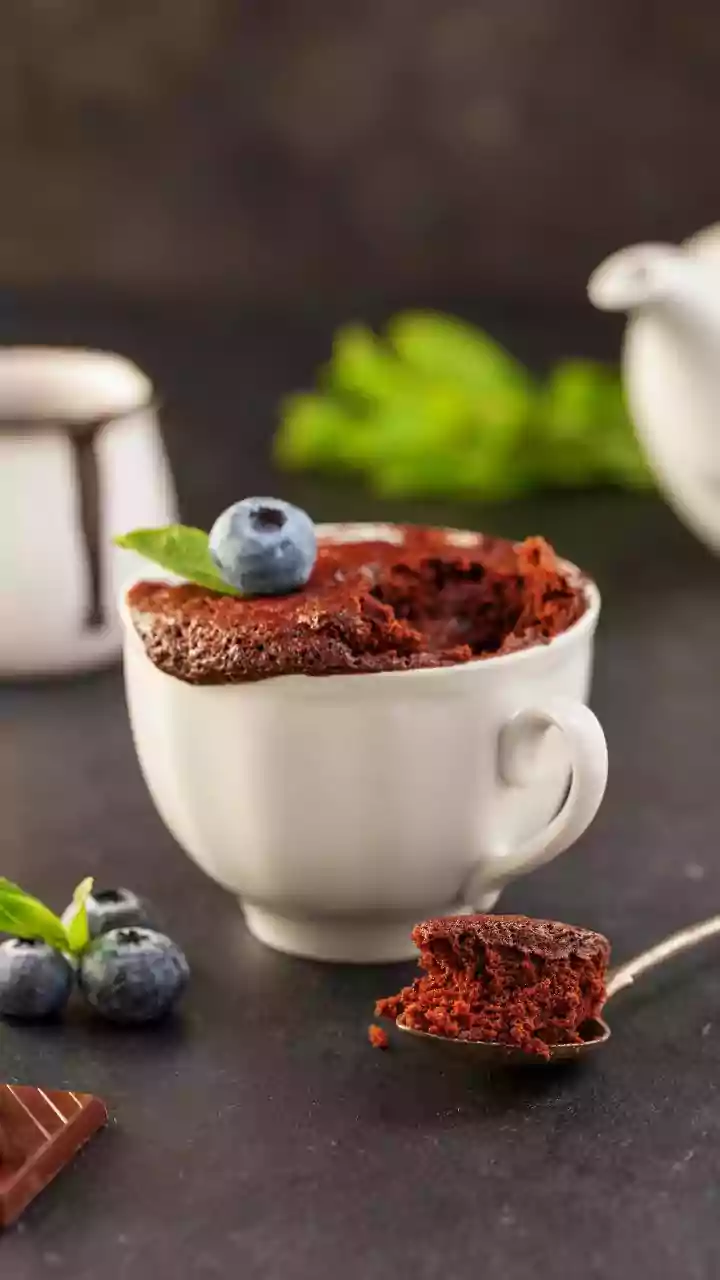
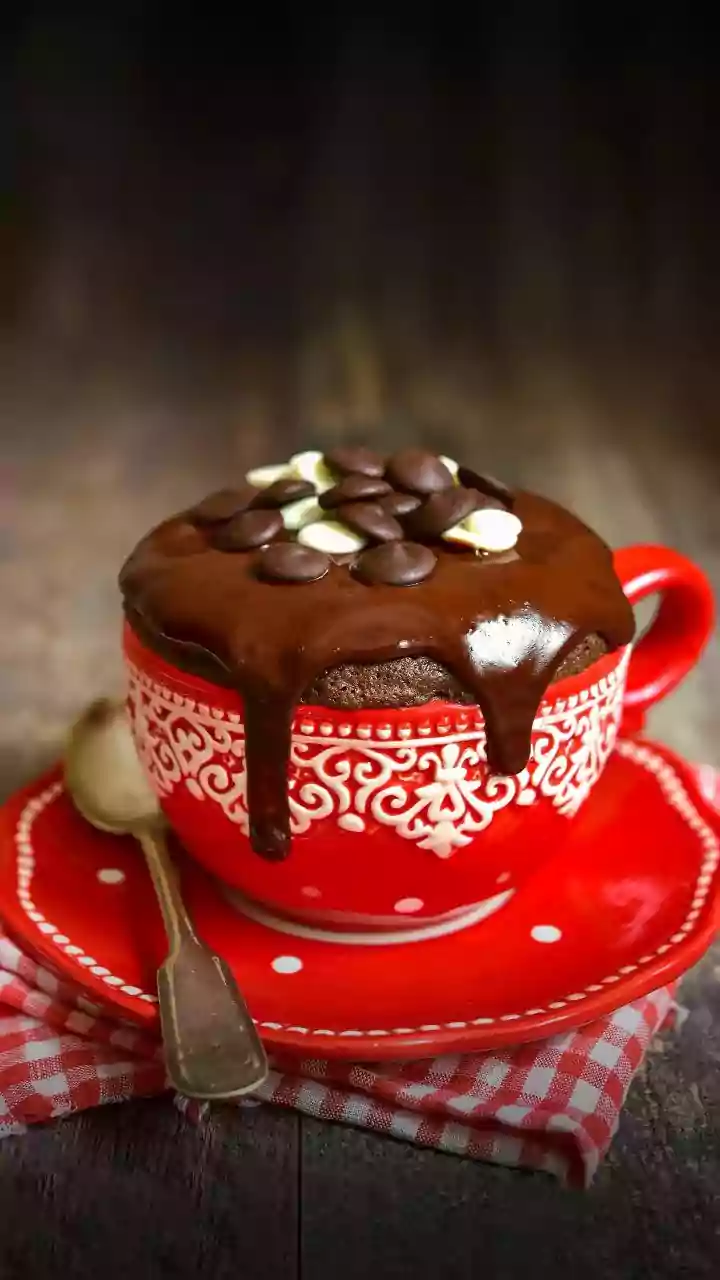
The cake itself is the main event, but a little presentation goes a long way. You don’t need to be a pastry chef to add a touch of elegance. A simple dusting of icing sugar or cocoa powder over the top creates a beautiful contrast. A few fresh berries (raspberries or strawberries are classic partners for chocolate) on the side add a pop of colour and a touch of acidity to cut through the richness. For the ultimate indulgence, serve the warm cake alongside a small scoop of vanilla bean ice cream or a dollop of fresh whipped cream. The contrast between the warm, gooey cake and the cool creaminess of the ice cream is a guaranteed showstopper. The first spoonful, when that river of liquid chocolate flows out, is the moment you’ll know you’ve succeeded.