






The Must-Have (But Basic) Tools
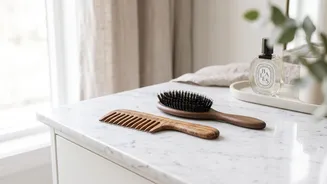
A professional-looking blowout doesn't require a professional's budget. All you truly need are three key items: a hairdryer with a concentrator nozzle, a medium-sized round brush, and a few clips for sectioning. The nozzle is non-negotiable; it focuses
the airflow, giving you control to smooth the hair cuticle and direct heat precisely where you need it. For a bob, the size of your round brush matters. A medium barrel will give you the perfect amount of lift and bend without creating tight curls. Ceramic or boar bristle brushes are excellent choices for distributing heat evenly and reducing frizz.
Prep Your Hair for Success
Starting with the right foundation is crucial. It’s best to work with damp, not soaking wet, hair. After washing, gently towel-dry your hair until it's about 80% dry. Applying products to sopping wet hair dilutes their effectiveness and prolongs drying time. Before any heat touches your hair, apply a heat protectant spray or serum from roots to ends. For added lift, a volumizing mousse or root-lifting spray applied directly to the scalp can make a significant difference, especially for fine or straight hair that tends to fall flat. Comb the products through to ensure even distribution before you begin drying.
Sectioning Is Your Secret Weapon
It might seem like an extra step, but sectioning is the key to an even, controlled blowout. Trying to dry your entire head of hair at once is inefficient and often leads to a flat top and frizzy, untamed ends. Divide your hair into manageable sections. A simple method is to create a top and bottom section, clipping the top hair out of the way. You can also divide it into four parts: two at the back and two at the front. By working on one small area at a time, you ensure every layer is properly dried and shaped, which is essential for showing off the dimension of a layered bob.
Master the Root-Lifting Technique
Volume starts at the root. Take a small subsection of hair from the bottom layer you’ve left down. Place your round brush underneath the section, right at the scalp. As you turn on the dryer, pull the brush upwards and away from your head, maintaining gentle tension. Follow the brush with the hairdryer's nozzle, keeping it a few inches away and pointed down the hair shaft to smooth the cuticle and prevent frizz. For maximum lift at the crown, try 'over-directing' the hair—pulling sections up and forward, in the opposite direction they naturally fall. This simple motion forces the roots to stand up, creating lasting volume.
Shape the Ends and Define Layers
Once the root of a section is dry and lifted, move the brush down the hair shaft toward the ends. To achieve that classic, polished bob shape, rotate your wrist to roll the brush under as you dry the ends. This creates a soft, inward curve that enhances the cut's shape. The beauty of a layered bob is its built-in texture, and this technique helps each layer fall beautifully. Work your way through all the bottom sections before releasing the top and repeating the process. The top layer is the most visible, so take your time here to ensure it's smooth and perfectly shaped.
Lock It In with a Cool Finish
Don't skip the final step: the cool shot. Once a section is dry and shaped, press the cool shot button on your hairdryer for a few seconds while the hair is still wrapped around the brush. Heat shapes the hair, but cool air sets the style in place. Skipping this can cause the volume and bend you just created to fall flat within an hour. After you've finished all sections, you can gently tousle your hair with your fingers. If you need extra hold, a light mist of a flexible hairspray or a texturizing spray can add definition and ensure your fresh blowout lasts all day.