


What Exactly Are Microgreens?
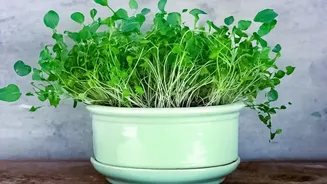
Microgreens are not to be confused with sprouts, which are germinated seeds grown entirely in water. Instead, microgreens are the young seedlings of vegetables and herbs, harvested just after their first true leaves appear. Typically grown in a shallow
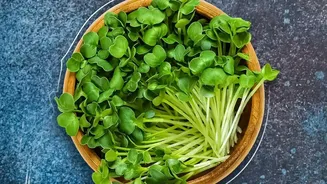
layer of soil or on a growing mat, they are harvested when they are just a few inches tall, usually within one to three weeks of planting. What they lack in size, they make up for in intensity. Research has shown that microgreens can pack a serious nutritional punch, containing significantly higher concentrations of vitamins and nutrients than their fully grown counterparts. They also offer a burst of concentrated flavour, from the peppery spice of radish to the mild sweetness of broccoli.
Gathering Your Simple Supplies
You don't need a green thumb or expensive equipment to start your windowsill farm. In fact, you may already have most of what you need. The basic materials include shallow trays, a growing medium, seeds, and water. For trays, recycled plastic takeout containers, berry clamshells, or foil baking trays work perfectly; just be sure to poke a few drainage holes in the bottom. For the growing medium, a simple potting mix or seed-starting soil is ideal. Alternatively, you can use soil-free options like coconut coir or hemp growing mats. You’ll also want a spray bottle for gentle watering and, of course, your chosen seeds. Many companies sell specific microgreen seed mixes, but any standard vegetable or herb seeds with edible leaves will work.
Your Step-by-Step Growing Guide
Once your materials are ready, the process is straightforward. First, fill your tray with about an inch of pre-moistened potting mix, making sure it’s damp like a wrung-out sponge but not waterlogged. Next, sprinkle your seeds evenly and densely across the surface—they should be close but not overlapping. Lightly press them into the soil and cover with a very thin layer of additional soil. Mist the surface well with your spray bottle and cover the tray with a lid or another tray to create a dark, humid environment for germination. Check on your seeds daily, misting to keep them moist. After a few days, you'll see sprouts emerge. At this point, remove the cover and move the tray to your sunniest windowsill.
Achieving a Continuous Harvest
The key to a truly continuous supply of fresh greens is staggered planting. Since most microgreens are ready to harvest in 7 to 21 days, you can create a cycle that ensures you always have a tray ready for snipping. The method is simple: start a new tray of seeds every few days or once a week. By the time you finish harvesting your first tray, the next one will be ready to take its place. This rotation transforms a one-time project into a sustainable source of fresh produce. You can use multiple small containers or one larger tray divided into sections to manage your planting schedule. Once a crop is harvested, you can often reuse the soil by removing the old roots, tilling the soil with a fork, and adding fresh seeds.
Harvesting and Enjoying Your Greens
Your microgreens are ready for harvest when they are about two inches tall and have developed their first set of “true leaves,” which appear after the initial “seed leaves.” This usually takes about one to three weeks. To harvest, use a clean pair of scissors or a sharp knife to cut the stems just above the soil line. It’s best to harvest them right before you plan to use them to maximize their flavour and nutritional content. Give them a gentle rinse before enjoying. Their uses are endless: toss them into salads, pile them onto sandwiches and tacos, blend them into smoothies, or use them as a beautiful and tasty garnish for soups, pizzas, and main dishes.