





Gather Your Simple Supplies
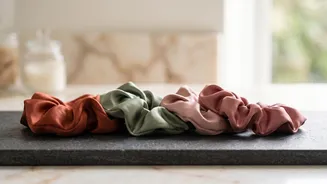
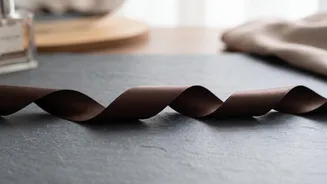
Before you begin, you'll only need a few basic items. First, choose your ribbon. Satin, grosgrain, or velvet ribbons work beautifully. Satin offers a sleek, shiny finish, while grosgrain provides more grip. For a standard braid, a ribbon that is about
a half-inch wide is a great starting point. You will want it to be a bit longer than the full length of your hair to ensure you have enough to tie it off at the end. You will also need a hairbrush, a comb for sectioning, and a couple of clear elastics or hair ties. A bobby pin that matches your hair colour can also be very helpful for securing the ribbon at the start.
Prepare Your Hair
For the best results, start with hair that is brushed and free of tangles. While this style works on freshly washed hair, it often holds even better on second-day hair, which has a bit more texture and grip. If your hair is very fine or silky, you might consider applying a light-hold mousse or a texturizing spray to prevent the ribbon from slipping. Decide where you want your braid to sit—a low ponytail at the nape of your neck is a classic and easy option for beginners. Gather your hair into a loose ponytail and secure it with one of the hair ties.
Anchor the Ribbon
The key to a neat ribbon braid is securing the ribbon firmly before you start weaving. One of the easiest methods is to tie the ribbon directly onto the hair tie at the base of your ponytail. Another popular technique involves folding the ribbon in half and placing the midpoint of the ribbon at the top of your ponytail base, underneath the hair. You can then slide a bobby pin through the loop of the ribbon and into the base of the ponytail to anchor it discreetly. This will leave you with two ribbon strands hanging down, ready to be incorporated into the braid.
The Weaving Technique
Now for the fun part. Divide your ponytail into three equal sections of hair. Take one of the ribbon strands and combine it with the left section of hair. Take the other ribbon strand and combine it with the right section. The middle section will be just hair. You now have three strands to work with: left hair plus ribbon, middle hair, and right hair plus ribbon. Begin a standard three-strand braid. Cross the right section over the middle section. Then, cross the left section over the new middle section. As you braid, try to keep the ribbon visible on top of the hair sections. Continue this simple 'over, over' pattern until you reach the end of your hair.
Secure and Finish Your Braid
Once you've braided to the end, secure it with a clear elastic. You should have some extra length from your ribbons. You can tie these ends into a simple knot or a pretty bow to cover the elastic, which provides a polished and intentional finish. For a fuller, more romantic look, you can gently pull on the edges of the braid—a technique known as 'pancaking'—to make it look thicker and more voluminous. A light mist of hairspray can help set the style and tame any flyaways, ensuring your ribbon braid looks great all day long.
Try Some Creative Variations
Once you've mastered the basic three-strand ribbon braid, the possibilities are endless. You can incorporate this technique into nearly any type of braid. Try it with a French braid by starting at the crown of your head and weaving the ribbon in as you add new sections of hair. A Dutch braid, where the sections are crossed under instead of over, makes the ribbon pop even more. For a more intricate look, try a four-strand braid using the ribbon as the fourth strand. You can also play with different ribbon textures and colours to match an outfit or celebrate a festive occasion.