


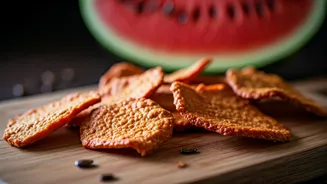


More Than Just Compost
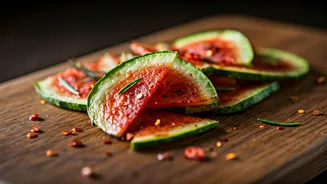
Before you dismiss watermelon rind as flavourless scraps, consider what you're throwing away. The rind—the firm, white part between the pink flesh and the tough green skin—is not only edible but also surprisingly nutritious. It’s packed with citrulline,
an amino acid that may improve blood flow and heart health. More importantly for our purposes, it has a fantastic, cucumber-like mildness and a firm texture that transforms beautifully when cooked. In many parts of the world, particularly in the Southern US and parts of Asia, pickling or stewing watermelon rind is a long-standing tradition. By turning it into crisps, we’re simply giving this old-school, no-waste philosophy a modern, snackable twist.
Gather Your Ingredients and Tools
This recipe is incredibly flexible, so feel free to experiment with spices. The key is thin, uniform slices and a low, slow drying time. Here's what you'll need to get started.
**For the Crisps:**
- Rind from one medium watermelon
- 2 tablespoons olive oil or melted coconut oil
- 1 tablespoon sugar (white or brown)
- 1 teaspoon salt
**For the Spice Mix:**
- 1 teaspoon smoked paprika
- ½ teaspoon chilli powder (adjust to your heat preference)
- ½ teaspoon cumin powder
- ¼ teaspoon black pepper
**Tools:**
- A sharp vegetable peeler
- A sharp knife or mandoline (for safety and uniformity, a mandoline is highly recommended)
- A large mixing bowl
- Baking sheets lined with parchment paper
Step 1: Prep the Rind
First, separate the rind from any remaining pink flesh. A little pink is fine, but too much will make your crisps soggy. Next comes the most important step: peeling the tough, dark green outer skin. Use a sturdy vegetable peeler, just as you would with a cucumber or potato. You want to be left with only the thick, pale white/light green part of the rind. Once peeled, it's time to slice. For the crispest result, your slices need to be as thin and uniform as possible—about 1.5 to 2 mm thick, like a sturdy potato chip. A mandoline slicer is your best friend here, but if you have a steady hand and a sharp knife, you can achieve this with patience. Discard any awkwardly thick end pieces.
Step 2: Season and Spice
Place your thin rind slices into a large bowl. In a separate small bowl, mix together your sugar, salt, and all the spices. Drizzle the oil over the watermelon rinds and toss well to coat every slice evenly. Now, sprinkle the spice mixture over the oiled rinds and toss again until each piece is lightly dusted with the seasoning. Don't be afraid to use your hands to ensure everything is well-distributed. You can customise this blend endlessly. Try adding a pinch of cinnamon for warmth, garlic powder for a savoury kick, or a bit of cayenne for extra heat.
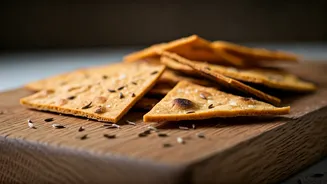
Step 3: The Low and Slow Bake
The secret to a crisp, not burnt, chip is low temperature and patience. You are essentially dehydrating the rinds.
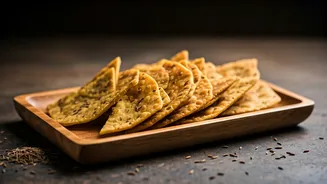
**For an Oven:** Preheat your oven to its lowest possible temperature, usually around 100-120°C (200-250°F). Arrange the seasoned rind slices in a single layer on your parchment-lined baking sheets, making sure they don't overlap. Overlapping will cause them to steam instead of crisping up. Bake for 90 minutes to 2 hours, flipping them halfway through. The exact time will depend on your oven and the thickness of your slices. They are ready when they are dry, firm, and lightly golden at the edges. They will continue to crisp up as they cool.
**For a Dehydrator:** If you have a food dehydrator, arrange the slices on the trays and set it to 60°C (140°F) for 6-8 hours, or until they are completely dry and brittle.
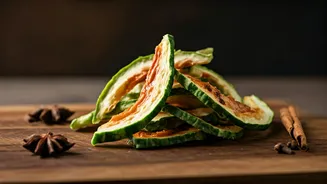
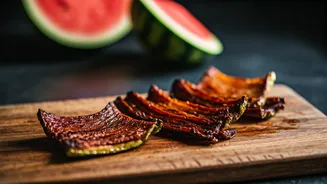
Storing and Serving Your Creation
Let the crisps cool completely on the baking sheet before touching them. This is when they’ll achieve their final, satisfying crunch. Once cool, they taste fantastic on their own—a little sweet, a little spicy, and surprisingly savoury. You can also serve them with a creamy dip like a yogurt-based raita or a simple hummus. To store them, place them in an airtight container at room temperature. Because they have been dehydrated, they should last for up to two weeks, but it's unlikely they’ll be around for that long. Enjoy the fruits (or rather, the rinds) of your labour!