



Step 1: Take a Full Inventory
Before you can organize, you have to know what you’re organizing. The most common mistake is buying storage solutions before you’ve even decluttered. This often leads to having the wrong types of containers or, worse, simply adding to the clutter. A better
approach is to start with a comprehensive inventory. Professional organizers recommend a method called the 'Category Consolidation Approach,' where you gather all items from a single category (like books, cleaning supplies, or t-shirts) from all over your house into one spot. This gives you a powerful visual of just how much you own in that category, making it easier to see duplicates and assess what you truly need. This holistic view prevents the common mistake of underestimating your possessions.
Step 2: Declutter with Purpose
Once you can see everything you have, the decluttering process becomes more manageable. Now is the time to sort your items into distinct piles: keep, donate, and discard. Be honest with yourself. Ask critical questions: When did I last use this? Does it serve a real purpose in my life right now? Is it worth the physical and mental space it occupies? The goal isn't just to get rid of things; it's to make intentional decisions about what earns a place in your home. Try to let go of the “just in case” mentality for items you haven't touched in years and be realistic about what you will actually use. Letting go of unused items frees up not only physical space but also valuable time and energy.
Step 3: Group Like with Like
With only the 'keep' pile remaining, the next step is to categorize. The classic organizer's mantra is to group “like with like.” This means storing all your pens together, all your batteries in one spot, and all your baking supplies in the same cabinet. You can categorize by function (items used together), by user (each family member gets a bin in the mudroom), or even alphabetically for things like spices or files. This system reduces decision fatigue and creates clear, simple 'homes' for your belongings, which is especially helpful for maintaining order long-term. When everyone in the house knows exactly where things go, cleaning up becomes an automatic habit.
Step 4: Measure Your Space
This is a non-negotiable step. Trying to fit furniture or storage systems into a space without measuring first is a recipe for frustration. Grab a tape measure and record the dimensions of the closets, shelves, and nooks where you plan to store your categorized items. Measure the width, depth, and height. It's wise to measure the width in at least two places, top and bottom, as walls are not always perfectly straight. Knowing the cubic footage (length x width x height) is crucial, as it tells you the total volume of storage you have to work with. Don’t forget to account for practicalities, like needing enough depth to pull out drawers or leaving walkway space.
Step 5: Choose Your Storage Solutions
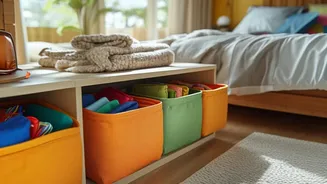
Only now, with a full understanding of what you need to store and the exact dimensions of where it will go, should you consider buying containers. This final step is about finding the right tools for the job you’ve already defined. Look for solutions that fit your measured spaces and are appropriate for the items you’re storing. Clear containers are great for seeing contents at a glance, while labeled bins create a cohesive and tidy look. Prioritize function over fleeting aesthetics; a giant bin might not be as Instagram-worthy as a tiny wicker basket, but it will be far more functional for a family that buys in bulk. This measured approach ensures you buy only what you need, saving you money and preventing new purchases from becoming a new source of clutter.